Today, I’m going to show you how to automatically grow your email list using your MobileMonkey chatbot in two steps.
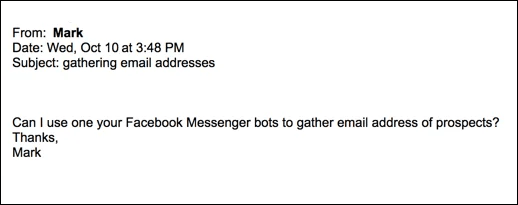
I got an email the other day asking about this:

It’s a great question. Using a website form to collect emails usually results in a conversion rate between 1% and 10%, and the average website conversion rate is 4%.
If you think this is the best you can do with your marketing automation tools, you’re living in donkey denial land.
Instead, use a chatbot to capture emails and see your email capture conversion rate increase to as high as the unicorn flies: 100% of impressions!

You’ll be able to collect new emails with a bot and send email addresses straight to your email marketing platform instantly:
- Step 1: Make a Chatbot that Collects an Email Address
- Step 2: Use a Zapier Integration to Connect MobileMonkey to Your Email Marketing Platform
- Bonus Step 3: Send Traffic to This Chatbot Funnel!
Experience the email capture chatbot we create in this tutorial for yourself.

Step 1: Make the Chatbot that Collects an Email Address
First up, you’ll need to create the chatbot that you’ll use to collect email addresses from your audience.
Start by creating your free MobileMonkey account here if you haven’t already.
You can learn the basics of how to build a bot for business in this guide. Or jump straight ahead to the advanced chatbot integrations below…
In MobileMonkey, go to Chatbots > Dialogues from the left menu.
What is a chatbot dialogue? A self-contained unit of chatbot conversation.
You’ll have to decide if you want to create a new folder for this chatbot lead capture funnel, or build this chatbot dialogue within an existing folder in your account.
Let’s create a new folder for the sake of clarity:

We’ll call it “Email Capture Demo”:

Once you’ve set up the Folder, select “Add Page” and give your new email collecting bot dialogue a descriptive name:

It’s always a good idea to make these things as interactive as possible, so add as many widgets as necessary to ensure that your chatbot is engaging and awesome.
For instance, I started the chatbot with an on-brand animated GIF, then a text widget that introduces myself to the new contact and to set expectations and options for the conversation:

The simple text widget gives a single button option for continuing the conversation.
Next, I’ll create the money dialogue that will collect emails, which I’m naming “Zapier Connection to Email Platform Demo Pt 2”.
You have two options for content widgets that automatically collect emails: a quick question widget or a chatbot form widget.
What’s the difference?
The quick question widget will ask one question while that chatbot form lets you ask multiple questions and to mark the answer as a conversion that you can view in your chatbot analytics.
Helpful guide: 2019 Guide to Facebook Messenger Chatbot Analytics: 10 Essential Chat Marketing KPIs.
Let’s use the chatbot form.
Fill it out with some catchy copy, and then select EMAIL as the user’s input type and the “EMAIL” attribute to save the input value to the user’s lead profile:

Using the email input type is crucial here.
When you use email as input type, Facebook will auto-populate a button for the user to tap with the email address connected to their Facebook account.
Automatically providing the user with an easy-to-tap button with their email address reduces the friction associated with lead capture and helps to increase your conversion rate.
Here’s what this looks like in your user’s Messenger app. Note the clickable email:

The power of a Facebook chatbot makes it super easy to collect email addresses.
And if they opt to give it to you, MobileMonkey will automatically save it for later use, like we’ll use in Step 2.
Before we move on to Step 2, connect the dialogue “Zapier Connection to Email Platform Demo Pt 2” to the button in the dialogue “Zapier Connection to Email Platform Demo”:

Choose to “Take users to a new Dialogue” from this button and then choose the dialogue from the drop down menu.
This is how you can connect chatbot dialogues together to create a chatbot conversion funnel.
But now you’re ready to collect emails and save those emails to your customer profiles.
Next let’s set up the automation to instantly send every collected email address to your email marketing platform using Zapier integrations in MobileMonkey.
Step 2: Connect MobileMonkey Lead Data to Your Email Marketing Platform
With MobileMonkey you can automate everything to ensure you don’t manually copy/paste each new contact into your email platform.
The easiest way to integrate MobileMonkey to your other business platforms is using Zapier.
Zapier is an automation platform that makes it easy to connect all of the apps you use on a daily basis.
So for instance, if you use MailChimp to send out email campaigns, you can connect MobileMonkey and MailChimp for maximum monkey power using Zapier.
We’re going to use MailChimp in this walk-through but you can replace MailChimp with any email marketing platform.
Helpful resource: Getting Started with MobileMonkey + Zapier Chatbot Integrations
To do this you’ll need a Zapier account.
A Zapier connection has two parts — the trigger and the action.
Start by going to MobileMonkey > Marketing Automations > Zapier. You’ll see a list of beautiful Zapier integration formulas waiting for you (and if you don’t see your platform, you can always create your own).
Here’s the MailChimp zap we need:

If this is your first time connecting MobileMonkey to Zapier, you’ll need to use the API key provided above to connect your MobileMonkey account.
Go ahead and head over to the advanced editor next:

Now you’ll have the option to assign a custom name to this Zap:

And choose the trigger event “Connection Widget Reached.” Hit continue.
Time to create the name of the Zap connection widget you’ll add to your chatbot dialogue:

Moving on to the action portion of the Zap, MailChimp is already the action app because that’s the formula we started with in MobileMonkey.

After you hook up your MailChimp account, you’ll have your choice of attributes in your MobileMonkey customer profiles to choose from. Pick EMAIL from the attributes selector:

Turn on the Zap — now we’re cooking!
And finish up the connection by going to your chatbot dialogue and adding the Zapier connection you named above to the right point in the conversation funnel.

Add the Zap Connection widget into your chatbot convo and then choose your named Zap from the drop-down:

Now go ahead and test the dialogue to see your email capture chatbot in action. You should end up subscribed to the MailChimp list you connected to your bot with Zapier.
Your email subscribers are now automatically pulled from MobileMonkey and sent to MailChimp, which means you can start sending those emails immediately.
You can also use this for other popular email automation tools like Constant Contact, iContact, and Awebber.
Bonus Step 3: Get Traffic to This Chatbot Funnel
Now it’s time to start pushing traffic the chatbot funnel you created in step one so your automation can work to maximum capacity.
If you don’t have anyone engaging with your chatbot, you’ll never be able to collect or send those emails. So let’s briefly overview three of the top ways to do that:
Messenger ads, drip campaigns, and links to Messenger.
Option 1: Use Messenger Ads to convert targeted Facebook ad audiences into captured emails.
To use a Messenger Ad, you’ll need to start in MobileMonkey. Go to the Messenger Ads tool and create a new ad.
Give it a name to make sure you remember its purpose and select the chatbot Page that starts your Messenger interaction.
Start by selecting the Messages option when you create a new ad:

Then you’ll fill out the standard ad set up like audience, budget, and period.
The chatbot is activated when you go to MobileMonkey and create a new Facebook Messenger ad:

href
Then automatically sync this chatbot autoresponder to your Facebook ad:

Running Facebook ads that send the targeted audience to your chatbot that is set up to collect emails is a unicorn email list building tactic.
Option 2: Use your website chat to collect emails from website visitors that chat with your bot.
You know how you can use your chatbot as your website chat using the website chat widget?
Well why not ask your website visitors chatting with your bot for their email address?
Better yet, did you know MobileMonkey has a chatbot template that does just that?
From Templates > View templates library you’ll find the “1-minute Lead Gen Bot” template:

This simple bot template asks anyone it talks to for these simple things:
- Email address
- Phone number
- What they want help with

When you embed this chatbot on your site, and take the extra steps from this tutorial to automatically send this lead data to MailChimp, Constant Contact, iContact, AWeber or your email platform, you’re working with a unicorn of list building.
Options 3, 4, 5 and More!
MobileMonkey’s chatbot platform features dozens of ways you can send traffic to your chatbot with creative entry points and strategies.
Helpful guide: 12 Magnetic Ways to Generate Leads with Your Facebook Bot
Use these methods to keep building your email subscriber list with powerful chatbot optimization.
Republished by permission. Original here.
Image: Depositphotos.com