
The release of the OptinMonster email sign-up form plugin was one most developers could only dream of, with nearly every WordPress news-and-review blog publishing glowing coverage of this premium popup lead-generation tool almost as soon as it became available.
However, now that OptinMonster has been available for some time, it’s worth taking another look to see if it really is the best WordPress email optin form plugin available — and if it’s been able to live up to the hype.
It’s especially worth revisiting it now, as there have been some big changes in the way it works — such as a number of new features and add-ons aimed at making it an even more versatile tool for those looking to increase their mailing list subscribers.
One of the biggest changes is that OptinMonster is now no longer simply a WordPress plugin — read on to find out more.
OptinMonster: A Quick Overview
OptinMonster joined the premium email optin form plugin market in 2013, and managed to differentiate itself from the competition by offering a user-friendly interface, a selection of clean and attractive designs for its optin forms, and a new feature that wasn’t widely available at the time: Exit intent. When exit intent is enabled, popup forms are only triggered when a visitor is about to leave the site — something that quickly helped win the plugin plaudits from users and reviewers alike (especially those averse to bombarding visitors with popups on each page load).

Other features of the initial version of this optin form plugin included:
- lightbox, footer bar, and slide-in forms
- multiple form design templates
- the option to add custom HTML and CSS to forms
- the ability to create unlimited forms for different posts on your site
- impression and conversion stats for each form
- the ability to clone forms for instant A/B testing
- exit intent to only show popups as visitors are about to leave
- integration with all major email marketing services
- a user-friendly native WordPress user interface.
In short, the developers of OptinMonster went to great lengths to try to include just about everything you could ever need to start creating powerful optin sign-up forms for your email list.

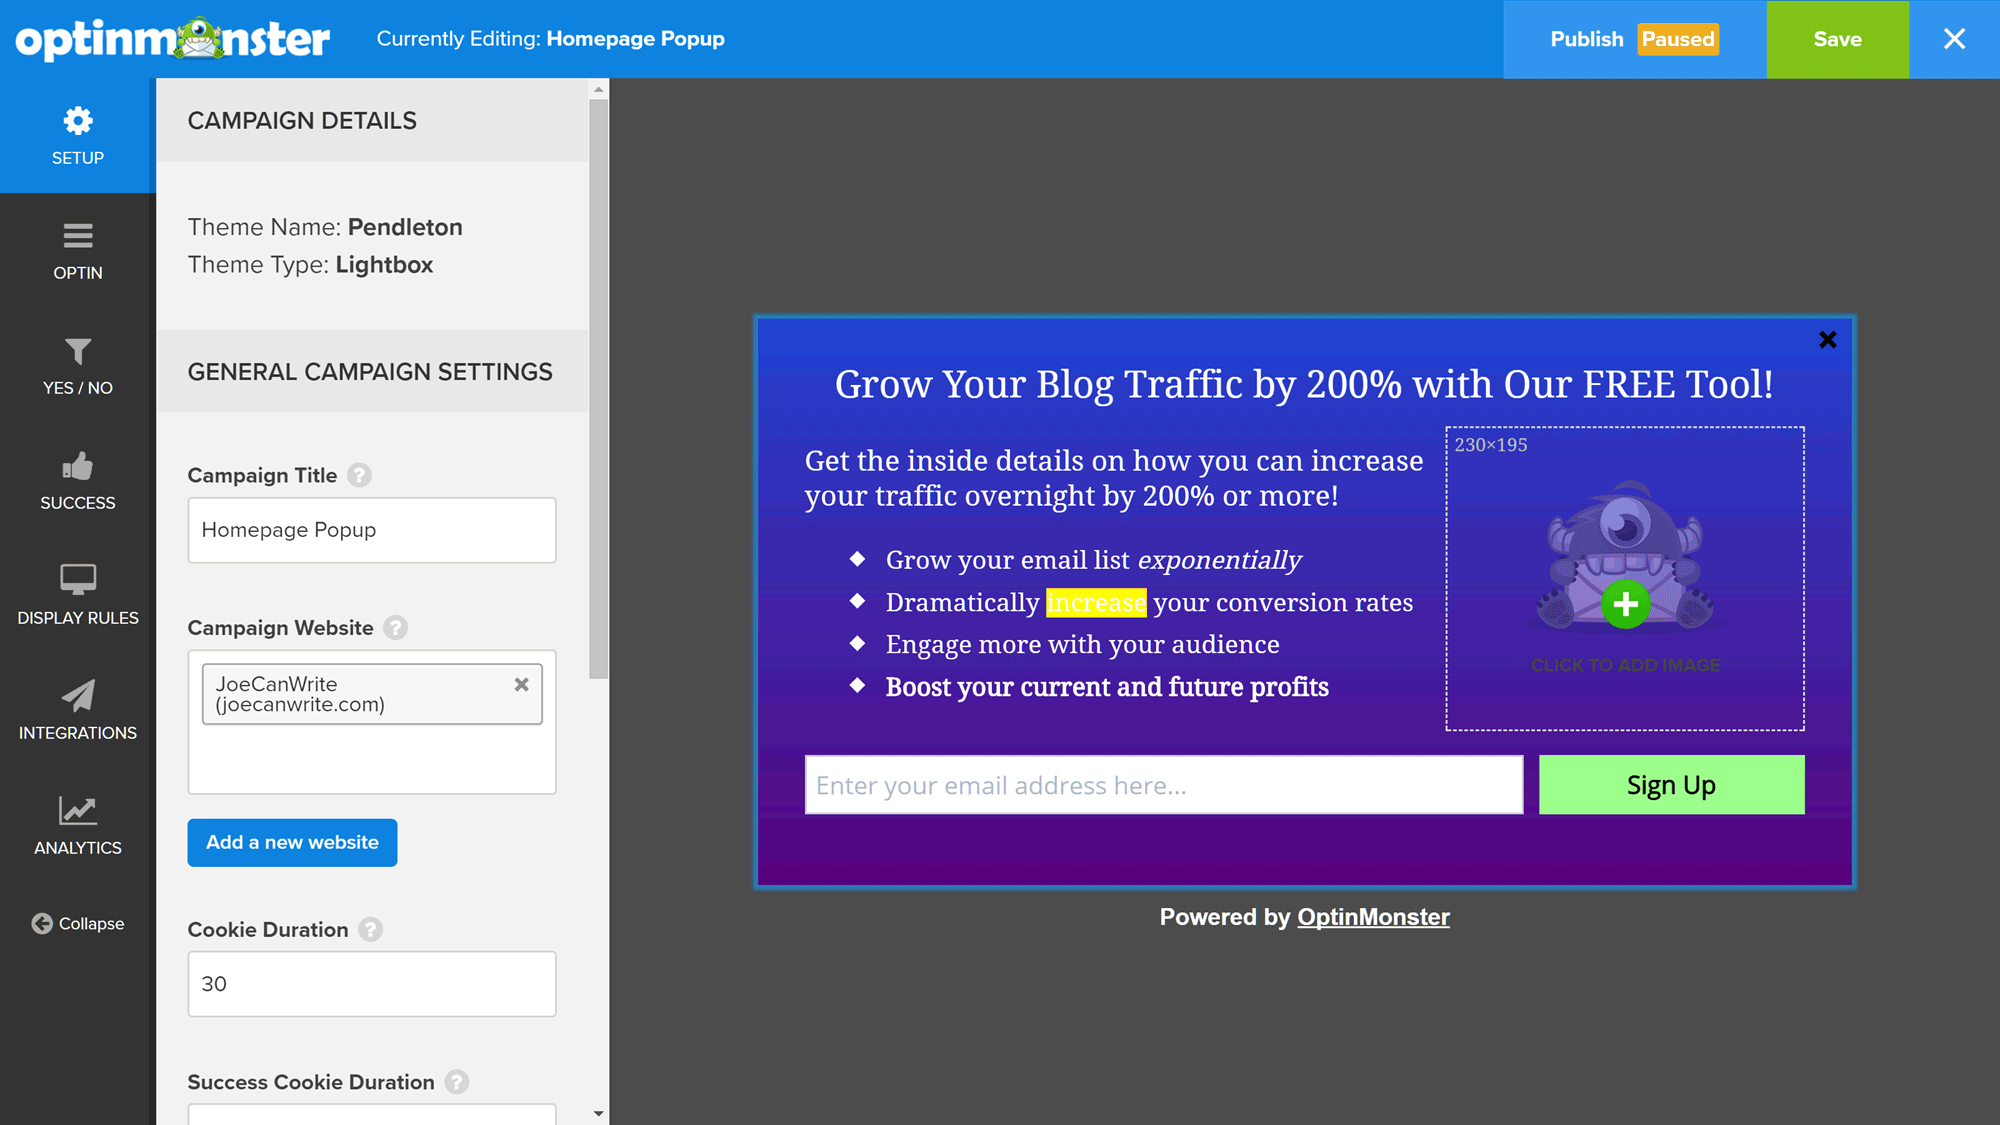
An example of the type of popup optin forms you can create with OptinMonster.
OptinMonster: The New Features
As mentioned, the biggest change to OptinMonster is that it’s no longer just a WordPress plugin: It’s now a hosted service that any website owner — whether they’re using WordPress or otherwise — can use to add a range of email sign-up forms to their site.
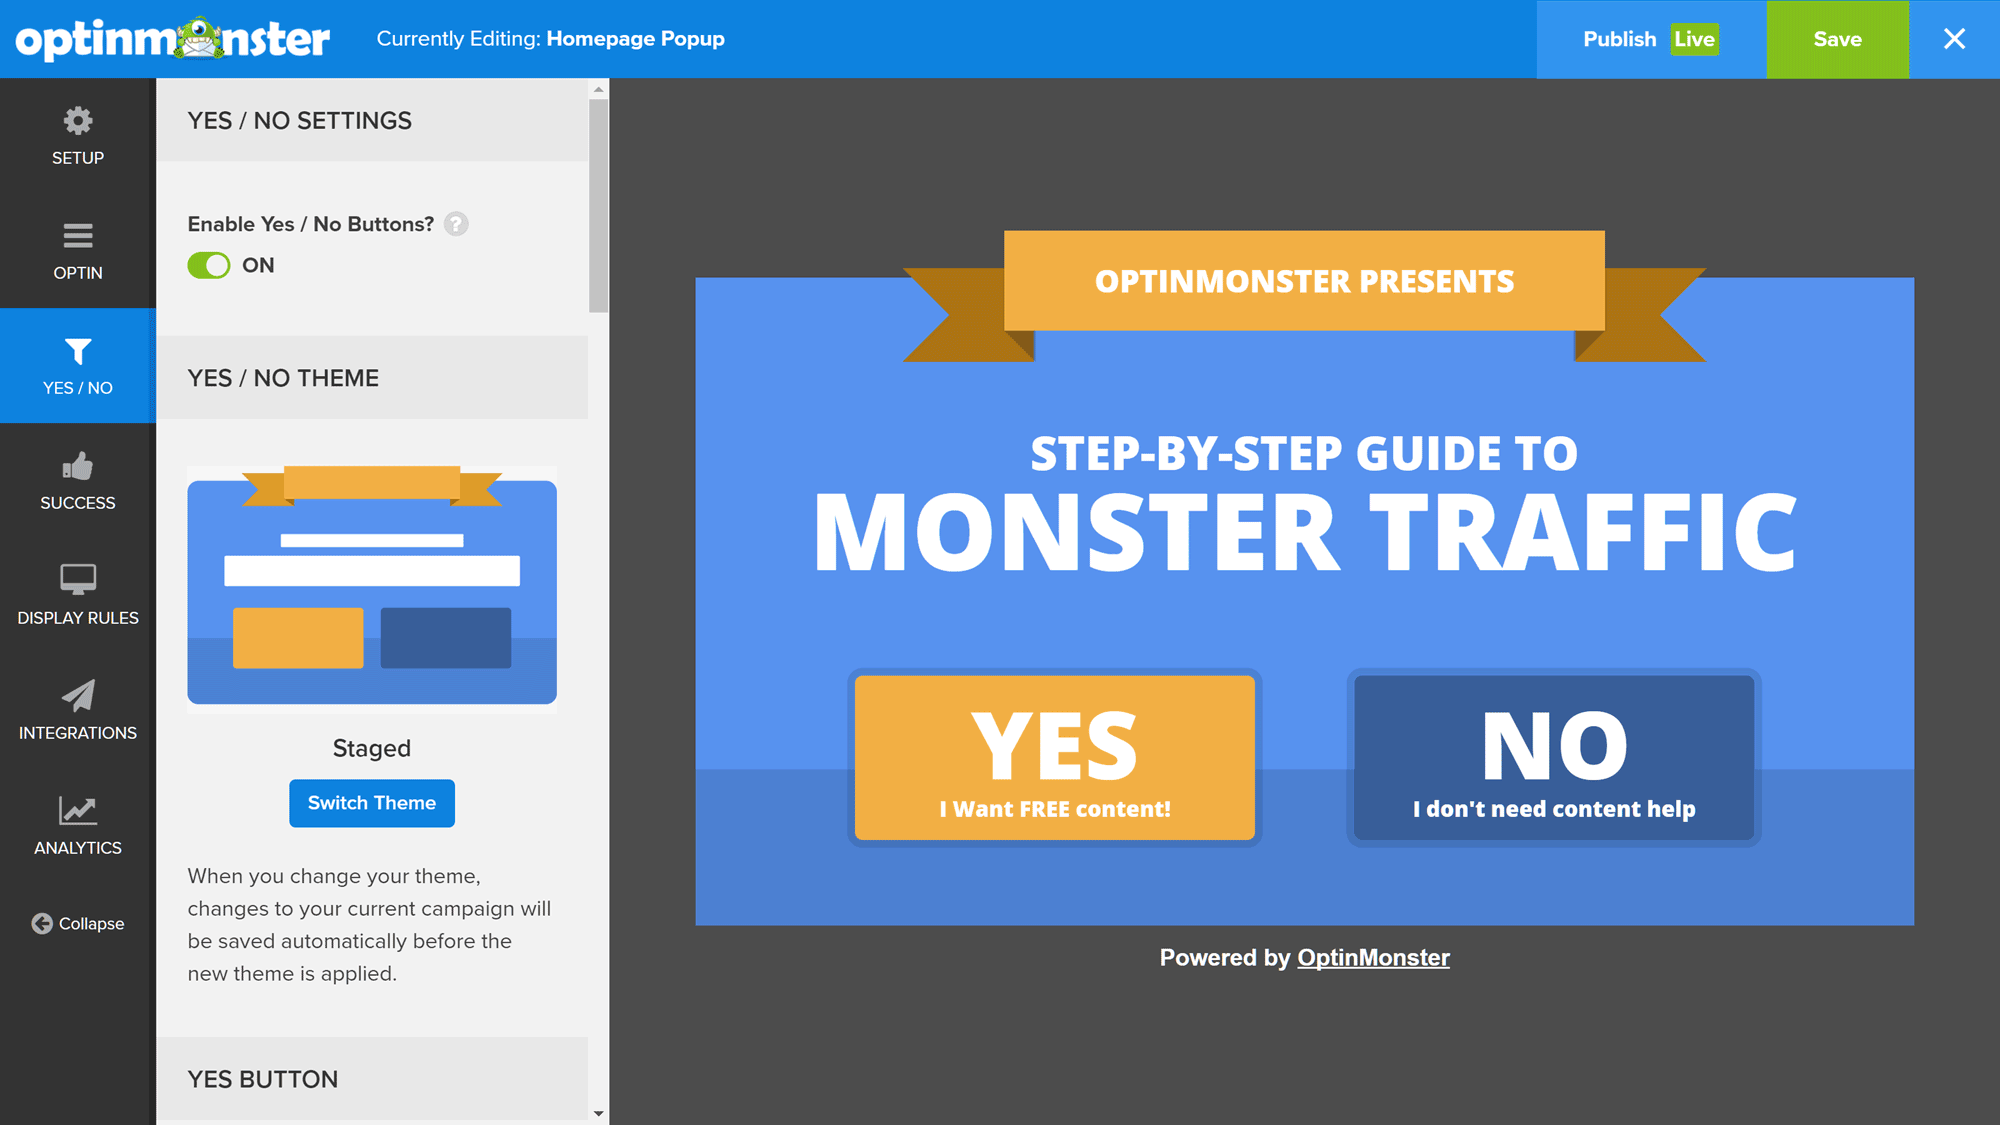
OptinMonster now lets you ask your visitors a custom yes/no question.
As it’s a hosted service, all of the form and other content creation and management tasks now take place through your account dashboard on the OptinMonster website. This has a number of benefits, including the introduction of a clutter-free, purpose-built user interface; the ability to manage all of your forms and other content through one central location; and one less (large) plugin to manage on your website. Your OptinMonster account is indeed still linked to your WordPress website via a plugin, but the current plugin is much smaller and more lightweight than its previous incarnation.
Making things hosted isn’t all the OptinMonster team have been up to, though. To reward early adopters and keep the plugin competitive, the developers have added some other great new features, such as:
- more form types (blank, sidebar, and in-content/after post, full-screen entrance and exit gateways)
- purpose-built mobile forms
- more form appearance themes
- a canvas tool for creating small window and full-screen custom popups, and welcome mat-style optins
- the ability to insert forms into posts and pages using shortcodes
- the ability to add animation and sound effects to forms as they load
- a manual optin trigger (i.e. to launch forms on mouse clicks)
- newly optimized code for faster loading times
- a testing mode for previewing forms
- a Yes/No form option for asking visitors a question
- success templates that are shown after a positive form interaction
- more controls for when and where popups are displayed
- an Adblock detection popup trigger.
OptinMonster launched in 2013 with three types of optin forms. Since then, the developers have added more options to the list of popup form types, and it currently stands at as many as seven sign-up form types — each with its own variety of templates.
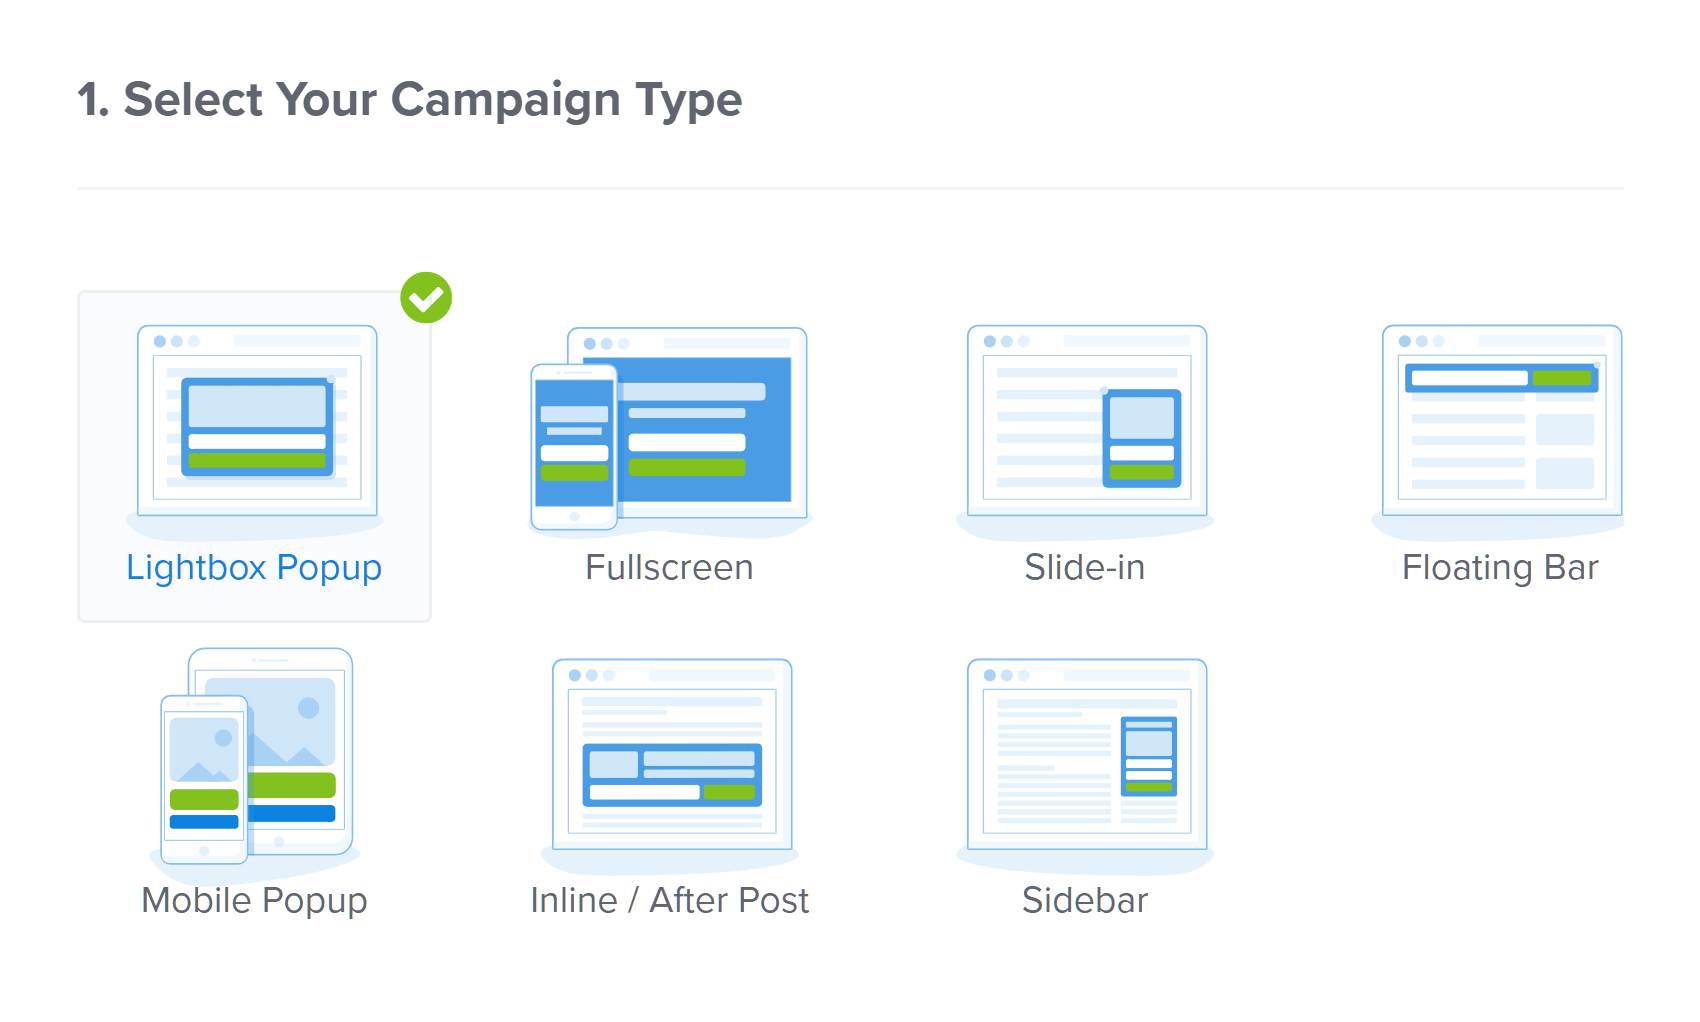
The seven form campaign types that are now available.
The list includes the following email optin forms and popup types:
- Lightbox popup.
- Fullscreen welcome mat window overlay (new).
- Slide-in.
- Floating bar (new).
- Mobile optimized popup (new).
- Inline/after post (new).
- Sidebar widget.
The new options are welcome additions, particularly the in-content form — a type that was notably absent from the early selection. Another interesting addition is the fullscreen option, which allows you to cover the whole screen with your form — thereby practically forcing your visitors to either sign up or hit the back/close button. A popular use of these types of fullscreen form is to display them as a kind of welcome or gateway message to your visitors as they arrive at your site (or just before they’re about to exit).
There’s also a new selection of form types for mobile visitors, but it’s not just new ways of displaying the forms that have been added — OptinMonster now includes more templates for the forms.
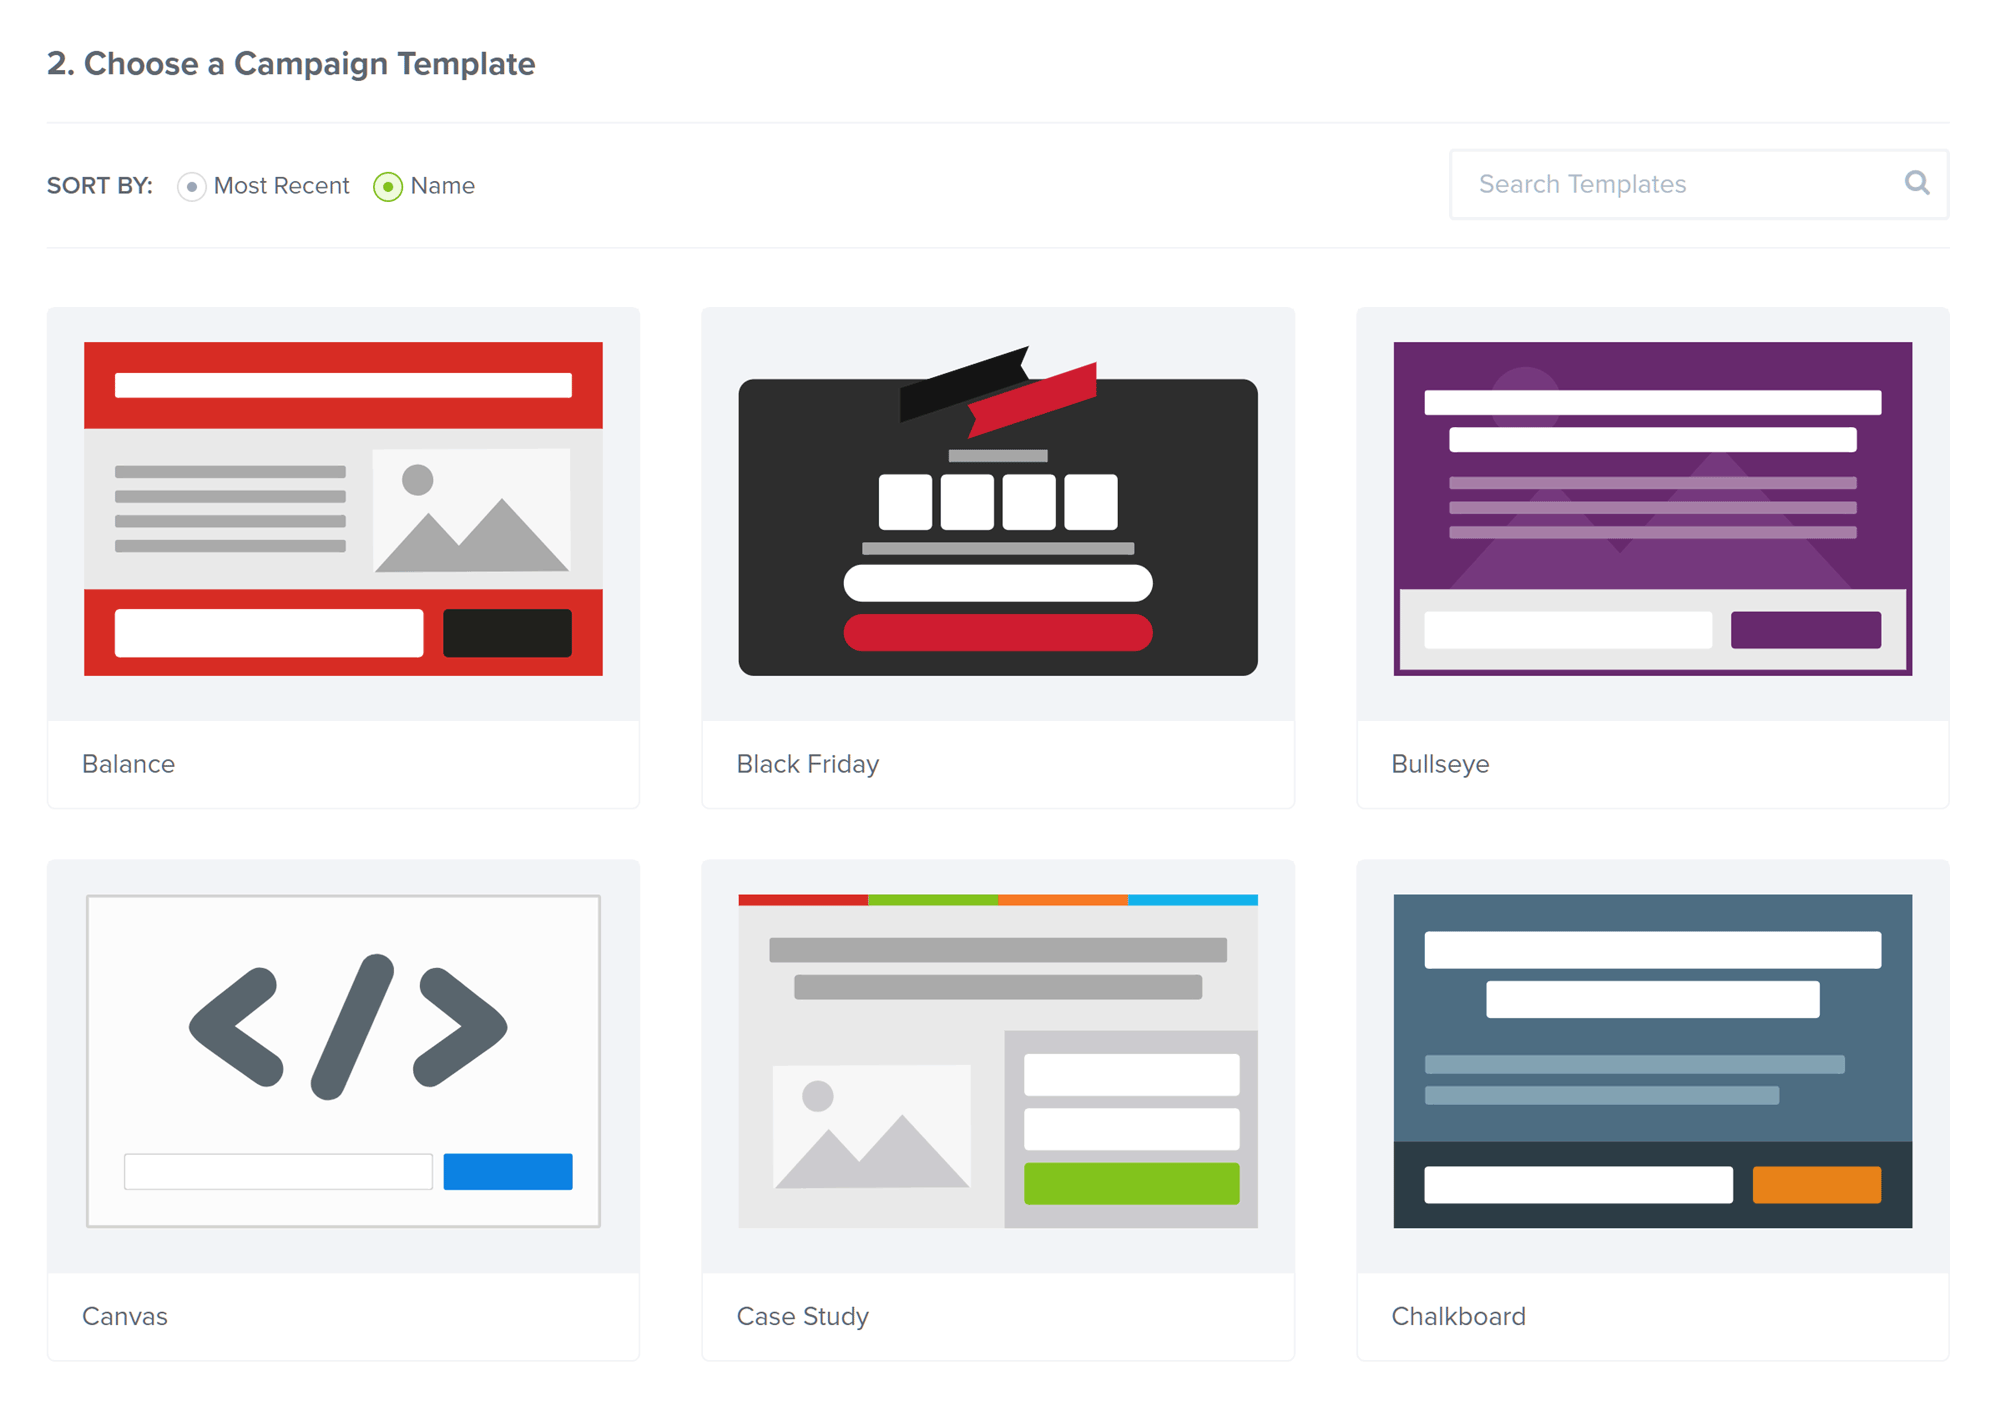
The latest version of OptinMonster includes even more useful templates.
Once you’ve chosen a template, the design can be fully customized through the intuitive OptinMonster form editor. Thanks to recent updates to the editor, you can simply click on a form element to start modifying it. In fact, it’s fair to say that OptinMonster has a live front-end editor that rivals some of the best page builder plugins for WordPress. So, if you’re looking for a tool that lets you create truly custom popups for your website, OptinMonster certainly has the right level of functionality.
OptinMonster makes it very easy to edit the form templates and create your own custom designs.
Another recent addition to OptinMonster is the selection of new CSS3 animation effects, which can be triggered as a form is being displayed to help catch the attention of your visitors. You can now also add a sound effect to your forms that plays when they load.
Creating and managing your forms is even easier than ever, thanks to OptinMonster’s recent move to a hosted service. The same clean interface and well-labeled options-and-settings pages still remain, of course, but in more user-friendly surroundings.
The New Custom Content Canvas Form
While OptinMonster comes with an impressive selection of themes for styling and basing your form designs on, the new Canvas add-on form type lets you start with a blank slate.
When choosing this, you can set the width and height of the lightbox, and then enter your own custom content by providing the necessary HTML and CSS.

An example of the OptinMonster Canvas template being used to display custom content in a popup.
This means you’re no longer limited to creating and displaying sign-up forms with OptinMonster. Now, you can insert all kinds of content into the popup window, such as your social media buttons, links to other content on your site, products from your store, or anything else you think may be of interest to readers.
Also, before saving any custom optin popup forms created using the Canvas add-on, you can choose to apply one of the numerous animation effects (such as bounce, flash, wobble, flip, rotate, and slide effects) and sound effects (ping, pong, flam, or arpeggio) to make sure your popups get noticed as they come into view. Note: These effects can also be applied to the other lightbox forms.
OptinMonster as a Hosted Service
Now that OptinMonster is a hosted service, popup creation and management takes place in your dashboard on the OptinMonster website.
With early versions of OptinMonster, all of the form creation and management tasks took place from within your WordPress dashboard, but now the service is fully hosted you build and manage all forms and popups through your account area on the official OptinMonster website.
On hearing this, I was a little skeptical. One of the great things about using WordPress is that all of the work — including designing your site, configuring the way it works, and publishing content — takes place within one central location: Your WP dashboard and admin area. Adding an external service to the mix didn’t seem like such a great prospect.
However, I was also curious to see how the developers would handle this transition from WordPress plugin to universal hosted service. In case you’re wondering what the new service is like, or if you just want to know how easy OptinMonster is to use, let’s take a look at creating an optin form for your website using the new hosted interface:
Creating a Hosted Email Sign-Up Form with OptinMonster
One of the benefits of the move to a hosted service is that if you’re on the Plus, Pro, or Agency plans and are using OptinMonster on multiple sites (perhaps client sites), you can now log in to one central dashboard and create forms, tweak your existing optin popups, and view your conversion rate stats — all in one place.
This also means the process of building and deploying the email optin forms and other popups has changed quite a bit since previous versions. The good news is that now all the action takes place through a purpose-built user interface (rather than being shoehorned into the WordPress admin area), it’s even easier to add a wide range of optin/popup forms to any of the websites you manage.
How to Create an Email Optin Form With the New OptinMonster
The first step in creating an email optin form is to add the details of your website to your account area within the OptinMonster site, which is as simple as entering the site address or URL. You also have the option of creating and then deploying the same form to multiple sites by entering the individual URLs into the website field on the form settings page.
Creating the Email Optin Form
After entering your site address on the Create New Optin screen, you’ll need to select a campaign type. For this example, we’ll be using the lightbox popup option.
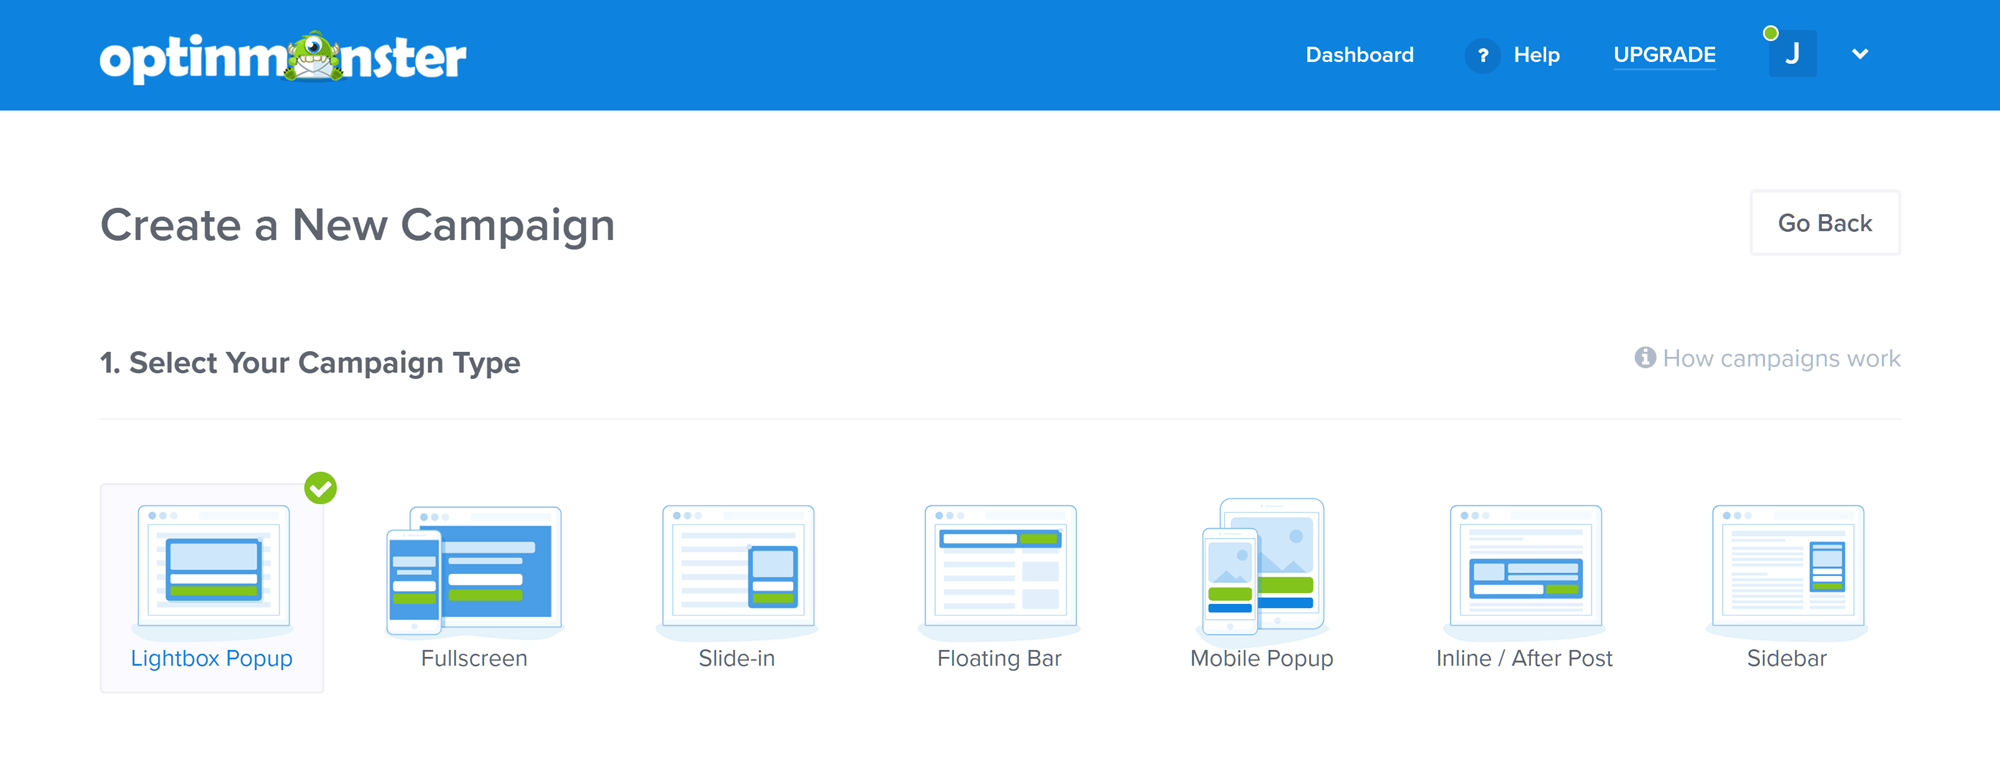
The first step in creating a new OptinMonster campaign is to choose a display type.
Once you’ve chosen a form or other display type, you can then decide which template you’d like to use. As mentioned, as well as using a prebuilt form template for your popup, you can also start with a blank canvas and add HTML and CSS to the popup area to display your own custom content.
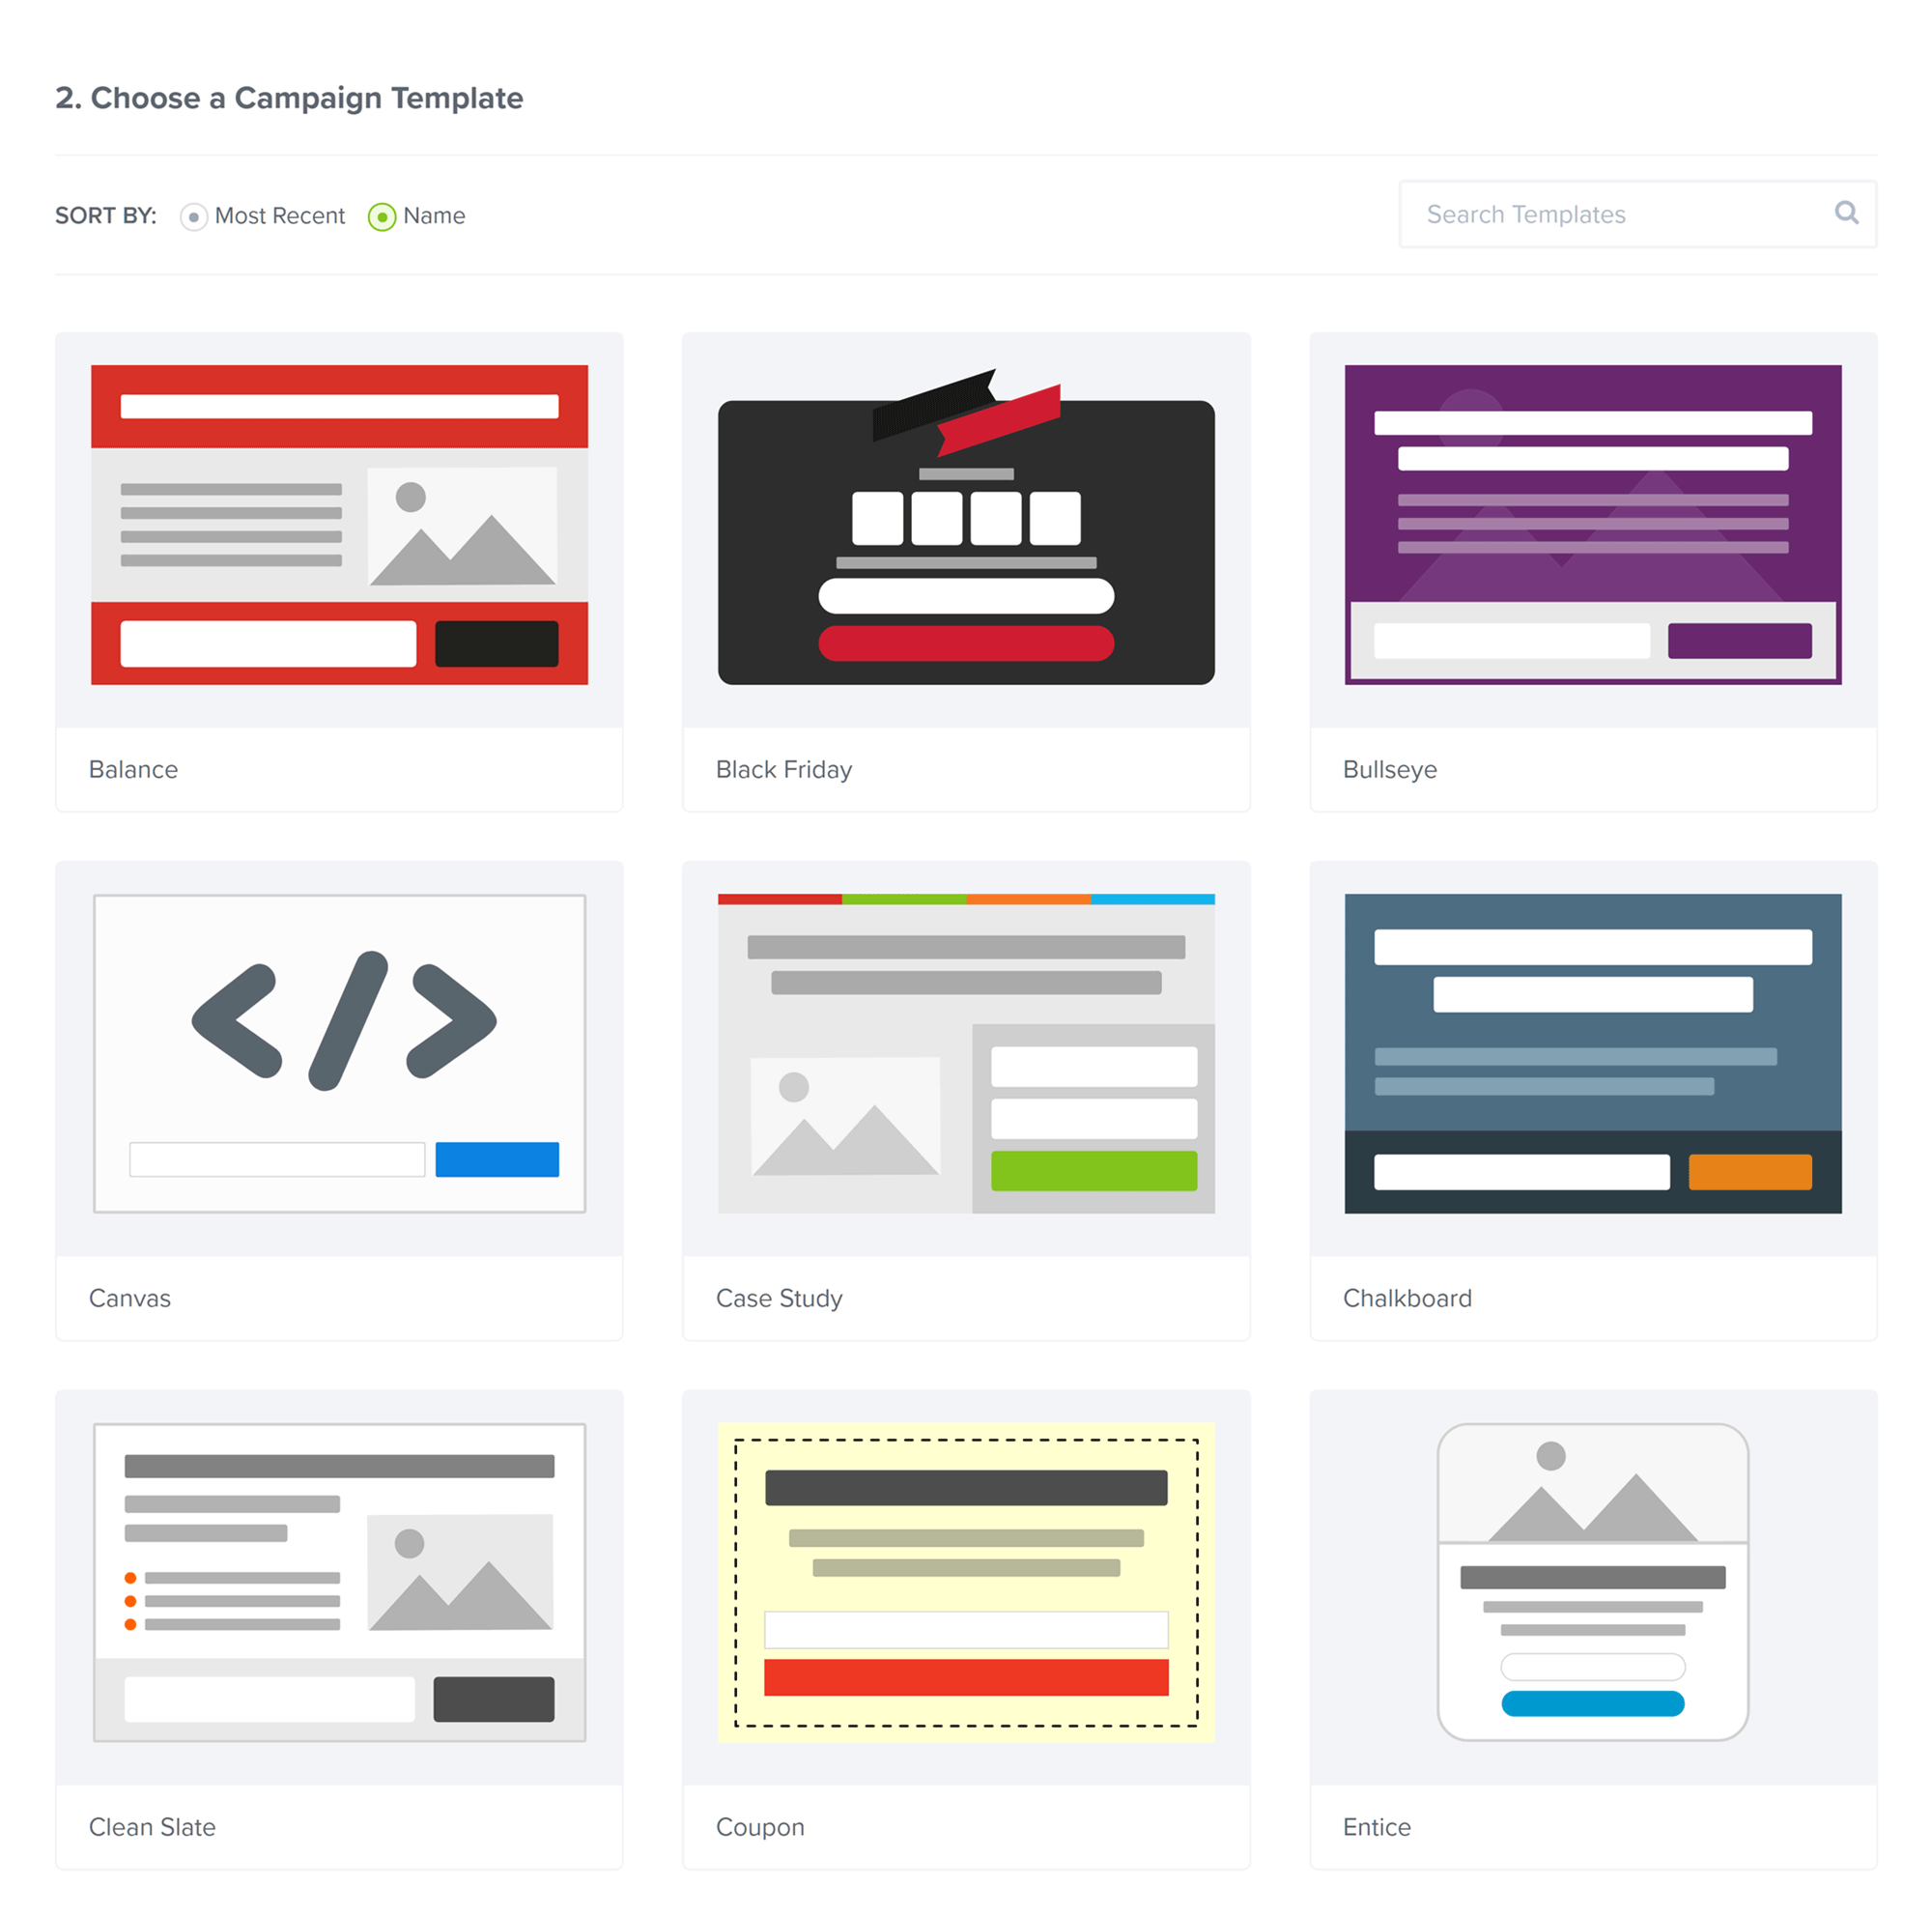
The OptinMonster popup and form templates cover a range of styles and goals.
Because of the different sizes and purposes of the campaign types, each option, such as floating bar, sidebar, or lightbox popup, has its own set of templates. At the time of writing, the latest version of OptinMonster had 26 customizable templates for the lightbox popup type, while the floating bar option had 12.
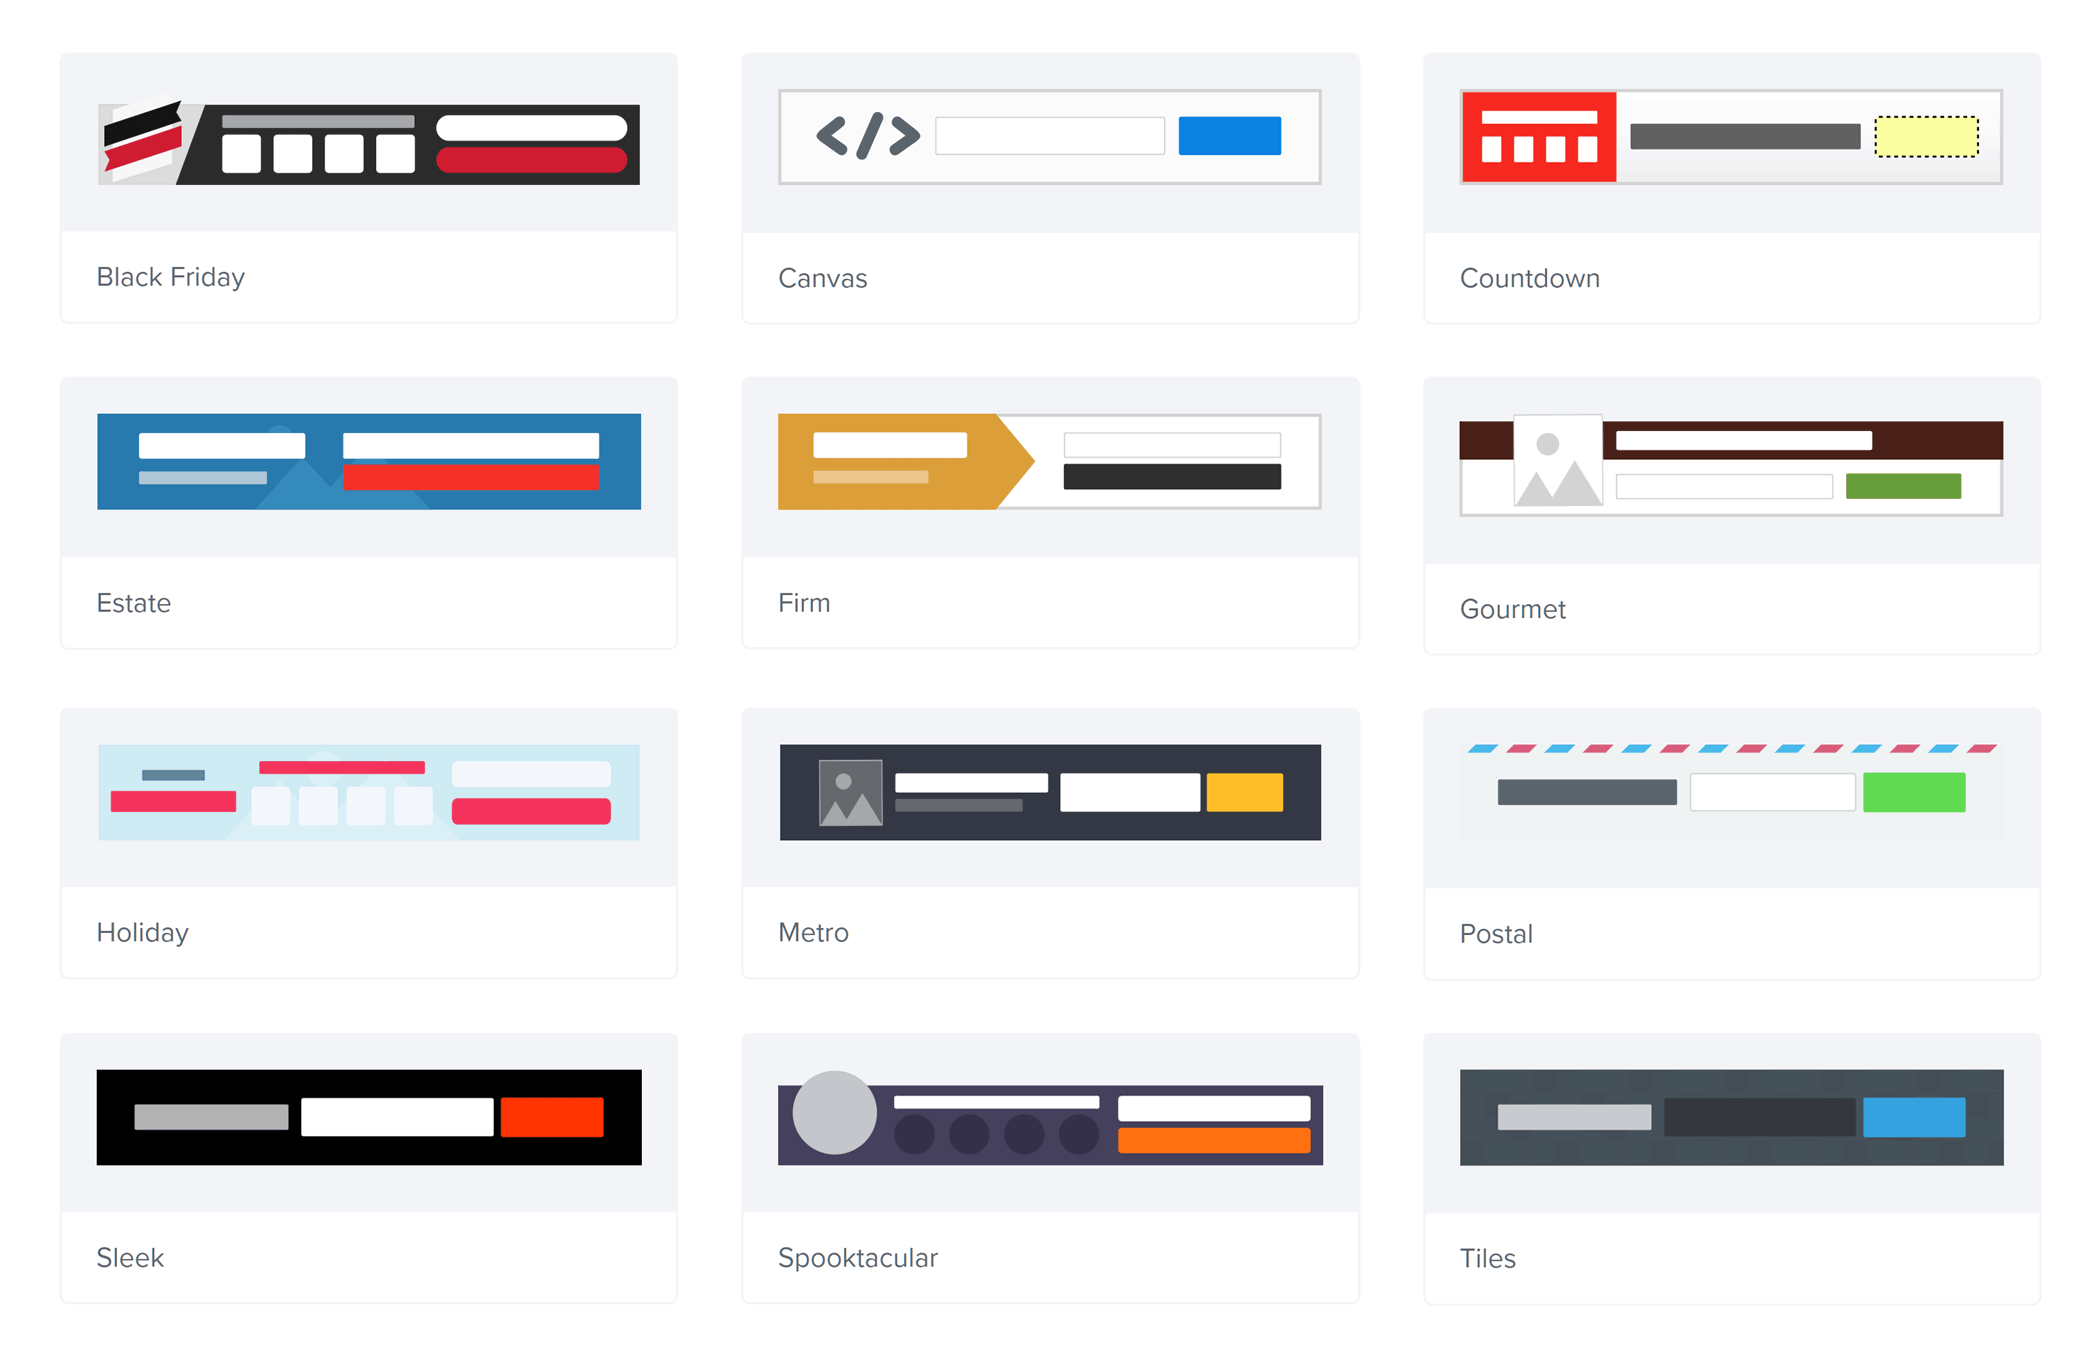
The different types of popups and displays have their own set of purpose-built templates.
Customizing the Form or Popup Design
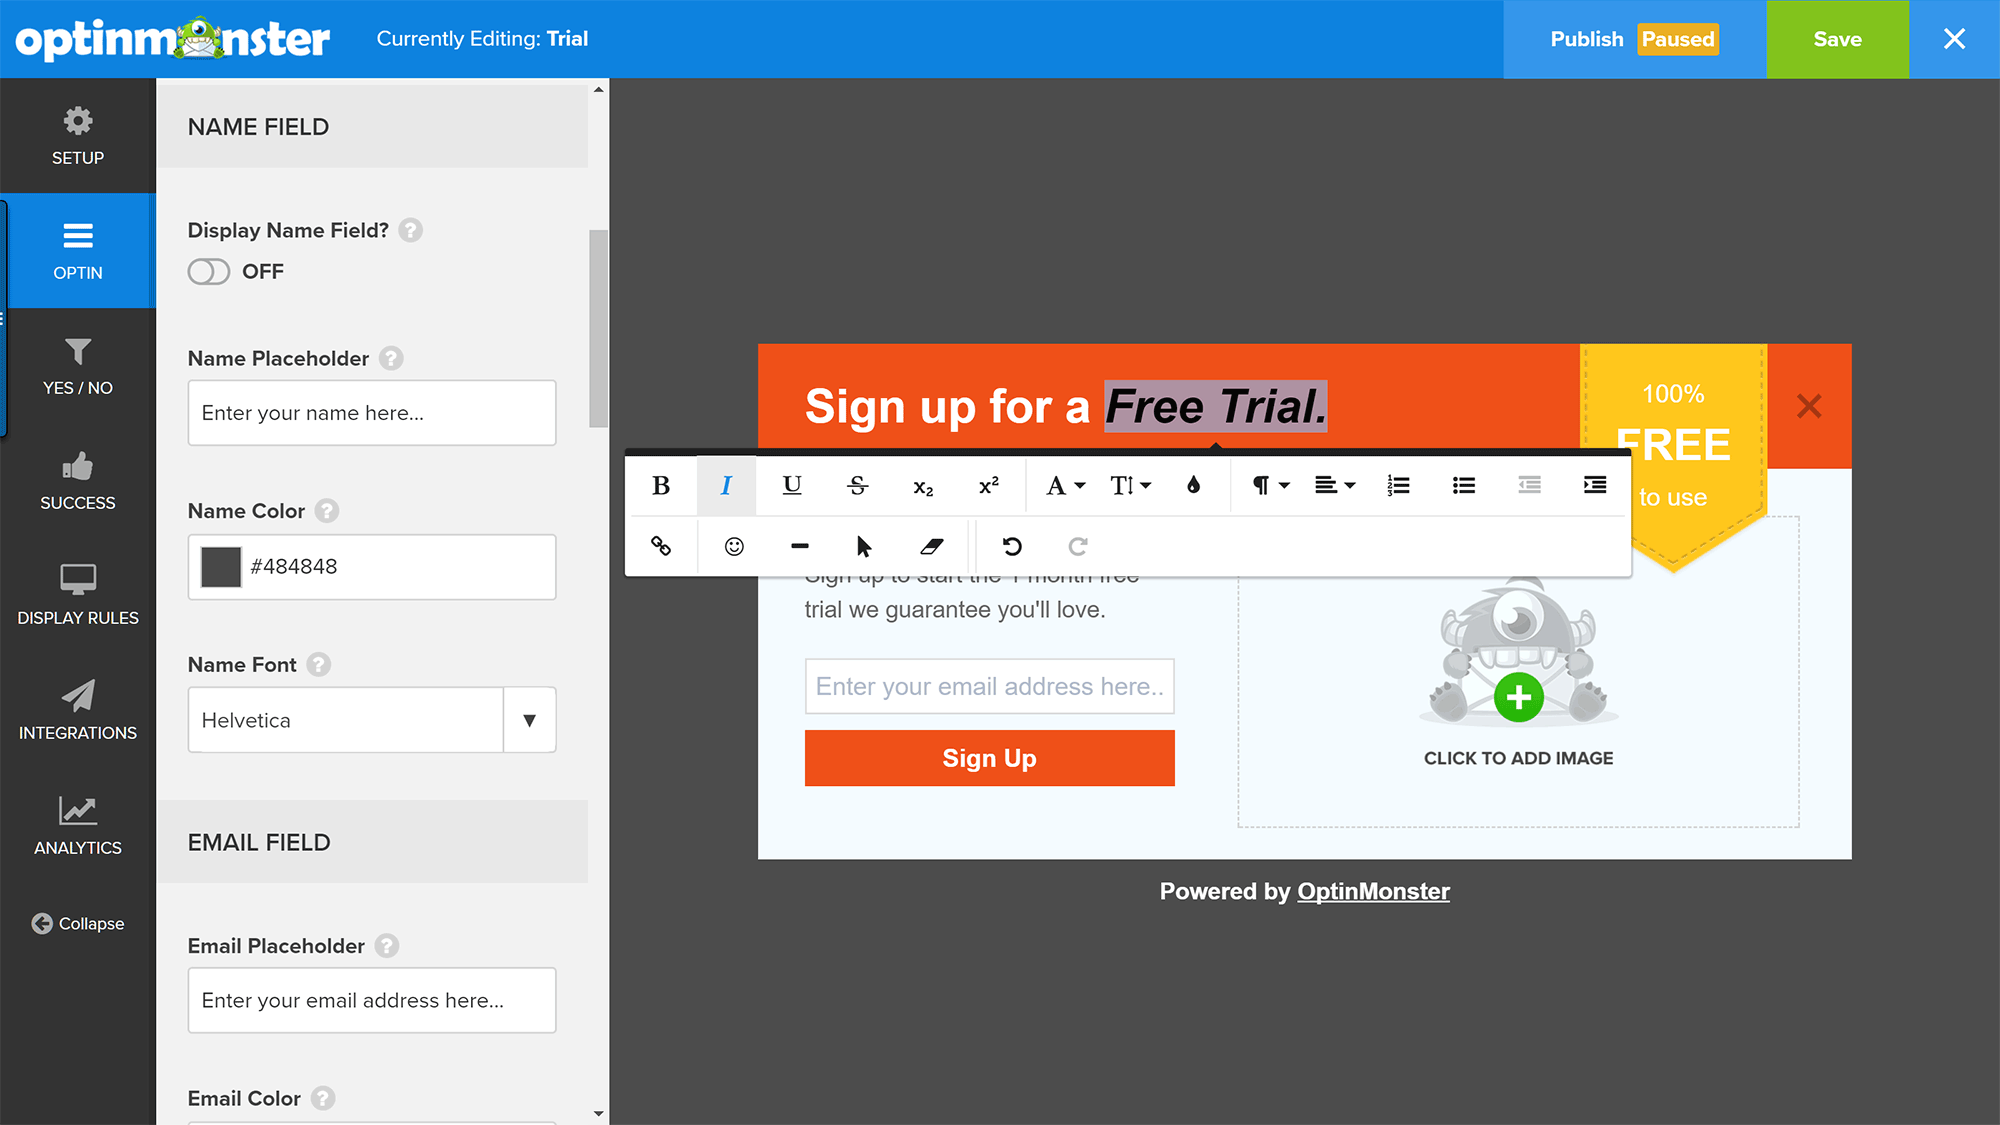
Once you’ve chosen the form type and a template, the new and improved OptinMonster live editor is displayed. From here, you can customize almost every aspect of the template you’ve chosen (or even switch to another design if you’re unhappy with your original selection).
The new OptinMonster template editor is very intuitive and easy to use.
Using the live editor to customize the design of your email sign-up form or custom popup is extremely easy. Now that the service is hosted on the OptinMonster website, rather than squeezed into the WordPress dashboard, the interface is much more spacious than before. The popup options, as well as the design controls, are displayed in the left-hand panel, giving you quick access to everything needed to build a truly custom popup for your website.
All of the controls for your popup are conveniently available on one screen.
As OptinMonster has a live editor, you can simply click on a form element to start customizing, and you can even enter text directly on the form design.
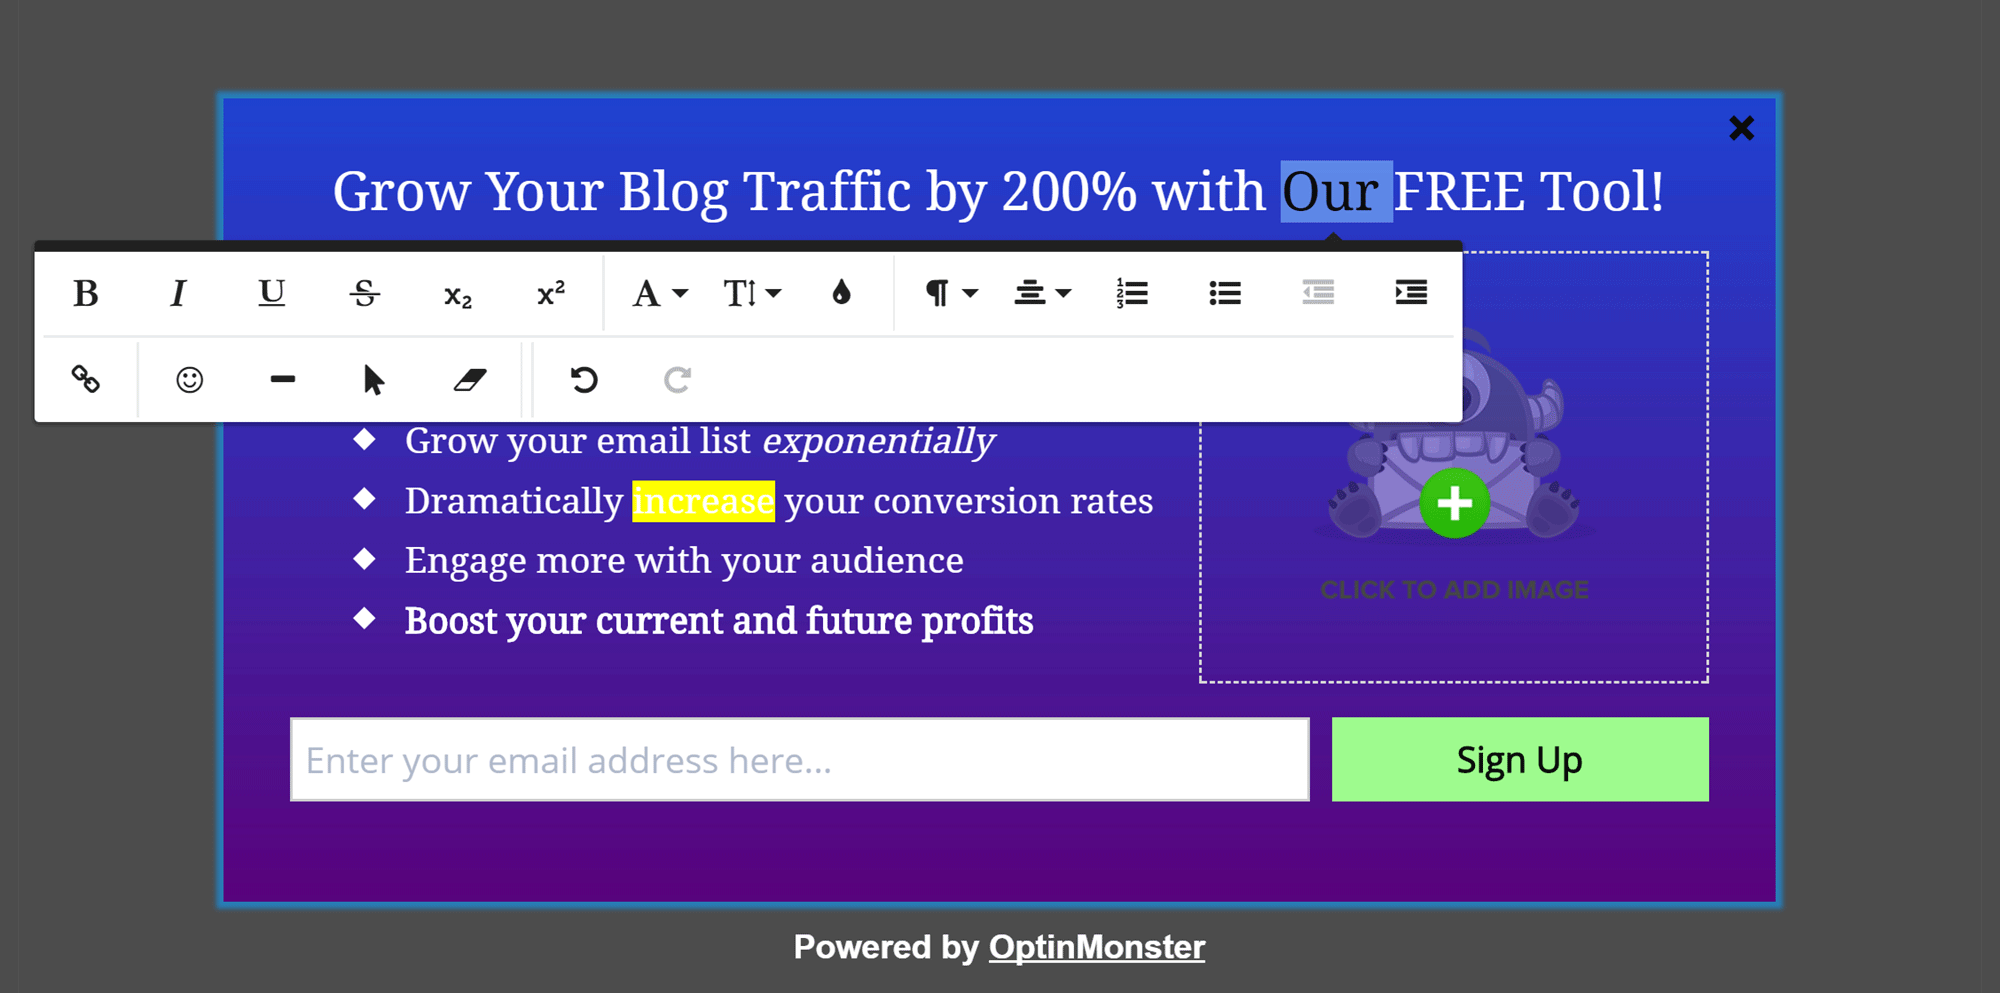
You can click on a form or popup element to start editing it.
You can easily customize the colors, button text, fonts and more to create a personalized form, or simply use one of the many prebuilt designs and just add your own text. It’s up to you!
Configuring How the Popup Campaign Works
Once you’re happy with the design of your form, it’s time to configure how it will work on your site. This takes place on the same screen, albeit via a different sub menu of the left-hand sidebar.
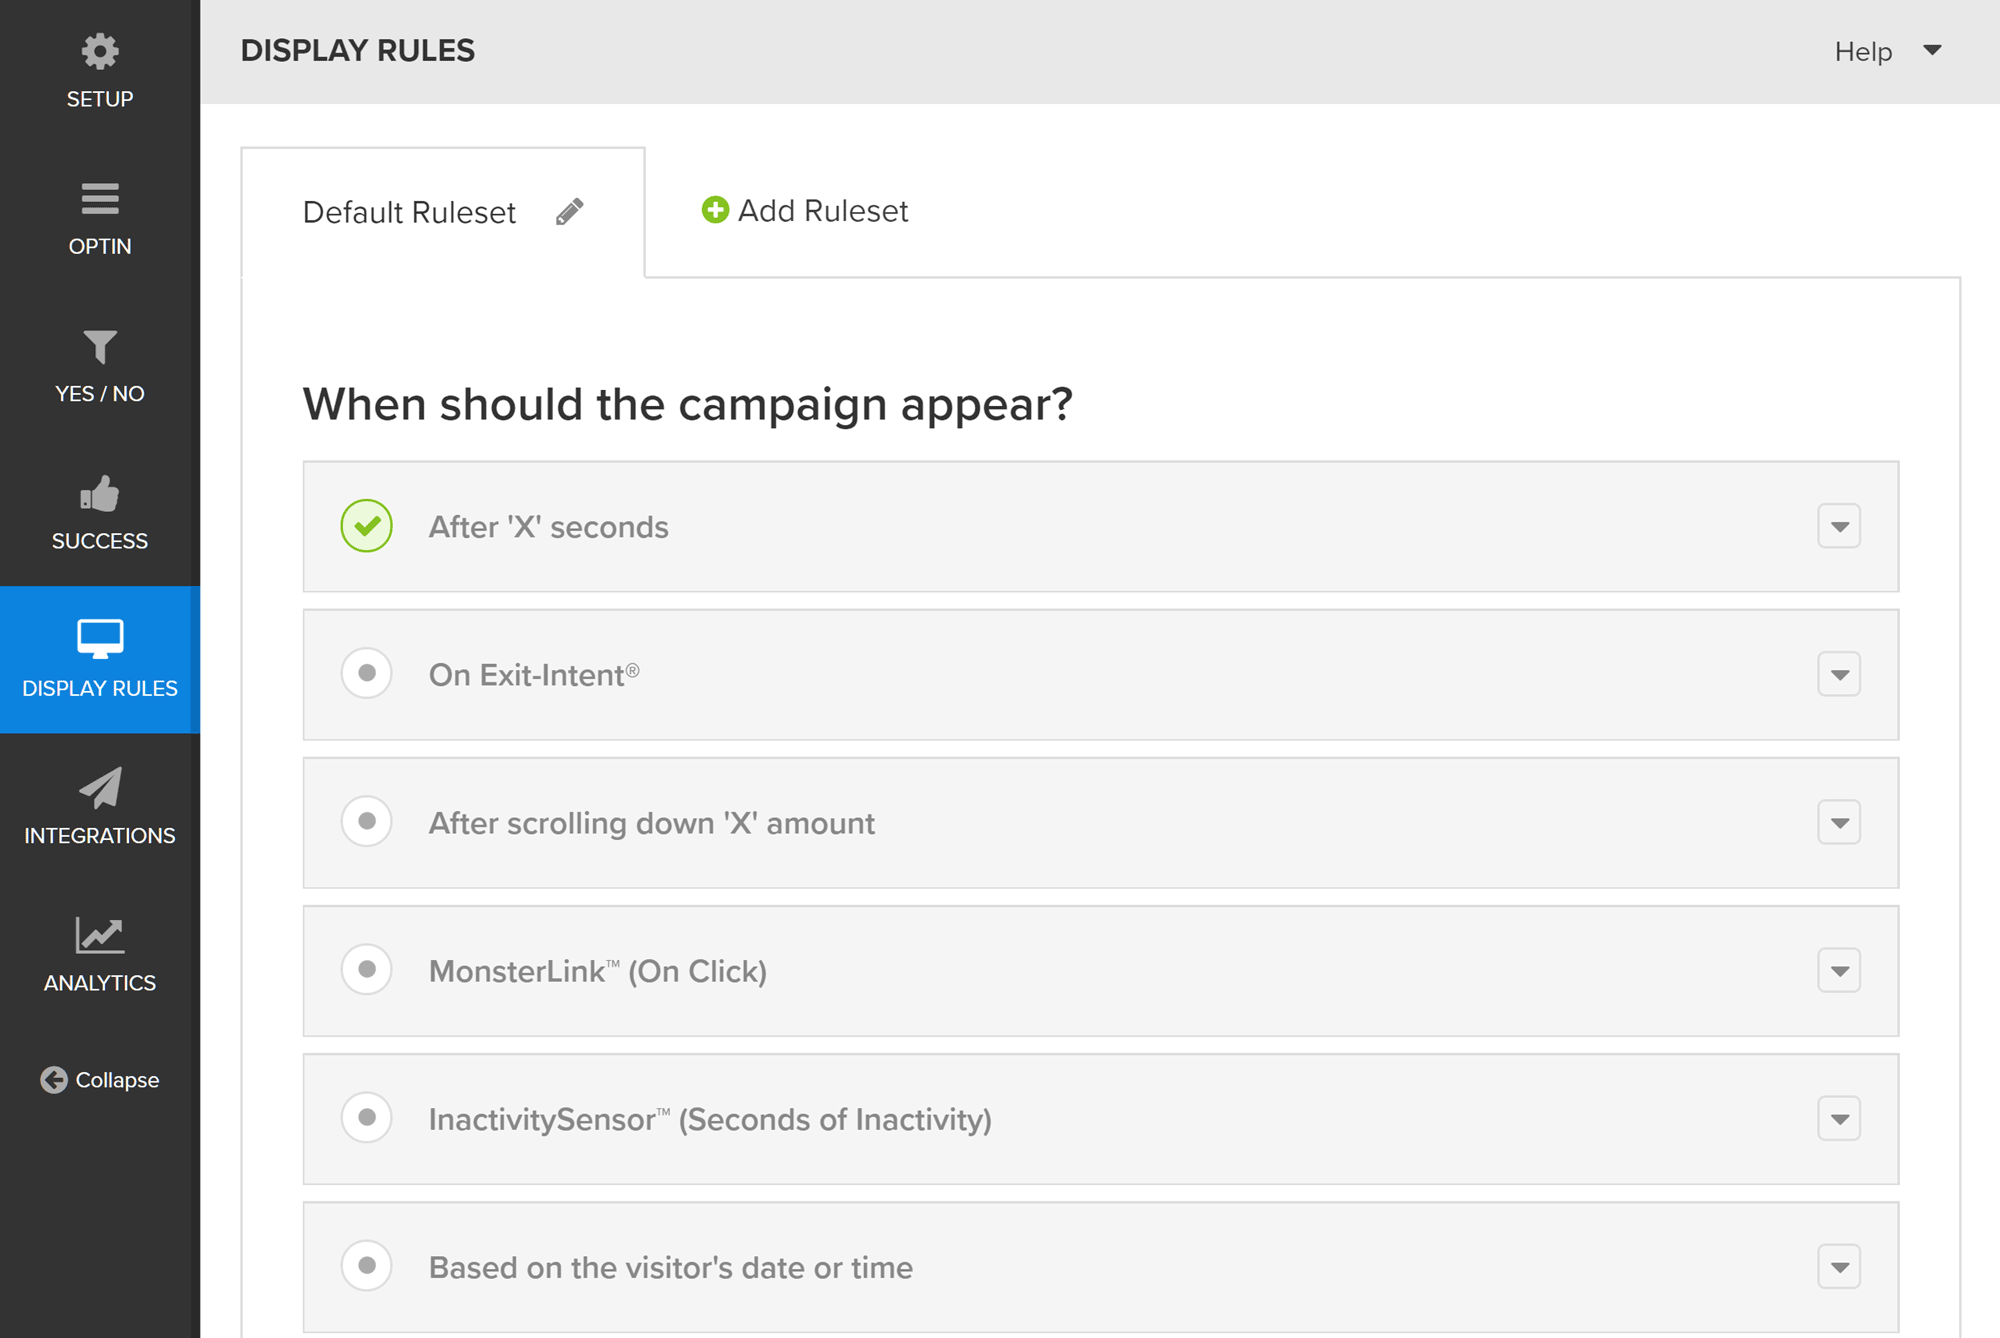
OptinMonster now has a wealth of rules that control when and where your popups are displayed.
Depending on the type of form you’re working with, you’ll have different options that govern how things will work on your site. For example, when creating a lightbox popup form, you can set the length of time to wait before it’s displayed, or, alternatively, you could make use of the scroll percentage trigger, or enable the rather brilliant exit intent trigger.
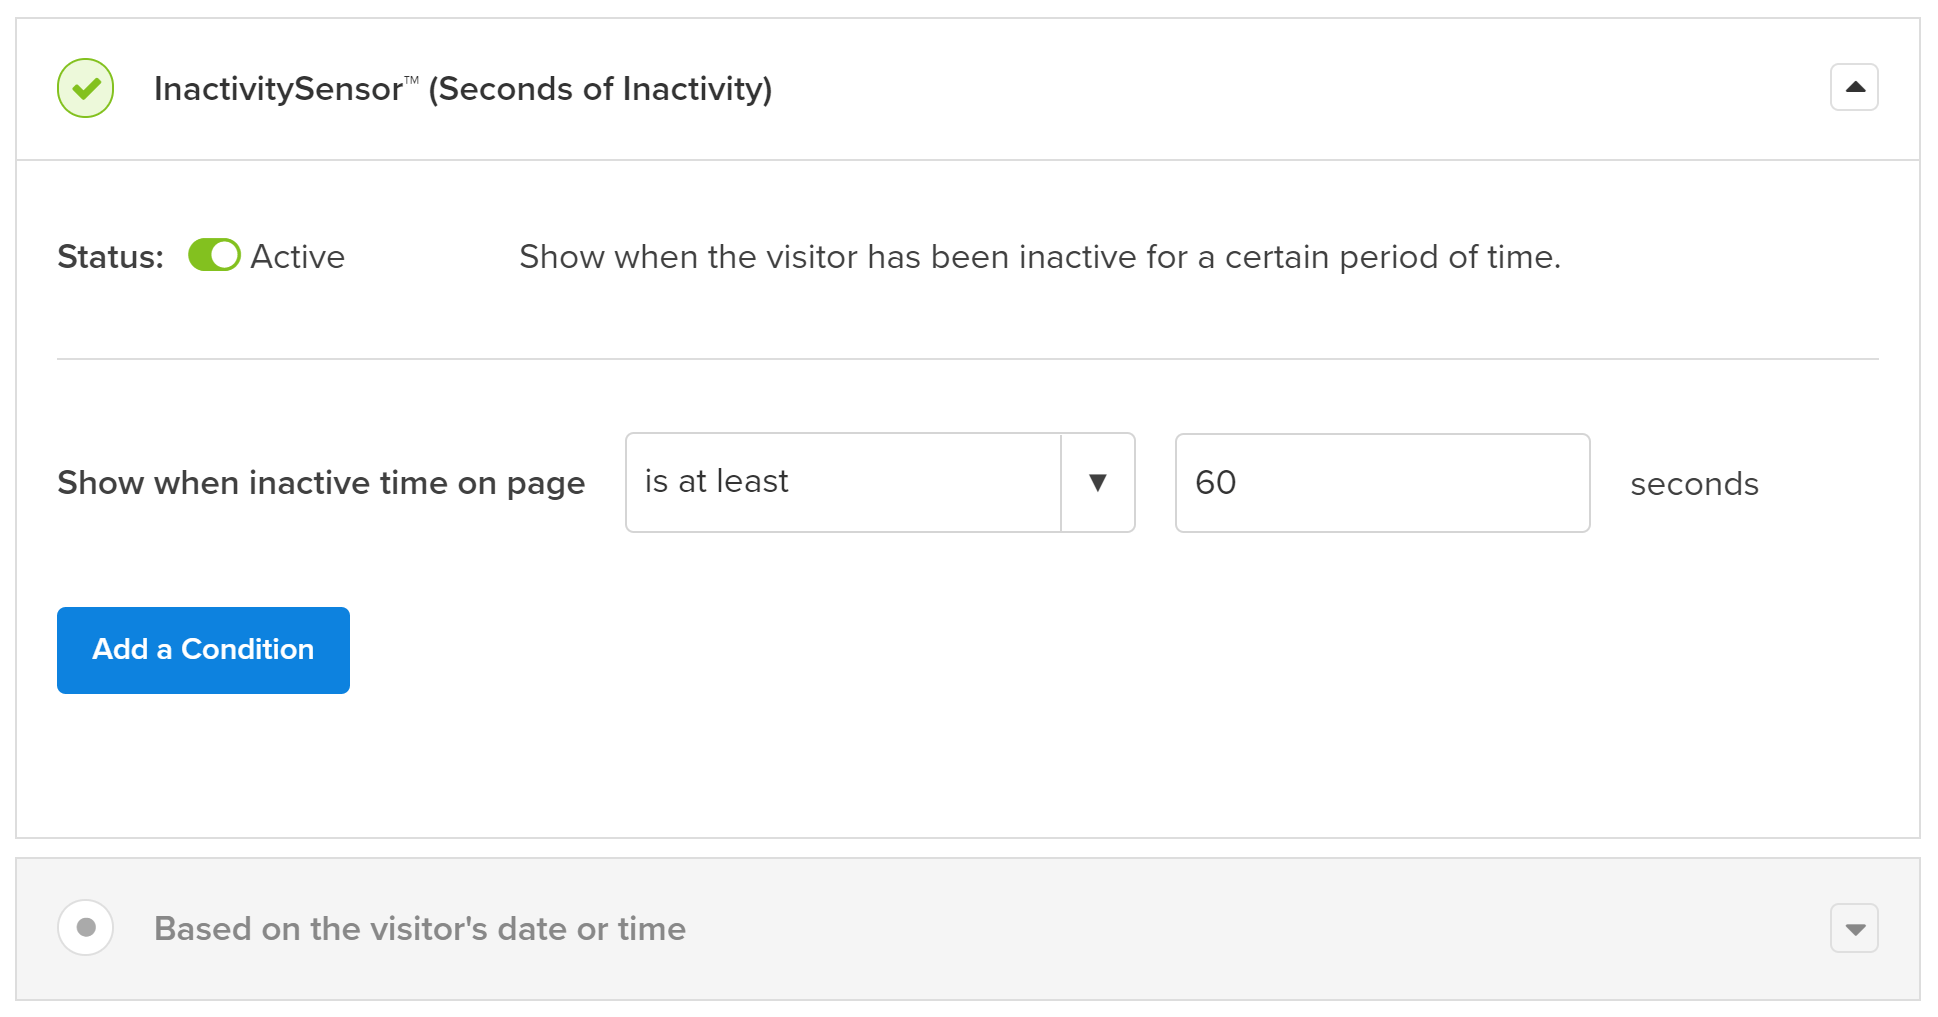
The inactivity sensor trigger is another way you can use popups on your site with OptinMonster.
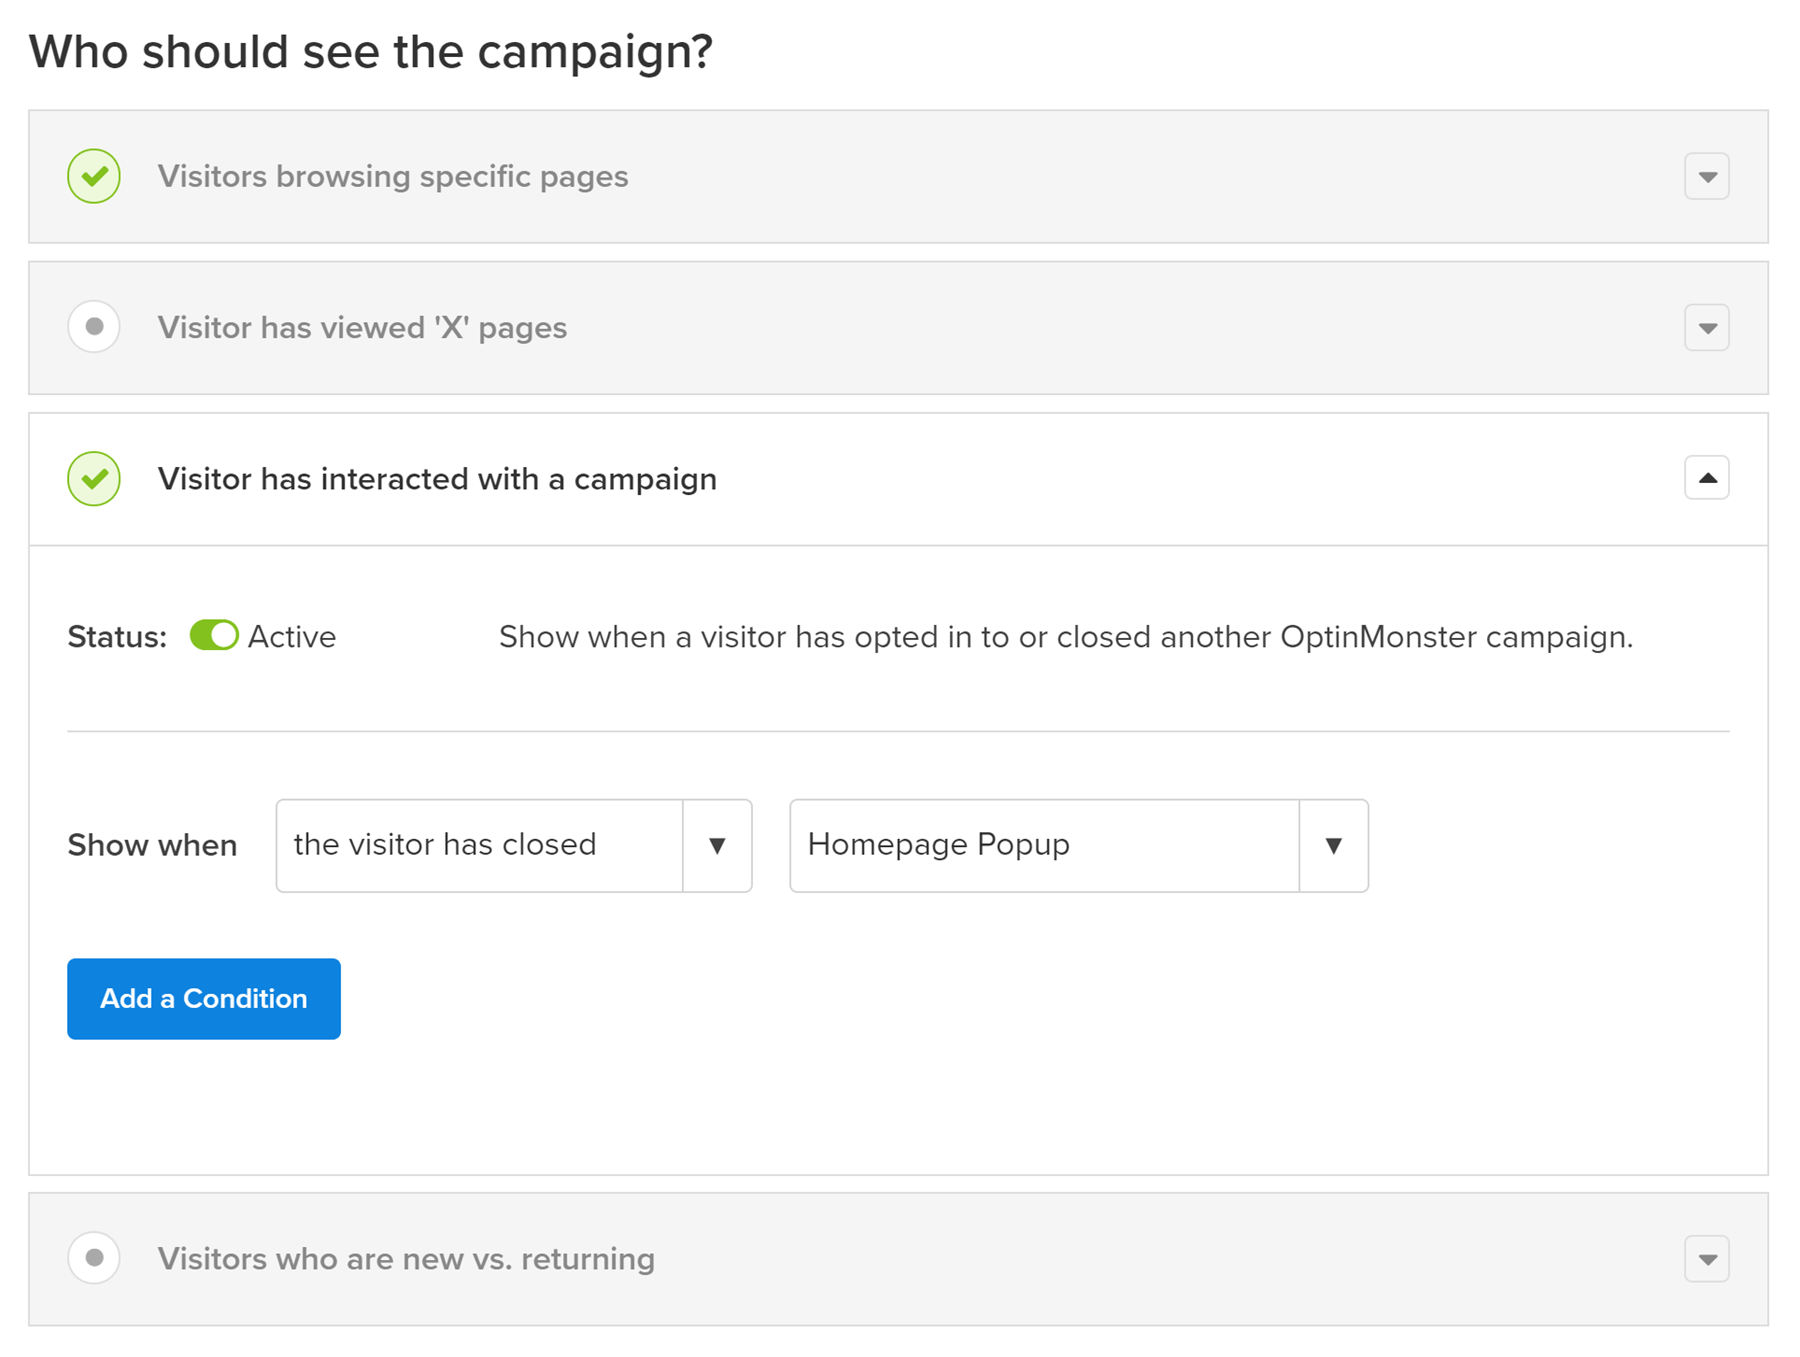
Over the years, as OptinMonster has been regularly updated, the amount of options available for controlling when your popups are displayed, where on your site they’re used, and who can see them has greatly increased. Some of the options that can now be used to control who can see your campaign or popup include:
- visitors browsing specific pages
- visitors who have viewed X number of pages
- visitors who have interacted with other campaigns or popups on your site
- visitors who are new vs returning
- visitors from a specific physical location
- visitors from a specific traffic source (Referrer Detection)
- visitors who are using Adblock.
As you can see, with so many useful options covering when to display your popups or campaigns, you can really target your content to specific users in specific areas of your site. These settings, such as the viewed X number of pages option, also help to minimize the risk of annoying your visitors by displaying too many popups. Furthermore, as you can create multiple popups for each site, and then strictly define when and where each popup is displayed, it’s easier to create highly relevant and targeted campaigns that your visitors are more likely to respond to positively.
OptinMonster gives you lots of control over who can see your campaigns or popups.
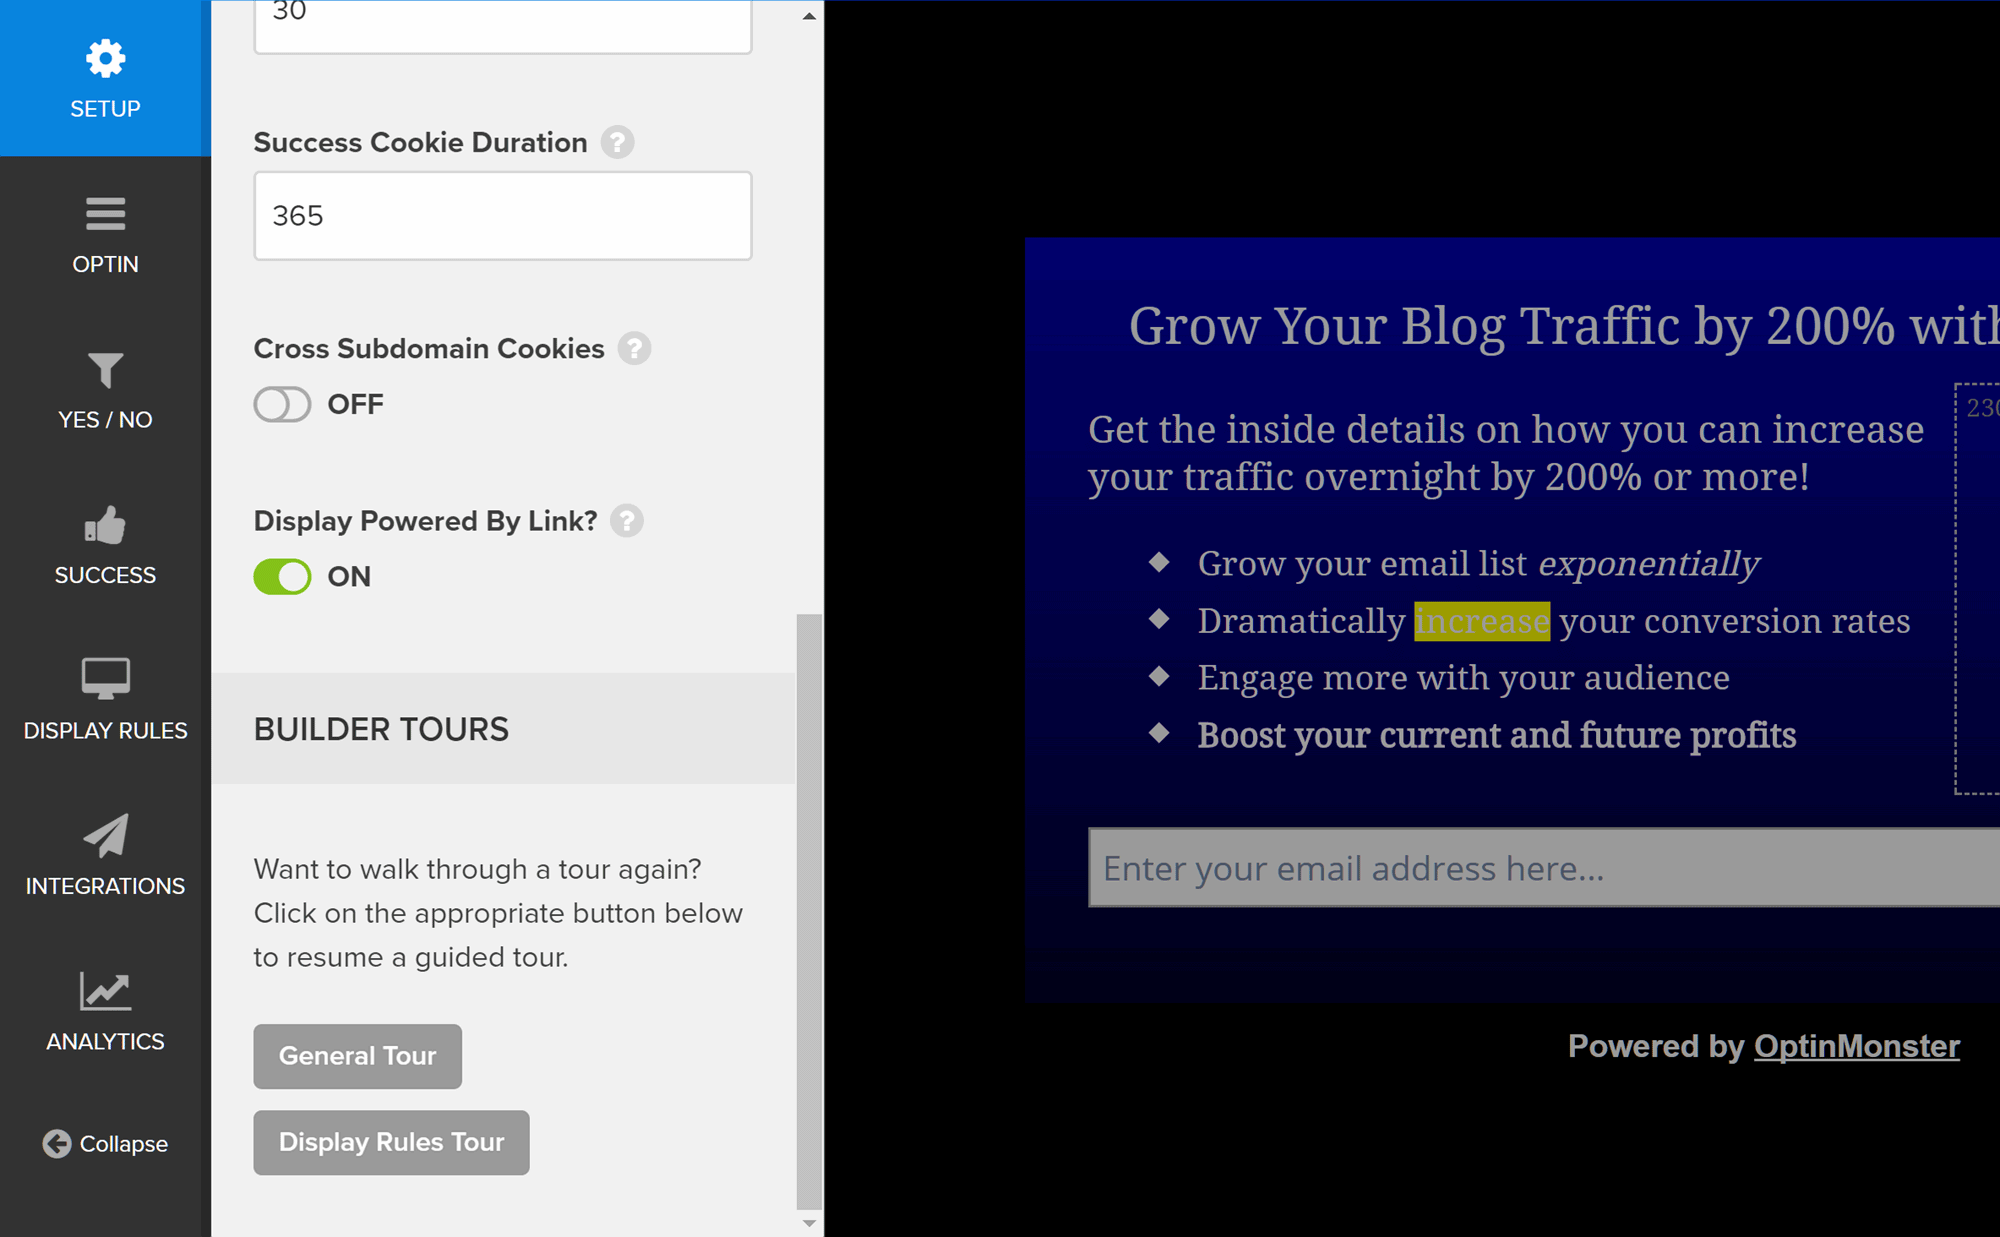
Other configurations include displaying a success message or redirecting users to a custom URL of your choice after the form has been completed. You can also set the cookie duration to avoid showing the form too often — and decide whether or not to show a ‘Powered by OptinMonster’ link.
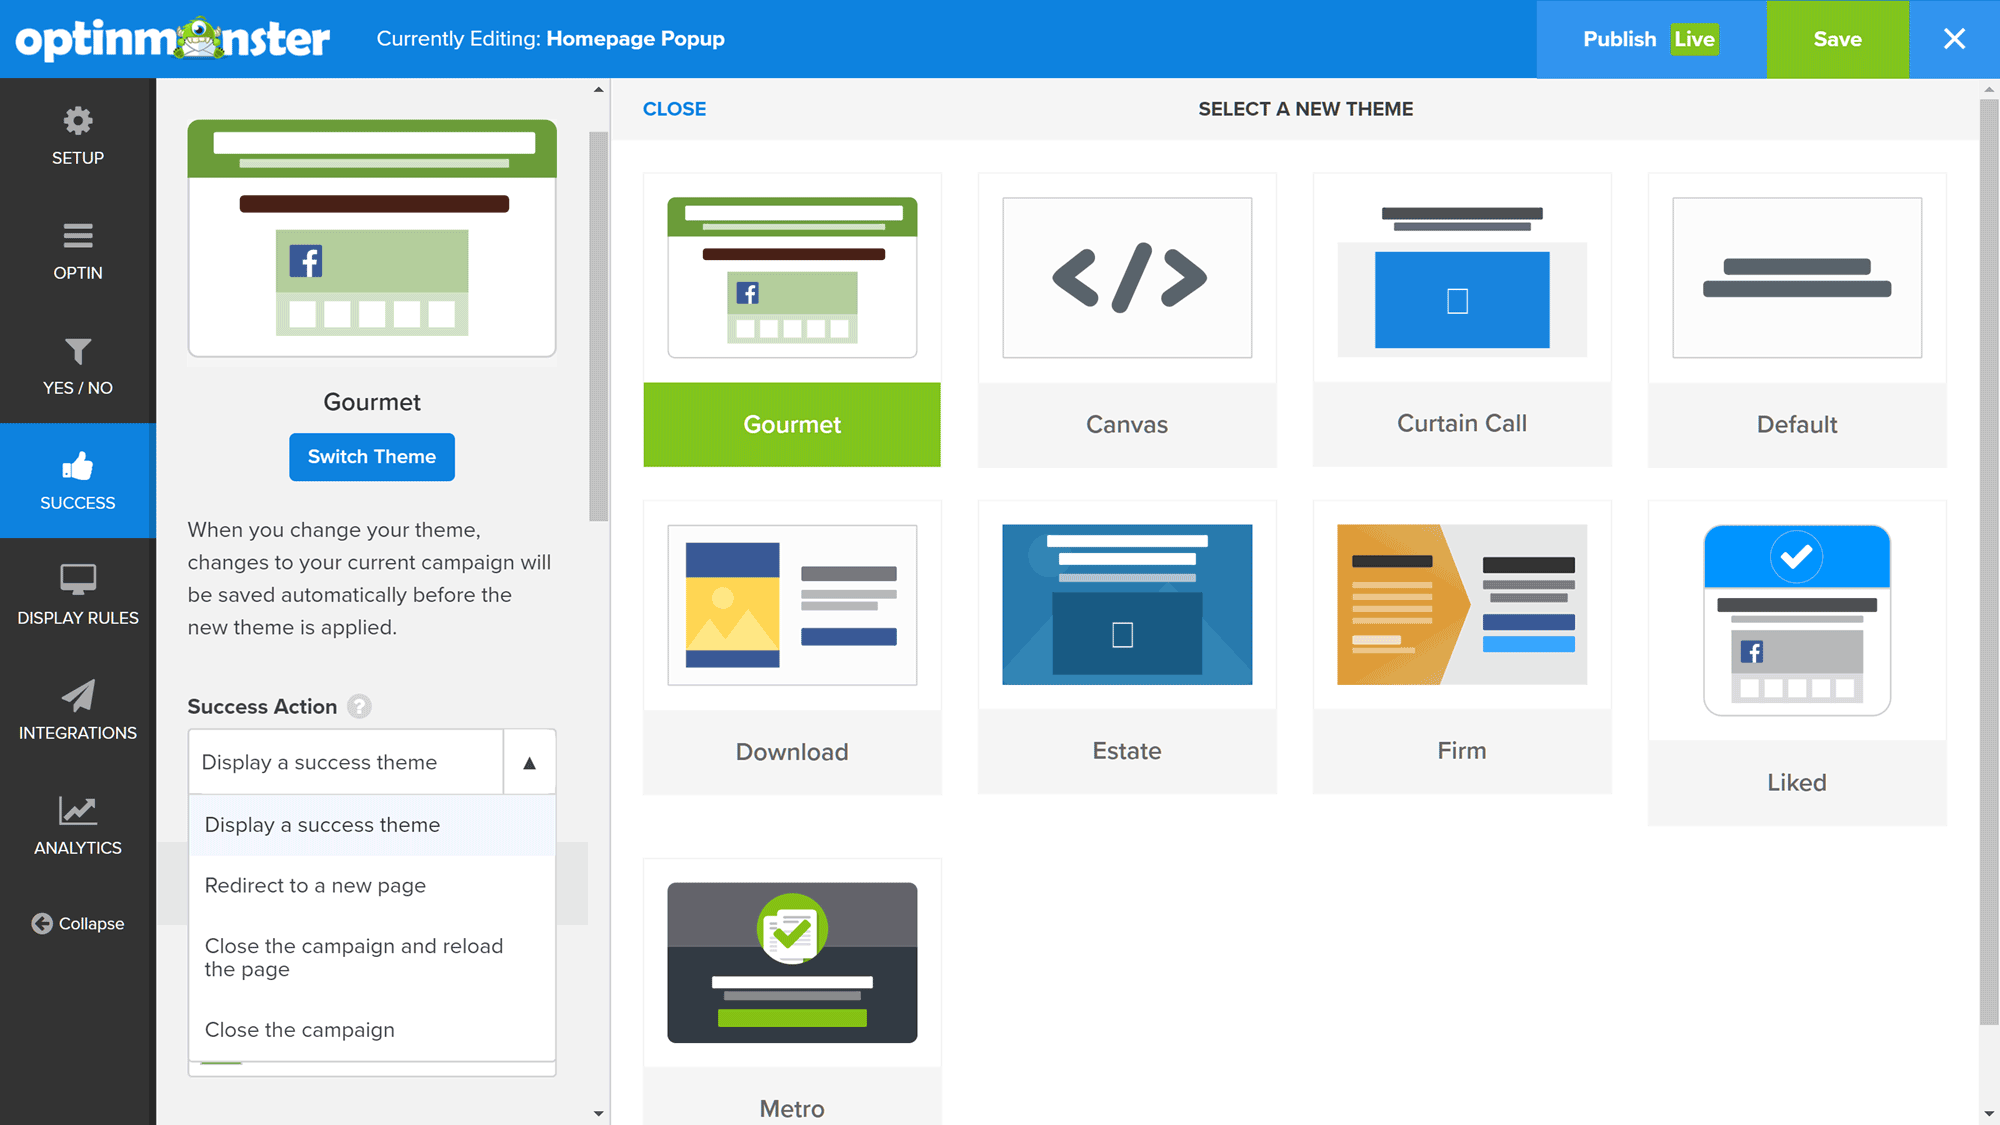
After a visitor has positively responded to a popup, you can display a success message or redirect them to a new page.
Email Marketing Service Integration
OptinMonster works with an impressive number of email newsletter service providers, including AWeber, ConvertKit, MailChimp, and Infusionsoft — and each update to the service seems to add even more.
Integrating your new form with your email list service of choice is as simple as selecting the option from a drop-down list, and then authorizing your account. While each service works differently in this regard, a handy link to the relevant piece of online documentation is displayed on the screen to help you to figure things out. After your form is set up and saved, it’s time to deploy it to your website.
Adding the OptinMonster Form to Your Website
Once you’re happy with your popup campaign design and settings, you can change the published status to live. OptinMonster now works with a wide range of website types, and not just WordPress. But if you’re using WordPress, then installing the OptinMonster plugin connects your website with your OptinMonster account.
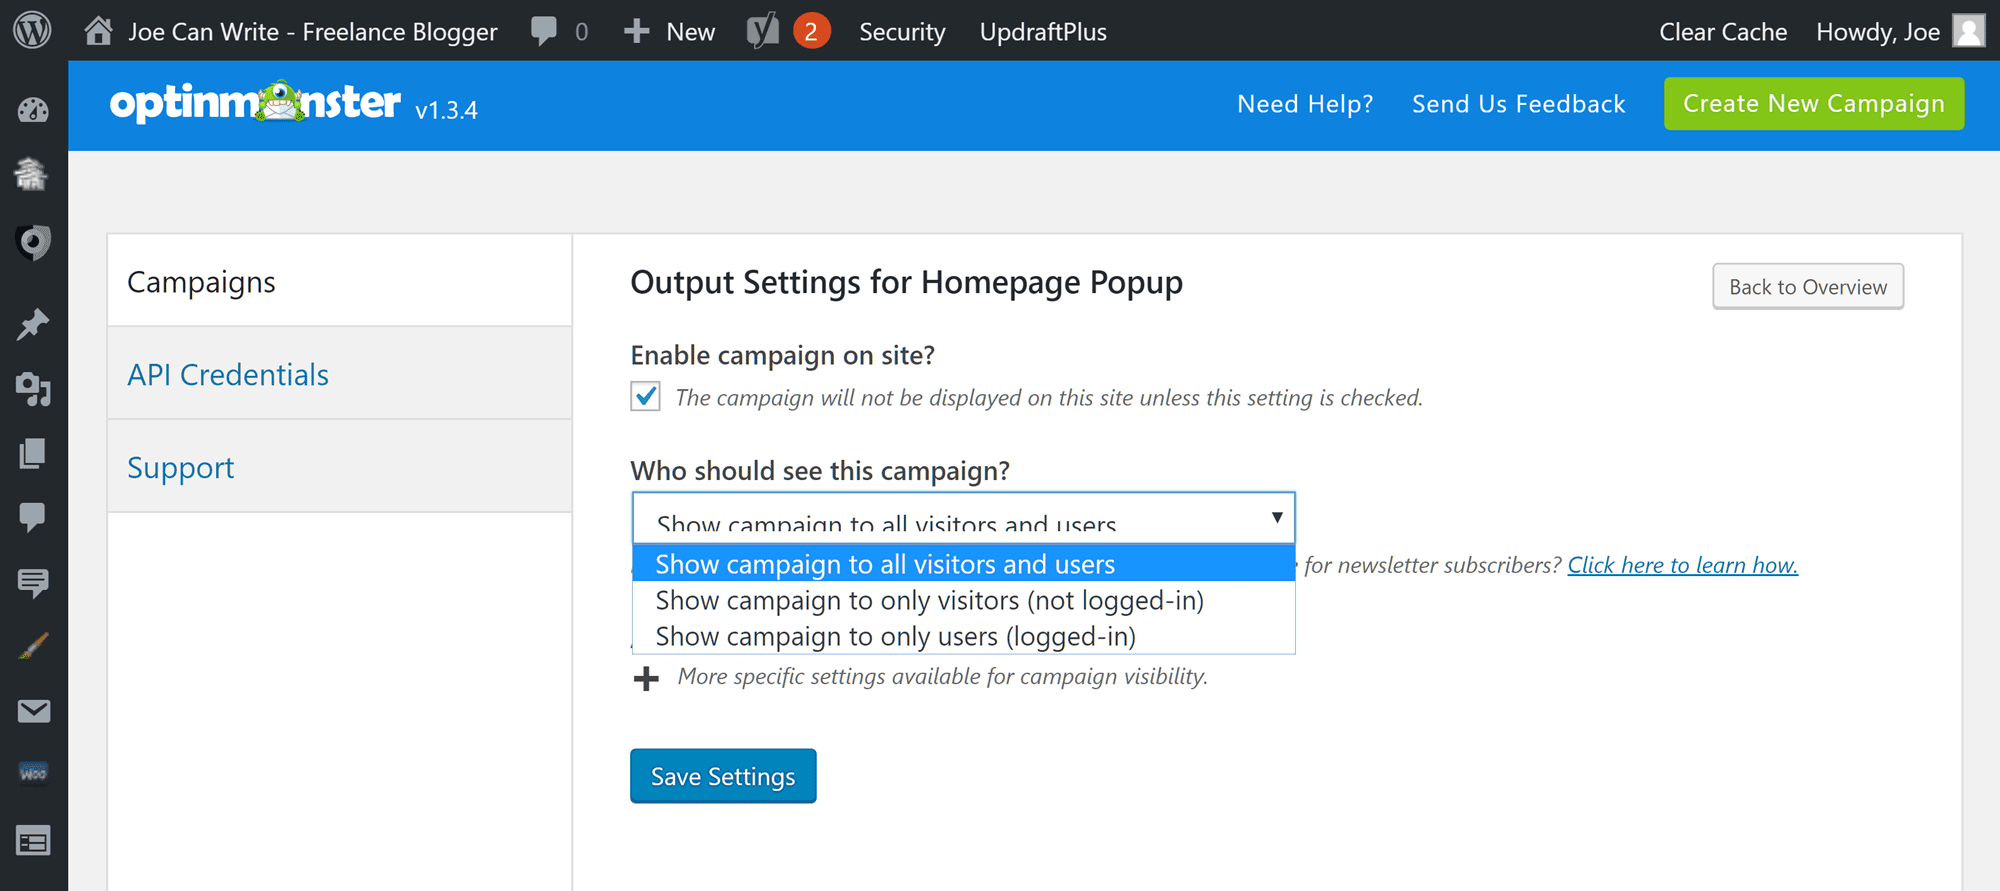
The OptinMonster WordPress plugin helps you to add the popups to your website.
You can then configure the campaigns from the OptinMonster area of your dashboard, including determining who can see the campaign and other visibility settings. Although most of these settings are accessed through the OptinMonster dashboard, the plugin lets you use WordPress categories and tags to control when the popups are displayed.
If you want to deploy the form on a non-WordPress website, you can quickly copy the relevant code from your account area on the OptinMonster website. Note: There’s a bunch of handy online documentation covering all of the most popular publishing platforms, as well as generic instructions for other types of website.
Now, if all has gone well, your new optin forms should start displaying in accordance with your chosen settings.
Final Thoughts
As you can see, the move to a hosted service has improved the OptinMonster user experience. Now that you can create and manage your popup campaigns through a purpose-built interface, you’re no longer constrained by the limitations of working through the WordPress dashboard.
The new features that have been added to OptinMonster make it arguably the best email optin and custom popup creation tool for WordPress users. Thanks to the varied selection of high-quality templates, a feature-rich editor, and detailed settings that control when your popups are triggered, on which pages they’re active, and who can see them, you can really take your lead generation efforts to the next level.
Another nice feature is the ability to launch the optin form popups from a button or link on a page — thereby giving you even more flexibility in how you attempt to persuade visitors to interact with your content. The blank canvas option should also come in handy for anyone who wants to display custom content in a popup window.
In short, although the very clever exit intent behavior trigger that helped this tool stand out from the crowd has now been copied or adopted by many of its rivals, the new features, existing features, and improved ease-of-use mean OptinMonster remains about the best email optin form plugin on the market!
Interested? Find out more about OptinMonster on the Official OptinMonster Website.
Used/using OptinMonster yet? Thoughts?