


When most people think of LinkedIn, they think of networking. They know the platform is great for staying in touch with professional contacts and making new connections. But what they don’t realize is that it can also be a very effective marketing platform too.
LinkedIn allows you to promote your business directly to interested professionals and includes a number of unique targeting options based on one’s professional history. Making it especially effective for B2B sales and professional services.
Though just because you don’t fall into those niches, doesn’t mean you should ignore the platform which serves up a powerful demographic of professional of all ages and experience levels.
So what’s stopping you? If you’re new to the ad platform, you may not know where to even start. This guide will walk you through the process of creating a campaign from scratch with a few helpful tips along the way.
Launching your LinkedIn Ad Campaign
Step 1: Start a new campaign
Let’s get started by setting up a new campaign on LinkedIn.
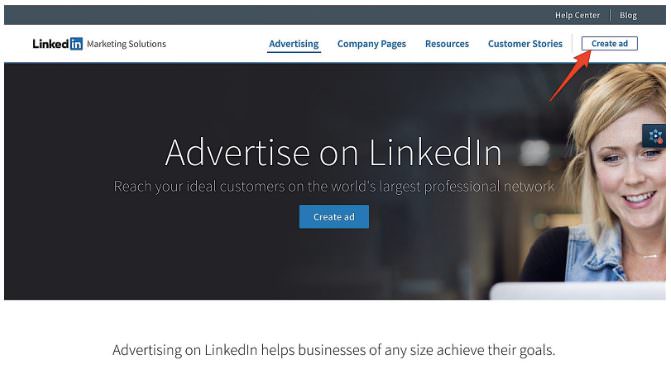
Go to https://www.linkedin.com/ads/ and click “Create Ad” in the top right-hand corner.

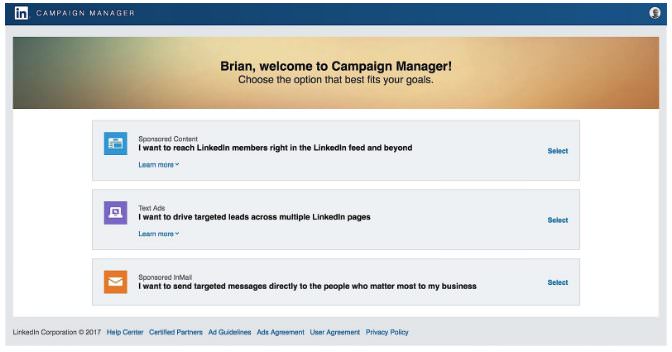
Once inside you’ll have to select what type of ad you’ll be creating. You have three options:
- Sponsored Content – essentially, you can pay to have your company updates pushed out to a larger audience than those already following you. These will appear in the user’s feed similar to Facebook’s sponsored stories.
- Text Ads – these ads show up on various parts of the LinkedIn website and mobile application and look more like traditional ads. They are limited to 25 character title and 75 character message. They also tend to be a bit cheaper.
- Sponsored InMail – This allows you to pay to send ads directly to different user’s mailbox which can be very effective for important, targeted ads.

Sponsored InMail is certainly the most unique feature the platform offers and they’ve done a good job keeping the community from abusing it. The other ad formats should remind you of something you’d see in AdWords or Facebook. Each has their pros and cons.
At the end of the day, you should play with a few ideas and find what works best for your business. But don’t write off Text Ads just because they’re more basic.
One study published by Rebel Hack shows that while the click-through rate (CTR) was lower for Text Ads, those clicks converted at double the rate (around 20%)! They also received 10 times the impressions on the same $10 budget.


That means that while they might look a little less sexy, Text Ads can really help you maximize the ROI of your ad spend.
That’s why for the rest of this guide I’m going to use the Text Ad example. However, creating sponsored content is a very similar process. Just follow along below.
Step 2: Create your ad
Once you’ve selected a format, you’ll need to add the details. In this case, you’ll need to provide four key things on the left-hand side:
- Ad Destination
- Title
- Ad Copy
- Image
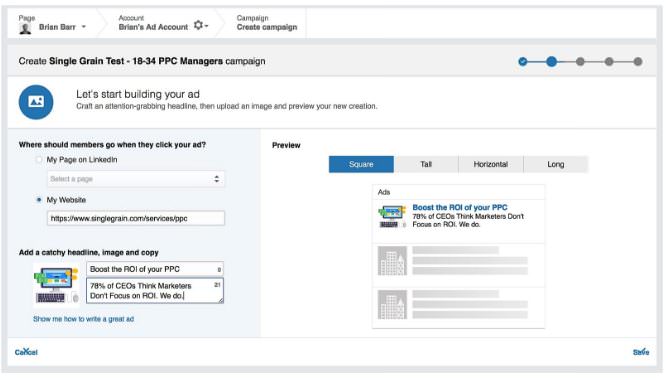

The ad destination is the page you’d like to send people to when they click on your advertisement. That can be a page you or your business already have on LinkedIn or it can be any external destination by URL such as a specific product landing page.
You’ll then need to add a catchy title that grabs the reader’s attention at first glance. Try using emotional and rational trigger words to make sure they read on to the body of your ad.
Your ad copy should expand on your offer. Make sure to incentivize the reader to click through by highlighting the key benefits of your offer here.
Lastly, you should include a small, but catchy image. Avoid using anything complex or confusing because people will only see it as a small thumbnail for a quick second as they scroll past your ad. Many people choose to use their logo here. But do whatever makes sense for you.
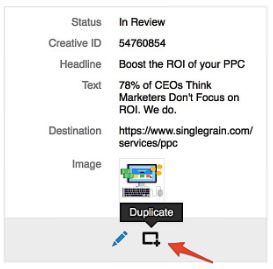
Pro-tip: You can test multiple versions of the same ad easily on LinkedIn. Once you’ve finished creating the ad (in a few steps) you can easily duplicate it and return to this page to tweak the copy and images.

Step 3: Set your targeting
This part is where LinkedIn starts to distinguish itself from other PPC platforms. While they don’t have as many targeting options as Facebook, they do have a number of interesting and useful ones due to the nature of their platform and the data they collect from customers.
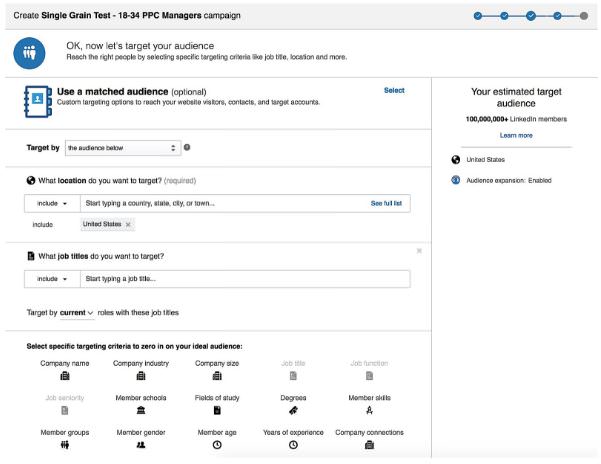

You can target individuals at specific companies or that have specific job titles. You can even target people based on their specific work history, education, skills, interests and much more.
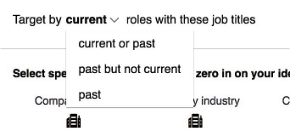

You’ll need to target a geographic area which can be entire countries, or more specific regions if you serve specific markets. After that, you have free reign to use as many or as few criteria as you’d like.
Pro-tip: Just like Facebook and AdWords, LinkedIn lets you setup retargeting campaigns or target users based on an email list that you obtained outside the platform. To access these features, select “Use a matched audience” at the top of this page.
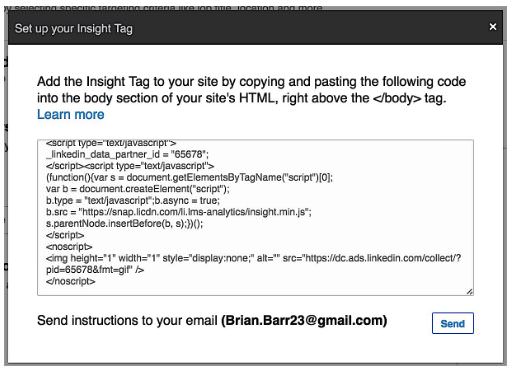
For retargeting, you’ll need to install a LinkedIn Insight Tag on your site like you would for any other retargeting campaign.

Step 4: Set Your Bid
Now that your ad is ready to go, you need to decide how you’re going to bid for placement. You have two options:
- Cost Per Click (CPC)
- Cost Per 1,000 Impressions (CPM)
With the first, you’ll only pay when someone clicks on your ad and LinkedIn will try to show it to people they believe (based on past data) are most likely to engage with your ad (and make them money).
Your alternative is to pay for every 1,000 people that see your ad. If you write compelling copy with a high CTR, this can actually save you money and boost ROI. But it’s better suited for campaigns designed for brand awareness, where your goal is as many views as possible.
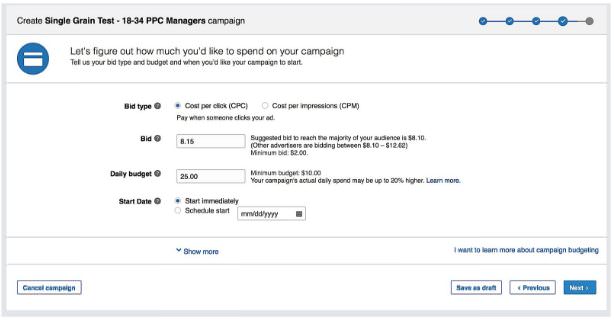

After you select the type of bid, you set the actual amount. LinkedIn will automatically recommend a range of bids based on what others are already doing. I recommend starting by bidding a little bit higher than the bottom of this range to make sure you get some decent placement.
You can also set a daily budget and LinkedIn will attempt to match your spend to that amount (although they do warn that your costs may be up to 10% higher than you budget).
I recommend you start with a small daily budget of $10-20 when creating new ads. After a week or two, you will have a better idea of which ads are performing well and can increase their budget (and your bid amount) if that makes sense for you.
Pro-Tip: if you are consistently coming in under budget it may be a sign that your bid is not competitive enough to win placement. If this is happening, just bump up you bidding a little bit and you should see your number of impressions (and hopefully clicks!) start going up.
Step 5: Set Up Your Billing and Launch!
If this is your first LinkedIn Ad, you’ll need to enter your billing information next. LinkedIn will not display any of your ads until this information is filled out and verified.
If you don’t have access to the company credit card or are waiting on someone else for this information, you can continue making new ads and campaigns simply by navigating away from this page (just return the ads homepage) and continuing to work.
Your account will display a large warning until that information is entered and your ads won’t run. But there’s no reason not to get everything setup first.
Note that once you add your billing information, it may still take a little bit of time before your ads start to run. LinkedIn has a review process that they submit most ads through, especially for new accounts to make sure that it’s content they want on their site.
Step 6: Monitoring and Reviewing Your Ads
Once you create your first ad, the dashboard will transform…
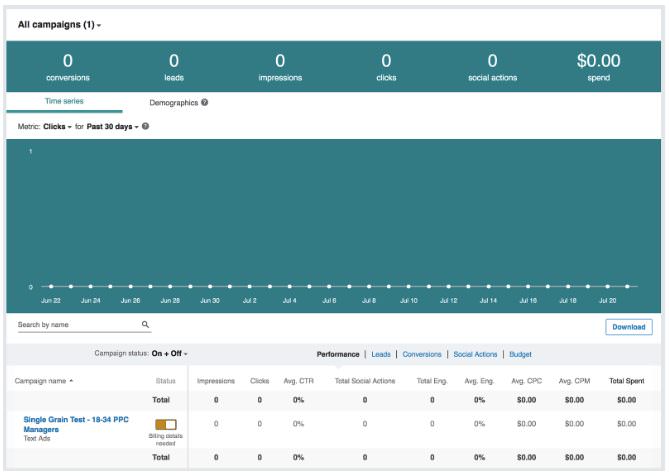

Of course, it will be full of zeros until your ads start getting some traffic and data points to measure.
Once the data arrives, you’ll be able to use the charts here to track all the important metrics of your campaigns like CTR and Avg. CPC.
What metrics are “good” depends on your business and your marketing objectives, but generally you’ll want to focus on minimizing CPC and CPM numbers as that means you’re spending less per customer you reach, maximizing the number of people you can reach with your budget and maximizing your ROI.
If you’re running multiple ads on the same objective (for example, generating leads for your PPC Advertising business), you should keep an eye on their comparative CPC. If you notice one is significantly outperforming the others, you should shift your budget to fund that ad more. This will help you reach more people, at a lower cost and maximize your ROI.
It’s important to also track the quality of clicks you are getting. To do this, you should setup conversion tracking in Google Analytics or a similar tool.
If you noticed that leads coming in via one of your campaigns are converting at an extremely low rate, you need to adjust that ad to better qualify your leads. Otherwise, you’re spending money to attract people who aren’t interested in your offer.
Likewise, if you have a campaign running with a low CTR or high CPC, but the traffic is converting very well comparatively, you might consider letting it run despite the engagement metrics.
At the end of the day, it’s CPA (cost-per-acquisition) that matters. So if you’re paying $2 per click, but converting 1-in-4 clicks, you’re actually outperforming the campaign that costs $1 per click but only converts 1-in-10.
Conclusion
Now you have everything you need to go and setup your first LinkedIn Ad campaigns.
Don’t worry about monitoring campaigns day-to-day too much. In fact, I’d urge you to avoid doing that. Campaigns fluctuate naturally every day and you could make poor decisions if you get wrapped up in those daily shifts.
You just need to check-in on them once every 2 weeks or so to make sure that your costs are reasonable and that your leads are converting well.