
Want to generate more sales revenue with your landing pages and marketing funnels?
Then look no further – read this post and start driving more quality traffic to your site with Facebook and Instagram ads.
Not sure if it’s the right thing for your business or maybe you’re worried that it’ll be difficult?
Don’t be!
In about 15 minutes, you’ll be ready to launch your first Facebook and Instagram ad campaign through GetResponse.
Yes, you read it correctly.
Once you connect your Facebook Page to your GetResponse account, you won’t even need to switch between different dashboards to reach your audience on social media.
It’s all been built into your GetResponse account.
But other than providing you with a step by step guide on how to do this, I’m also sharing some best practices and tips on how to run your social media ad campaigns effectively.
This way, your Facebook ad campaigns won’t strain your marketing budget, and you’ll feel more confident about managing your customer acquisition costs.
So let’s get started, shall we?
Update: On the 21st of August, we’ve added a new feature to our Facebook Ads tool that’ll allow you to target your website visitors – and those who abandon them without converting!
It uses the Facebook pixel that’s automatically added to all your landing and sales pages created in GetResponse.
Naturally, you can also copy and paste the pixel onto your own custom URL and later on use it in your Facebook ad campaigns launched from GetResponse.
To learn more about this new targeting option, click here, to be taken directly to the step 3 of this article where we’re discussing all audience types you can choose for your ads.
Step 0. Accessing the Facebook Ads in your GetResponse account
To access the Facebook Ads creator in your GetResponse account, all you have to do is click on the Menu icon on the left side of the navigational bar and then select Facebook Ads.
Note: As of August 8 this feature has been available in all GetResponse paid accounts. Please bear in mind that all ads are paid for in USD, regardless of the account’s payment currency.
When you click on it for the first time, you’ll be taken directly to the Facebook Ads creator screen where you can adjust all the components of your ad.
It’ll look like this:

Let’s move on to the next step and start setting up your campaign.
Step 1. Giving your campaign a name
The first thing you should do when creating a new ad campaign is to give it a good name.
Although it will only be visible in your account dashboard (your audience won’t see it), it’s important to choose an appropriate name that’ll help you quickly identify the following elements:
- which Facebook Page the ad is related to
- what’s the campaign about
- who’s the target audience
- what’s the ad placement
If you name it well, you’ll be able to understand and filter your reports more efficiently.
Here some examples of ad campaign names we would use if we wanted to promote our Chocolate Monster shop to specific audiences in Poland and the US:
- GRShop Product X CA Young mothers 18-25 Facebook News Feed
- GRShop Product X NY Young mothers 18-25 Facebook Audience Network
Step 2. Selecting the ad placement
Now, you’ll have to select where your ad will be presented.
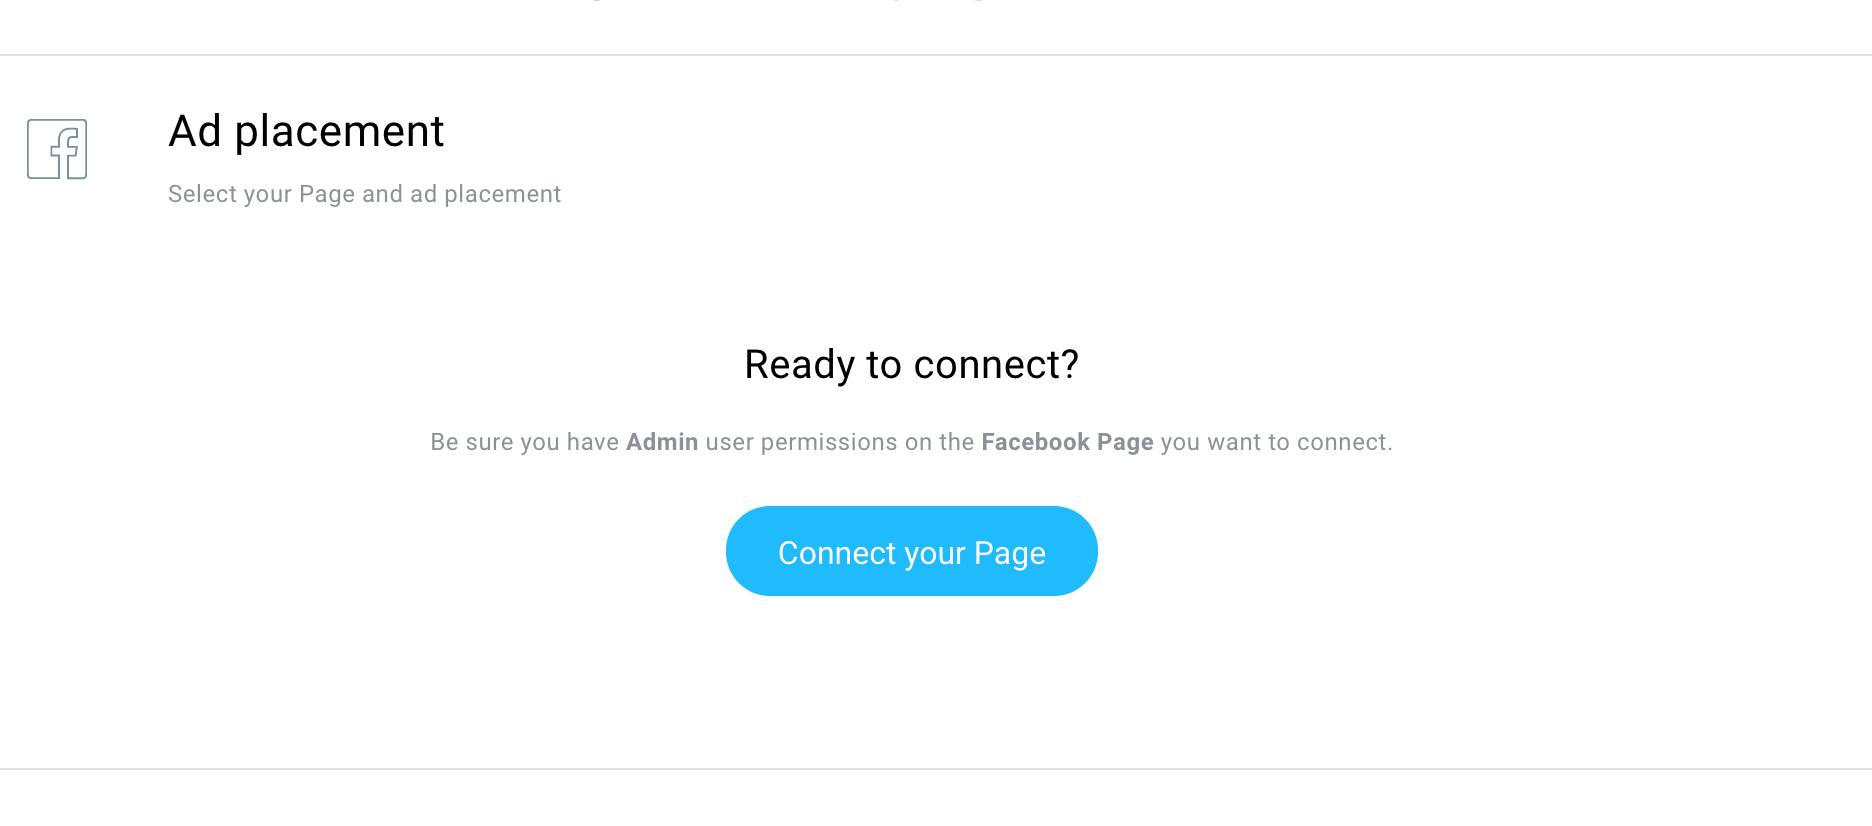
To do that, select your Facebook Page or connect a new one if you haven’t done it before.
If your Facebook Page is connected to an Instagram account, it’ll appear like this:

Now if you don’t already have a Facebook Page connected to your GetResponse account, you can do add it through the Connect your Page button. Alternatively, you can access it by clicking the Integrations link in the main menu.

Once you’ve selected the page, it’s time to pick whether you’d like your ad to be presented on the News Feed of your Facebook Page, the Facebook Audience Network, the Instagram feed, or the Instagram stories.
If you’re unsure what Facebook Audience Network is, here’s how they describe it in their Ads Help Center:
Audience Network allows advertisers to extend Facebook and Instagram campaigns across the internet – onto thousands of high-quality websites and apps.
People spend a lot of their time on Facebook and Instagram. But they are also spending time on other apps and sites. Audience Network helps advertisers reach more of the people they care about in the other places where they’re spending their time.
Before you choose any of these methods, ask yourself this question:
Who am I targeting? Are these people on one of those platforms? And if they are, how likely is it that I’ll interest them with my content?
In some cases, you’ll be better off if you skip the Facebook Audience Network and only target those who are on Facebook. Other times, Facebook on its own won’t give you the level of exposure you’re looking for.
Whatever you do, make sure to test your hypothesis using only a part of your budget.
Once you’ve got the data, you can make a well-grounded decision and invest a bit more money in your ads knowing that they’ll drive you more leads.
Step 3. Pick your audience
It’s time to select the people you want to target with your social media ad campaign.
There are five main options you can choose from:
- Existing contacts
- Lookalike audience
- Custom audience
- People liking your Page
- Website visitors

Here are short descriptions of all of these targeting options and how you can use them.
Existing contacts
Let’s say you want to run a Facebook ad campaign to reach some of your email subscribers.
For example, those who haven’t recently engaged with your email campaigns, so that you can reengage them, or those who have previously downloaded one of your ebooks because you’ve got a new product that they might be interested in.
You can reach them by using the existing contacts targeting option, which lets you direct ads to one of your email lists or segments.

This is a powerful way to reach your audience on Facebook, but there are two key conditions that you should keep in mind:
First of all, this option will work only if your email list or segment has at least 100 people in it. Otherwise, the group’s too small to create an audience on Facebook.
Second, you should understand that people don’t always use the same email address to access Facebook and sign up for products or services like the ones you’re offering. That’s why the size of your target audience on Facebook may be smaller than what’s stored in your email list.
Usually, Facebook is able to match 60-70% of the contacts from your list.
This is especially the case if you’re targeting people who have given you a work email address. The chances are that they’ve registered to Facebook using their private mailbox, which would affect the size of the audience for your ad.
So how can you use your existing contacts to run an effective Facebook ad? Here are some quick ideas.
Three ideas for using this targeting option:
- Target those who have registered for one of your webinars or your newsletter but haven’t become active paying customers yet. Present them an offer they don’t want to miss out on.
- Reach those who’ve become less active and haven’t opened your newsletters in the last 30 days. Reengage them and convince them to keep coming back for more.
- Launching a new tool or service? Target existing customers and upsell those who’ve bought from your once or are currently subscribed to a lower-tier plan.
Lookalike audience
How about targeting people who aren’t on your email list yet, but share the same characteristics as your email subscribers? Enter: lookalike audience.
Imagine that you’ve identified your most loyal customers or the highest-spenders. Or some other segment that has a huge potential for your business. Lookalike audience lets you search for and target people who are similar to them.
To do that, you need to select an email list or segment. If your selected group has at least 500 people, Facebook will use it to look for people who share similar traits.
Additionally, you can narrow down the search to target only a specific subset of your audience by providing other characteristics – like location, gender, age, or interest.
For example:
Let’s say you want to run your ads to entrepreneurs who are similar to your existing customers, but only to those located in California, because that’s where you’re organizing your next meetup.
In this case, all you have to do is select the list or segment that includes the entrepreneurs that should be used for comparison and add California, United States, as the additional characteristic.
Although this may not always be relevant, you can also choose your email list to be included in your Facebook ad target group.
Here’s a scenario where this solution could be useful:
You’re promoting a new online course on Advanced SEO tactics. A good bet might be to promote it to those who’ve previously registered for your SEO tactics 101 course and those who are similar to them. With lookalike audience, you can target both groups at the same time.
As you can see, this is one powerful option that lets you expand your audience and reach very promising leads.

Here are some other ways you could use lookalike audience in your ad campaigns.
Three ideas for using this targeting option:
- Identify those who’ve recently converted and target those who might also be influenced by your current campaign
- Target people similar to your influencers and those who’ve left a positive review on your site
- Want to expand into a specific niche? Find existing customers who match your criteria and target those similar to them
Custom audience
Now let’s pick a different situation. You don’t have an existing audience to base your search on, but you have a good idea of whom you want to reach.
By providing characteristics such as the location, gender, age, and interests, you can reach your target audience with your Facebook ads.
The question is: how far should you go with providing these characteristics?
You’ll have to answer this one for yourself, but keep in mind that the smaller and more specific audience you choose, the more expensive it’ll be to be reach them.
Plus, sometimes it’s better to be a bit more flexible and target a slightly larger audience. You can never be 100% sure that someone’s not willing to use your services.
Three ideas for using this targeting option:
- Want to launch a new product or enter a new market? Run a pilot program to a group of early adopters who’ll help you decide if it’s the right move.
- Are you attending or organizing an event in a specific location? Target people who’ll be in that area and offer them a discount if they stop by.
- Want to spend your ad budget more efficiently? Narrow down your reach by creating a custom audience that isn’t going to display your ad just to anyone.
People liking the Page
How about including people that like your Facebook Page into the equation?
This option is similar to the lookalike audience but instead of providing an email list or segment, you use those who already like your page on Facebook.
You can use this option to:
- Target those who like your Facebook page,
- Target people similar to those who already like your page,
- Target both of the above groups at the same time.
Here’s one example of when you could use this option:
Let’s say you’re just starting to build an email list, but you’ve already got an engaged community of brand followers on Facebook.
They like your posts, participate in discussions, and often ask about your future projects.
With the People liking the Page option you can start building your email list by targeting them and others that share similar characteristics.
It’s a quick and efficient way of reaching you target audience. And not just any audience, but those who have already shown interest in your offer.

Three ideas of how you could use this targeting option:
- Just starting to build a list? Target those who’ve already shown interest in your brand.
- Fed up by diminishing organic reach on Facebook? Move the conversation to email and convince your fans that it’s time to sign up for your newsletter,
- or just target those who are similar to your existing fans.
Website visitors
How about targeting those who’ve visited one or several of your landing pages but didn’t take the action you wanted them to?
Thanks to the newly added Facebook pixel feature, you can do just that.
The process is even more straightforward if you’re using GetResponse to build your pages. Why? Because we’ve already added the pixel to all the pages you have or will create using our tool.
So you can just go ahead and select which pages the users have or haven’t visited in a specified number of days, and you’re set.

If you’re using another tool to host your pages, the process isn’t too complicated either. But you’ll need to install the Facebook pixel manually before you can target your website visitors right from GetResponse.

Here’s an example of how you could use this targeting option:
Imagine that you’ve launched a new course and started promoting it across all your marketing channels.
The early-bird offer you’ve prepared is going to end soon, so you’ve decided that you’ll run a retargeting to reach those who have visited your page but who haven’t registered for the course.
- You go into your GetResponse Facebook ads tool
- Create a new ad campaign
- Select those who visited the page course in the last five days and exclude those who saw the thank you page, meaning they already have registered.
- Add your ad content
- Select the budget and time-frame
- And you’re good to go!
Step 4. Set the budget
Almost there! Now it’s time to set your ad budget.
In other words, how much in total you want to spend and for how long your campaign should run.
The daily spend can be anywhere between $5 and $100.
So, let’s say you want to run an ad for a week.
In this case, your minimum total budget will be $35 (7 days x $5).
The maximum, on the other hand, would be $700 (7 days x $100).
You might be wondering:
Why am I not able to also set an exact amount (other than the minimum or maximum amounts), that’ll be spent every day over a specific period of time?
The reason for this is that we let Facebook adjust your budget to help you generate a higher ROI. In case they notice that your audience is very active, they’ll spend a higher portion of your budget to deliver the best possible results. The opposite will happen if they see a slowdown in your target audience’s engagement.
Thanks to this, you’ll be able to spend your marketing budget more efficiently 🙂
Step 5. Add your content
Finally, it’s time to add content to your Facebook ads.
The words and images your target audience will see when they browse Facebook or other apps in the case of Facebook Audience Network.
Your ad will consist of the following elements. You can customize all of them so that they’ll meet your preferences:
- Message introducing your ad (optional)
- Image(s) or banner(s) that’ll be used to promote it (adding multiple images creates a carousel ad)
- Link to the site you want your audience to be referred to when they click on the ad button
- Headline of your ad
- Button type, e.g. Sign Up
- Link description (optional)
Note: Please note that Facebook may show your ad copy differently, depending on the device on which the ad is being displayed. This may affect how the text that introduces your ad is being shown to your audience.
This may look like a lot of elements, but the good news is that not all of them are obligatory.
You may choose to skip the optional ones, but before you do that, think twice whether it’s the right thing to do.
Below’s a blank Facebook ad image that highlights all of the above sections and fields you can provide when creating your ad.

If you’d like to see what your ads would look like when they’re published, you can check them out with this Facebook Preview Tool.
Keep in mind that there are certain requirements when it comes to what your ad content’s going to look like.
For example:
- the dimensions of the image you provide must be at least 600 x 315px
- Maximum file size is 8MB for GIFs and 10MB for static images
- Aspect ratio must be between 9:16 to 16:9
- GIF ads should be 15 seconds or shorter
- You can’t add more images to the ad if you’ve already added a GIF
We’ll talk about this a bit more later in the last section on Facebook ad campaigns best practices.
Step 6. Submit the ad
Now that you’ve set you ad it’s time to hit the submit the ad button.
Once that’s done, GetResponse sends the information to Facebook so they can have a look if everything’s been set correctly.
Having said this, there might be some situations where Facebook will reject your ad and you’ll have to edit it before you can resubmit it.
There are, in fact, about 100 reasons why an ad could get rejected. Here’s an official list provided by Facebook, in case you’re interested.
Just to give you an overview of what these could be, I’ve summarized the ones that are quite common:
- There’s excessive text in your ad images
- Your ad is targeting personal attributes
- Your landing page is not fully functional or doesn’t match your ad creative
- Your ad content is not in line with the community standards
- You’re advertising something that’s prohibited or restricted (e.g., adult products, alcohol, or cryptocurrency)
We’ll talk about the most important ones once again later, in the last section of this post.
Step 7. Managing your ads
Once you’ve submitted your ad, you can monitor its status in the Manage Ads section of your account.
There, you’ll see the full details for all the ads you’ve created.
This includes the thumbnail of one of the visuals you provided, the campaign name, the text introducing your ad, ad status, ad duration, budget, reach, and the number of clicks the ad generated.
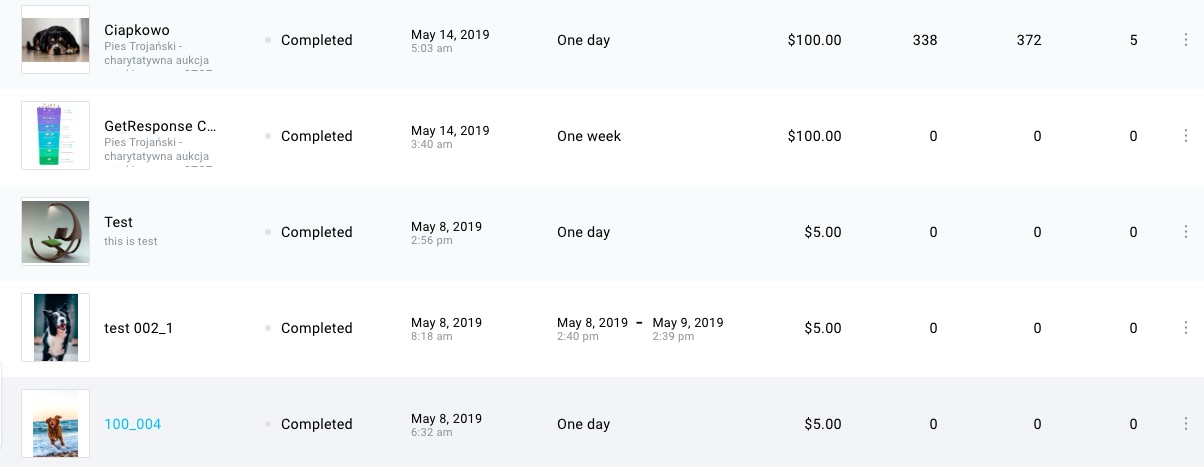
In the Manage Ads section, you’ll also be able to edit, duplicate, delete, and of course – create new ads.
When it comes to the ad status, there are several types of statuses you’re likely going to see.
These are:
- Draft
- Completed – when the ad campaign finished successfully
- Canceled – when the ad was canceled by the user
- Failed – when the ad couldn’t be activated
- Rejected – when the ad got rejected by Facebook
- Inactive – when the user paused the campaign
- Active – when the campaign is still running
- Scheduled – when the ad has been successfully approved and is now scheduled to start at a time specified by the user
- In Review – when the ad campaign is being reviewed
Note: When you hover over the status of your ad campaign, you should see additional information, e.g., why it may have been rejected.
The most important piece of information is that you’ll only be charged if your ad gets approved by Facebook.
How to create effective Facebook ads: best practices
To finish off this article, I’ve decided to provide you with a list of tips and best practices that’ll help you generate more bang for the buck with your Facebook ads.
That, of course, requires that your ads get approved by Facebook first, hence some of the tips that you’re about to read are directly related to match their ad requirements.
Minimize the amount of text in your images
Facebook found that ads that contain less than 20% text perform better.
That’s why they want their advertisers to meet these criteria when submitting their ads through Facebook.
To find out if your ad’s going to meet these requirements, you can use their Text Overlay tool that’ll evaluate your images.
Note that there are some exemptions to these rules (e.g. if your ad shows a book cover or an album cover).
That’s why it’s worth reading up more on these requirements directly on Facebook.
There, you’ll also find some useful ad examples with different amounts of text and explanation on how that element could affect their reach.
Make your ads personal
We see thousands of ads every day of the year. And we ignore most of them, too.
If you want your ads to stand out, you need to make them personal.
Rather than using stock photos, try using your own photos as often as you can.
Show your products in action. Make them feel natural, not like they’ve just been rendered out. But that doesn’t mean they shouldn’t be high resolution!
Match the colors and fonts in your ads with the ones that’ll be used on your landing page.
Maintain the scent. Thanks to this, your audience will feel that they’re in the right place and the ad hasn’t mistakenly directed them to some random site.
Not sure what’s going to work well for you? You can start by gaining inspiration by exploring the Facebook Ad Library and searching for other companies in your niche.
Keep it simple
Like in all areas of marketing, in Facebook advertising, simplicity pays off, too.
Effective ad campaigns are not only personal, but also tend to be simple.
The reason for this is also simple, we only have a couple of seconds (if not less) to capture someone’s attention and explain what it is that we can do for them.
So think twice before you submit a complex image or text that’s hard to comprehend.
Although some studies in the past have shown that people focus and understand more when the things they’re reading are hard to read, it might not be the most optimal experience for Facebook.
After all, many of your users will be accessing this social network to relax and socialize, not to strain their brain wires.
Understand that Facebook advertising is a bit different
If you’re new to Facebook advertising then you might not know this, but advertising on social media is a bit different from anything else.
Unlike on Google or Bing, people are spending time on Facebook to socialize and entertain themselves.
Sure, they do also learn about the latest news and events from it, but they’re not usually actively looking for that type of information.
Having said this, your Facebook ads should be a bit different from what you’d usually use in Google or Bing.
Your ads have to be eye-catching, interesting, and engaging. But, they can’t be distracting.
Think about this when designing your ads and you’ll see that their performance will be positive, too.
Match the ads with your funnel stages
As you may have read in our guide to marketing funnels, a typical audience goes through several funnel stages before they actually convert.
Typically, marketers refer to the top (awareness), middle (consideration), and bottom (conversion) of the funnel.
Each part of the funnel aims to achieve a different goal and you need to keep that in mind when you’re designing your Facebook ads.
If you’re running ads that are meant to fuel your marketing funnel at the top, i.e., drive traffic to your landing page, then your ad content should focus on generating awareness.
Naturally, if you’d be interested in retargeting those who’ve gone through your funnel, but haven’t converted yet, your ads should focus on the conversion.
To learn more about this, check out this article which provides further explanation on how to write ads for different business objectives.
Test different approaches
There’s not one single best way to reach your audience.
That’s why rather than betting big that your ad is going to convert like crazy, prepare several versions (including images, copy, and targeting option) to find the approach that works best for you.
Only when you know the potential outcomes, you should increase your budget.
Ready to take action?
Although this article turned out to be a bit lengthy, you’ll see that creating Facebook ads is not more complicated than sending out a newsletter to your email subscribers.
And if you want your marketing funnels to continually generate sales revenue, you should reach out to new audiences.
As you saw, there are at least several ways you can do this using the Facebook ads integration with GetResponse.
So, are you ready to give them a spin?
Go ahead and create your first Facebook ad campaign through GetResponse.
And if you have any questions, just let us know in the comments below 🙂
