You might have seen the Metered and Unmetered connections option buried deep inside your Android device’s WiFi settings countless times. But do you know its functionality or at least, understand the difference between the metered and unmetered WiFi networks? Not a lot of people seem to have much idea about this. And if you are one of them, then don’t forget to go through this detailed guide. It could be regarded as among the most important feature in the WiFi domain that many people have no clue of. To clear all such doubts, head over to the below section. However, if your doubts are regarding mobile networks, have a look at or comparison of 4G vs 5G Networks.
Metered and Unmetered WiFi Networks
Let’s have a look at what exactly are Metered and Unmetered Connections. Metered Connections could be regarded as a capped network that restricts the amount of data transfer. Whereas an unmetered connection allows for a free flow of data. By default, all WiFi networks on your device are unmetered. And mobile connections are more often than not metered.
This is the reason why you cannot perform heavy data consumption tasks like continuous background sync. Moreover, the Data Saver mode has a considerable impact on all metered connections, further restricting its usability. But it doesn’t have any impact as such on an unmetered connection (i.e. WiFi).
Setting up Metered and Unmetered WiFi on Android
So will there ever be a need to change to metered from an unmetered connection? Well, it depends on an individual basis. If you are using an unlimited network plan, then probably you wouldn’t be in much need of this feature. But people who have a capped (limited) Wi-Fi plan, should definitely consider this option.
So let us see how to enable this feature. The procedure to change the network settings to metered from unmetered is different on Android 9.0 Pie and on previous versions of Android. Keeping this in mind, the instructions are divided into two different sections.
On Android 9.0 Pie Devices
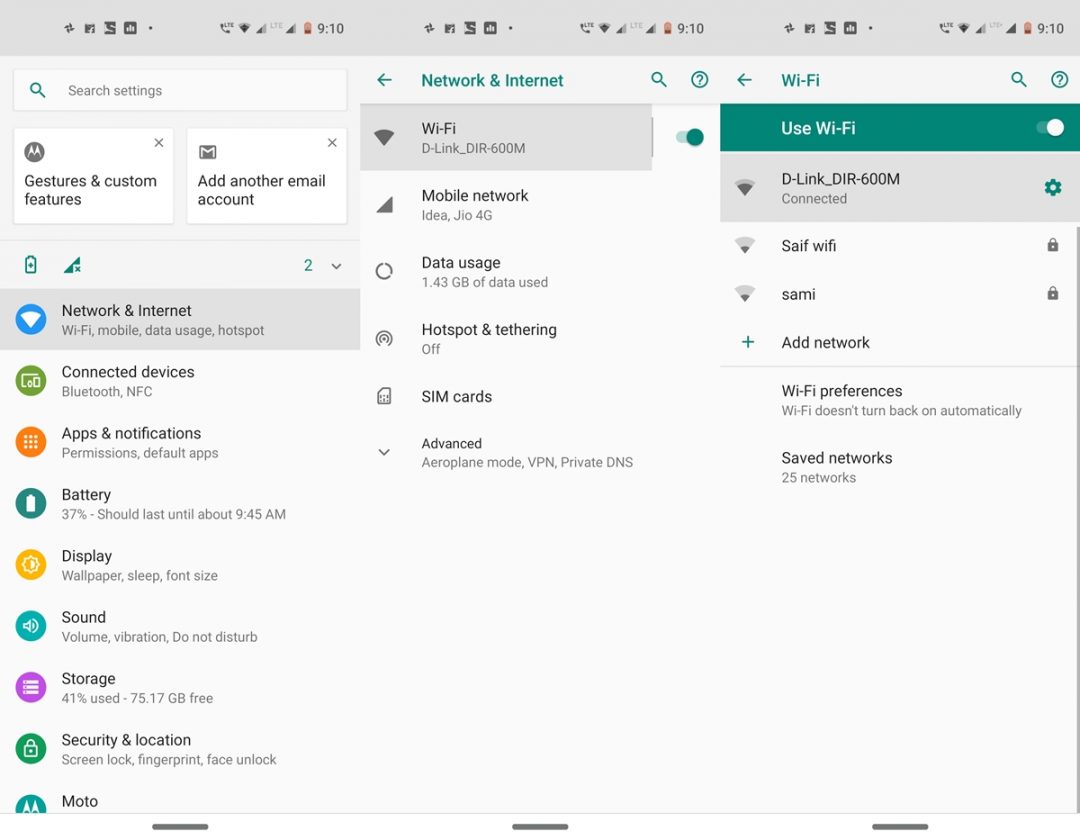
- Head over to Settings and navigate to Network and Internet.
- Tap on Wi-Fi and then on the WiFi network, you are connected to. However, if you are having issues turning on the WIFi, have a look at the method to fix WiFi connection problems on Android devices.

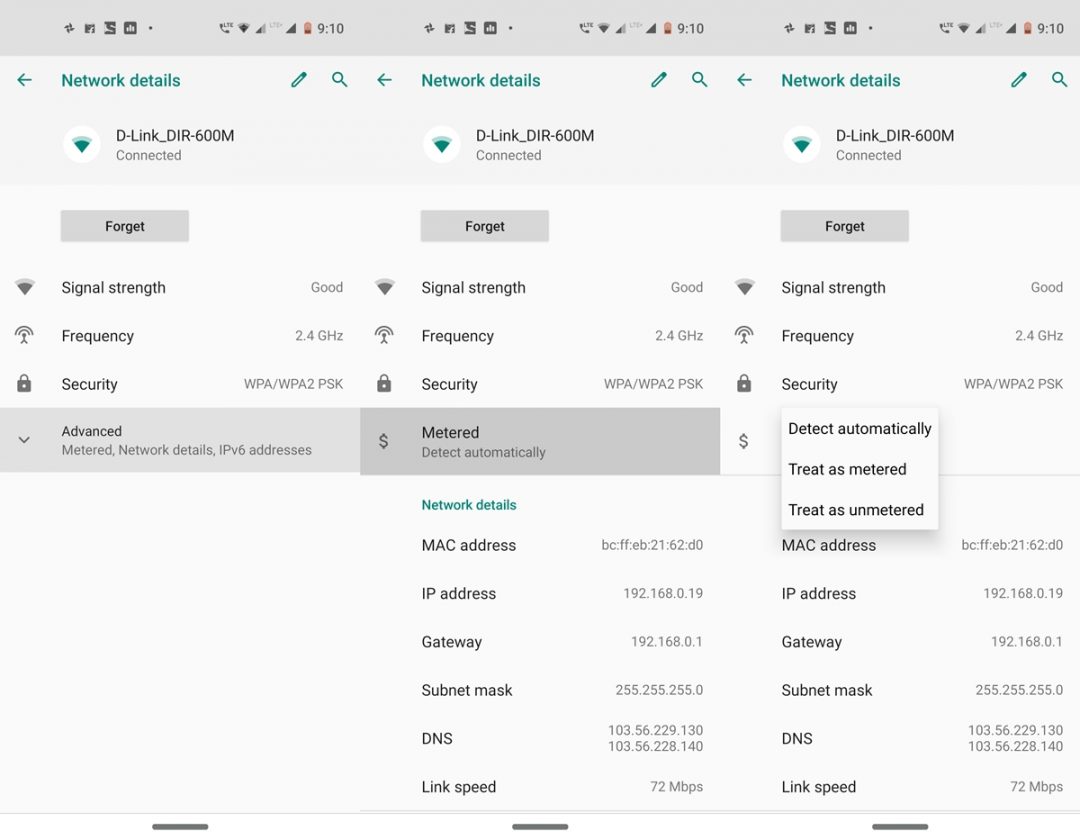
- Among the various available options, tap on Advanced.
- More options will now appear. Just below the Security option, you will see the Metered option. It will be set to Detect automatically by default.
- To change its current status, tap on Metered and select Treat as metered. The selected network will now be treated as Metered than the earlier Unmetered connection.
On Android 8.0 Oreo or previous versions
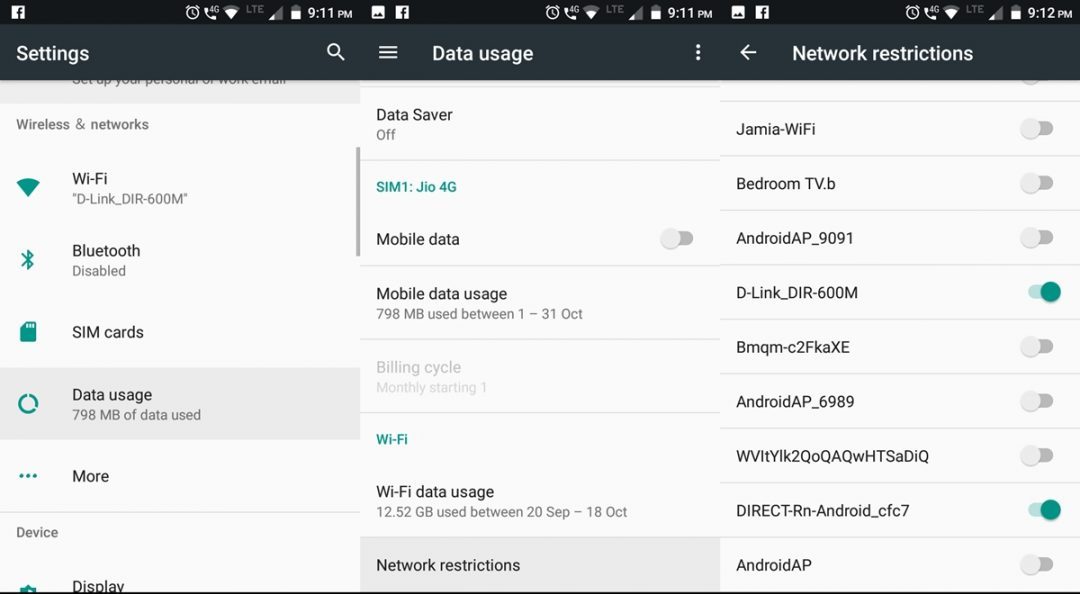

- Navigate to Settings and go to the Wireless and network section.
- Search for the Data usage option. Under that, scroll all the way down to the bottom and select Network Restrictions.
- Look for the WiFi network of which you wish to restrict data and toggle on the switch next to that network.
- That’s it. You have successfully changed the required WiFi network status to Metered from Unmetered connection.
Metered and Unmetered Mobile Networks
In the case of mobile networks, you wouldn’t directly find any method regarding metered/unmetered connections. But still, there exist various methods using which you could restrict the amount of data. This procedure will mostly be required if you have set up a portable hotspot using your data pack. Most data packs have a limited volume, exceeding which you may be charged. So to limit the data being shared, follow the below instructions.
Restricting Data on Android devices
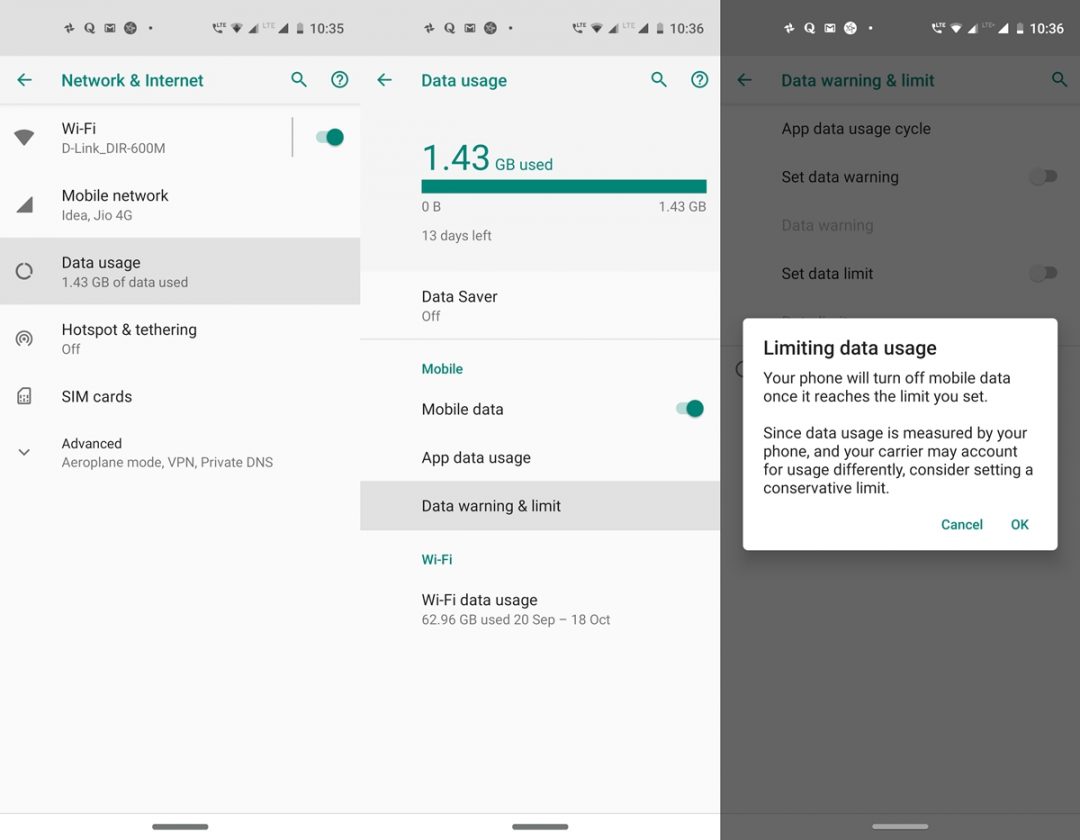
- Assuming that your data is turned on, head over to Settings.
- Go to Network & Internet and tap on Data usage.
- Now, tap on the Data warning & limit option and toggle on the switch next to Set data limit.

- In the Limiting data usage dialog box that appears, tap OK. Not explicitly, but in fact, we are doing the same thing as changing a network to metered from an unmetered connection by enabling this feature.
- Finally, enter the maximum data in MB or GB that you wish to consume/share with others. Tap on Set once you have entered the data limit.
- You may also set a data warning. This will warn you once the data consumption reaches the limit mentioned above. For that, enable the toggle next to Set data warning and enter the required data in the Data warning option.

So with this, we conclude the guide on Metered and Unmetered WiFi networks on Android. Do let us know what you feel about this feature in the comments section below.
Read next: Improve Your Wi-Fi Experience on Android with These Apps