Google just made an important announcement for merchants that depend on organic search traffic. It is now possible to update product listings in organic search results in real time!
Advertisers have long had this capability on Google Shopping. Now, companies can use the same product feeds for organic search, and yes, you don’t pay a single penny.

Merchants can now use product data feeds in Google Merchant Center to enhance organic search results. Click image to enlarge.
If you advertise on Google Shopping and have feeds with valid products, there’s no additional cost. (For now, Google allows only products sold in the U.S.) The Feb. 22 announcement stated, in part:
Product data feeds uploaded to Google Merchant Center will now be eligible for display in results on surfaces like Search and Google Images. This product information will be ranked based only on relevance to users’ queries, and no payment is required or accepted for eligibility. We’re starting with the expansion in the U.S., and support for other countries will be announced later in the year.
If you are not spending money on Google Shopping and don’t plan to, you may not have a Google product feed. In this article, I’ll explain how to create one from an XML sitemap.
Product Feed
After you sign up for Google Merchant Center, follow these steps:
- Under Products, click “Feeds,” and then the floating + sign in a blue square.
- “Country of sale” is the United States (for now). Then select English in the “Content language” pull down. Leave checked “Surfaces across Google” and uncheck “Shopping ads” if you are not going to advertise on Google Shopping.
- Next, name your feed, and select “Google Sheets” as the source.
- Finally, select “Generate a new Google spreadsheet from a template.”
The example Google Sheet, below, is for a product feed using hypothetical data. Required fields — highlighted in green — are “id,” “title,” “description,” “condition,” “price,” “availability,” “link,” and “image link.”
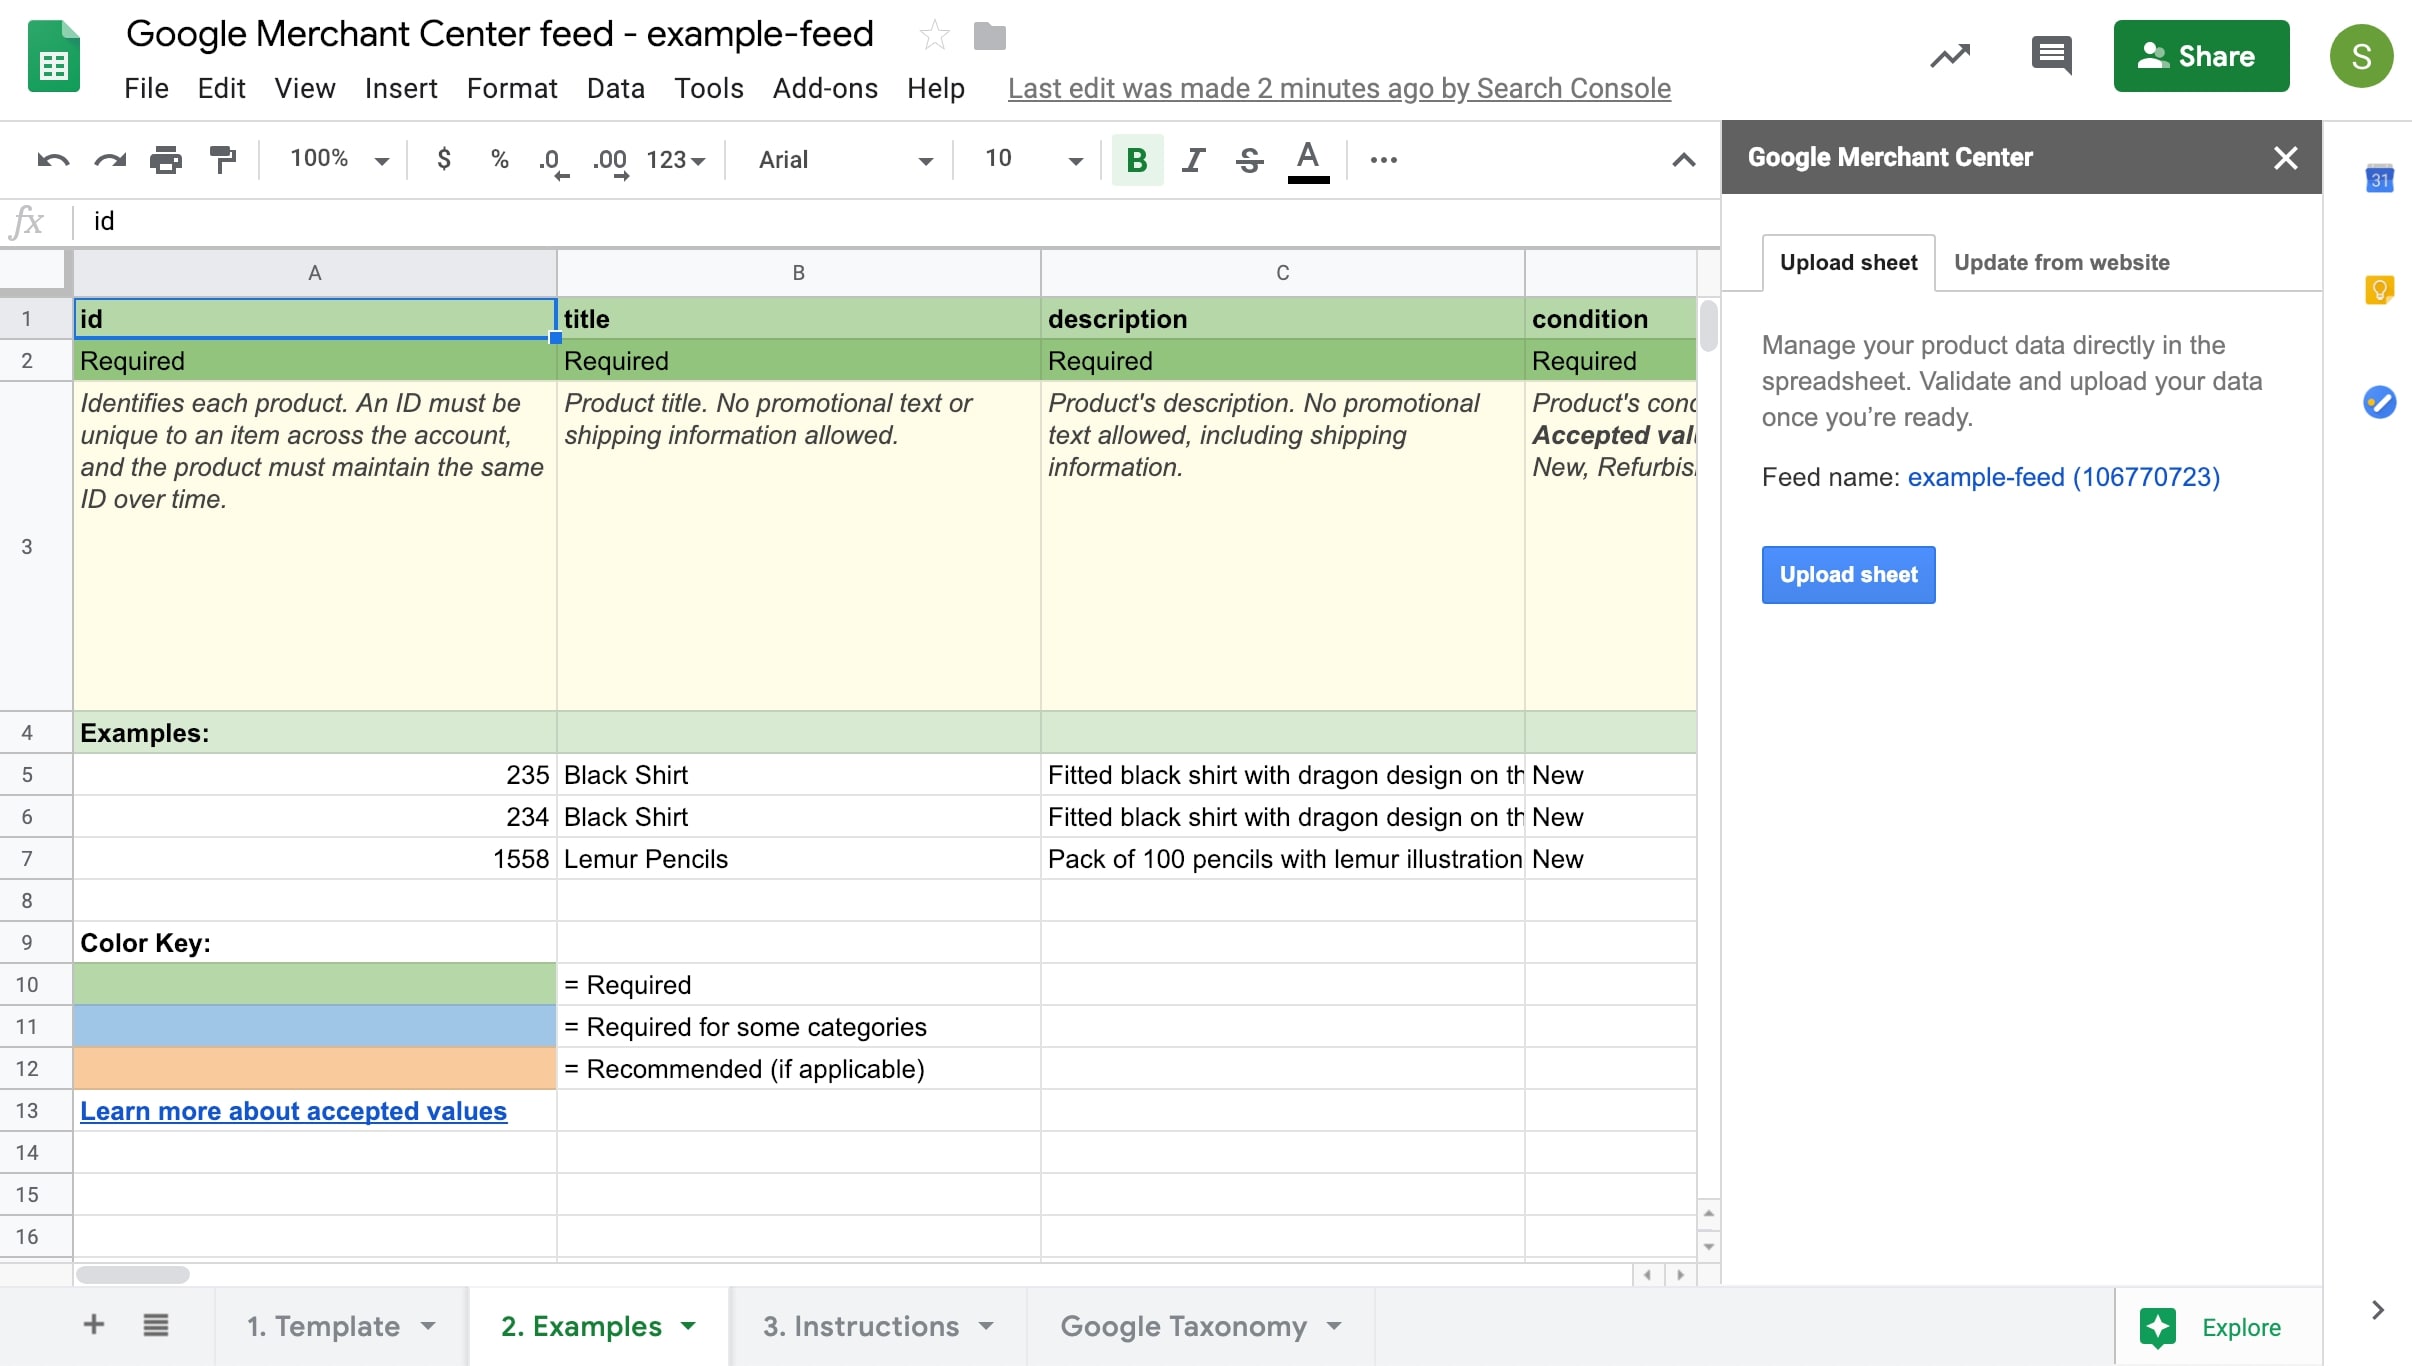
One way to generate a product feed is via Google Sheets. Click image to enlarge.
However, collecting this info manually for thousands of products would be a lot of work. We can, instead, use an XML sitemap with product URLs and automatically collect the data directly from the product pages.
Product Info
To illustrate, I’ll generate a sample product feed for P.C. Richard & Son, a brick-and-click retailer of appliances and electronics, using the company’s product XML sitemap, which was in its XML sitemap index.
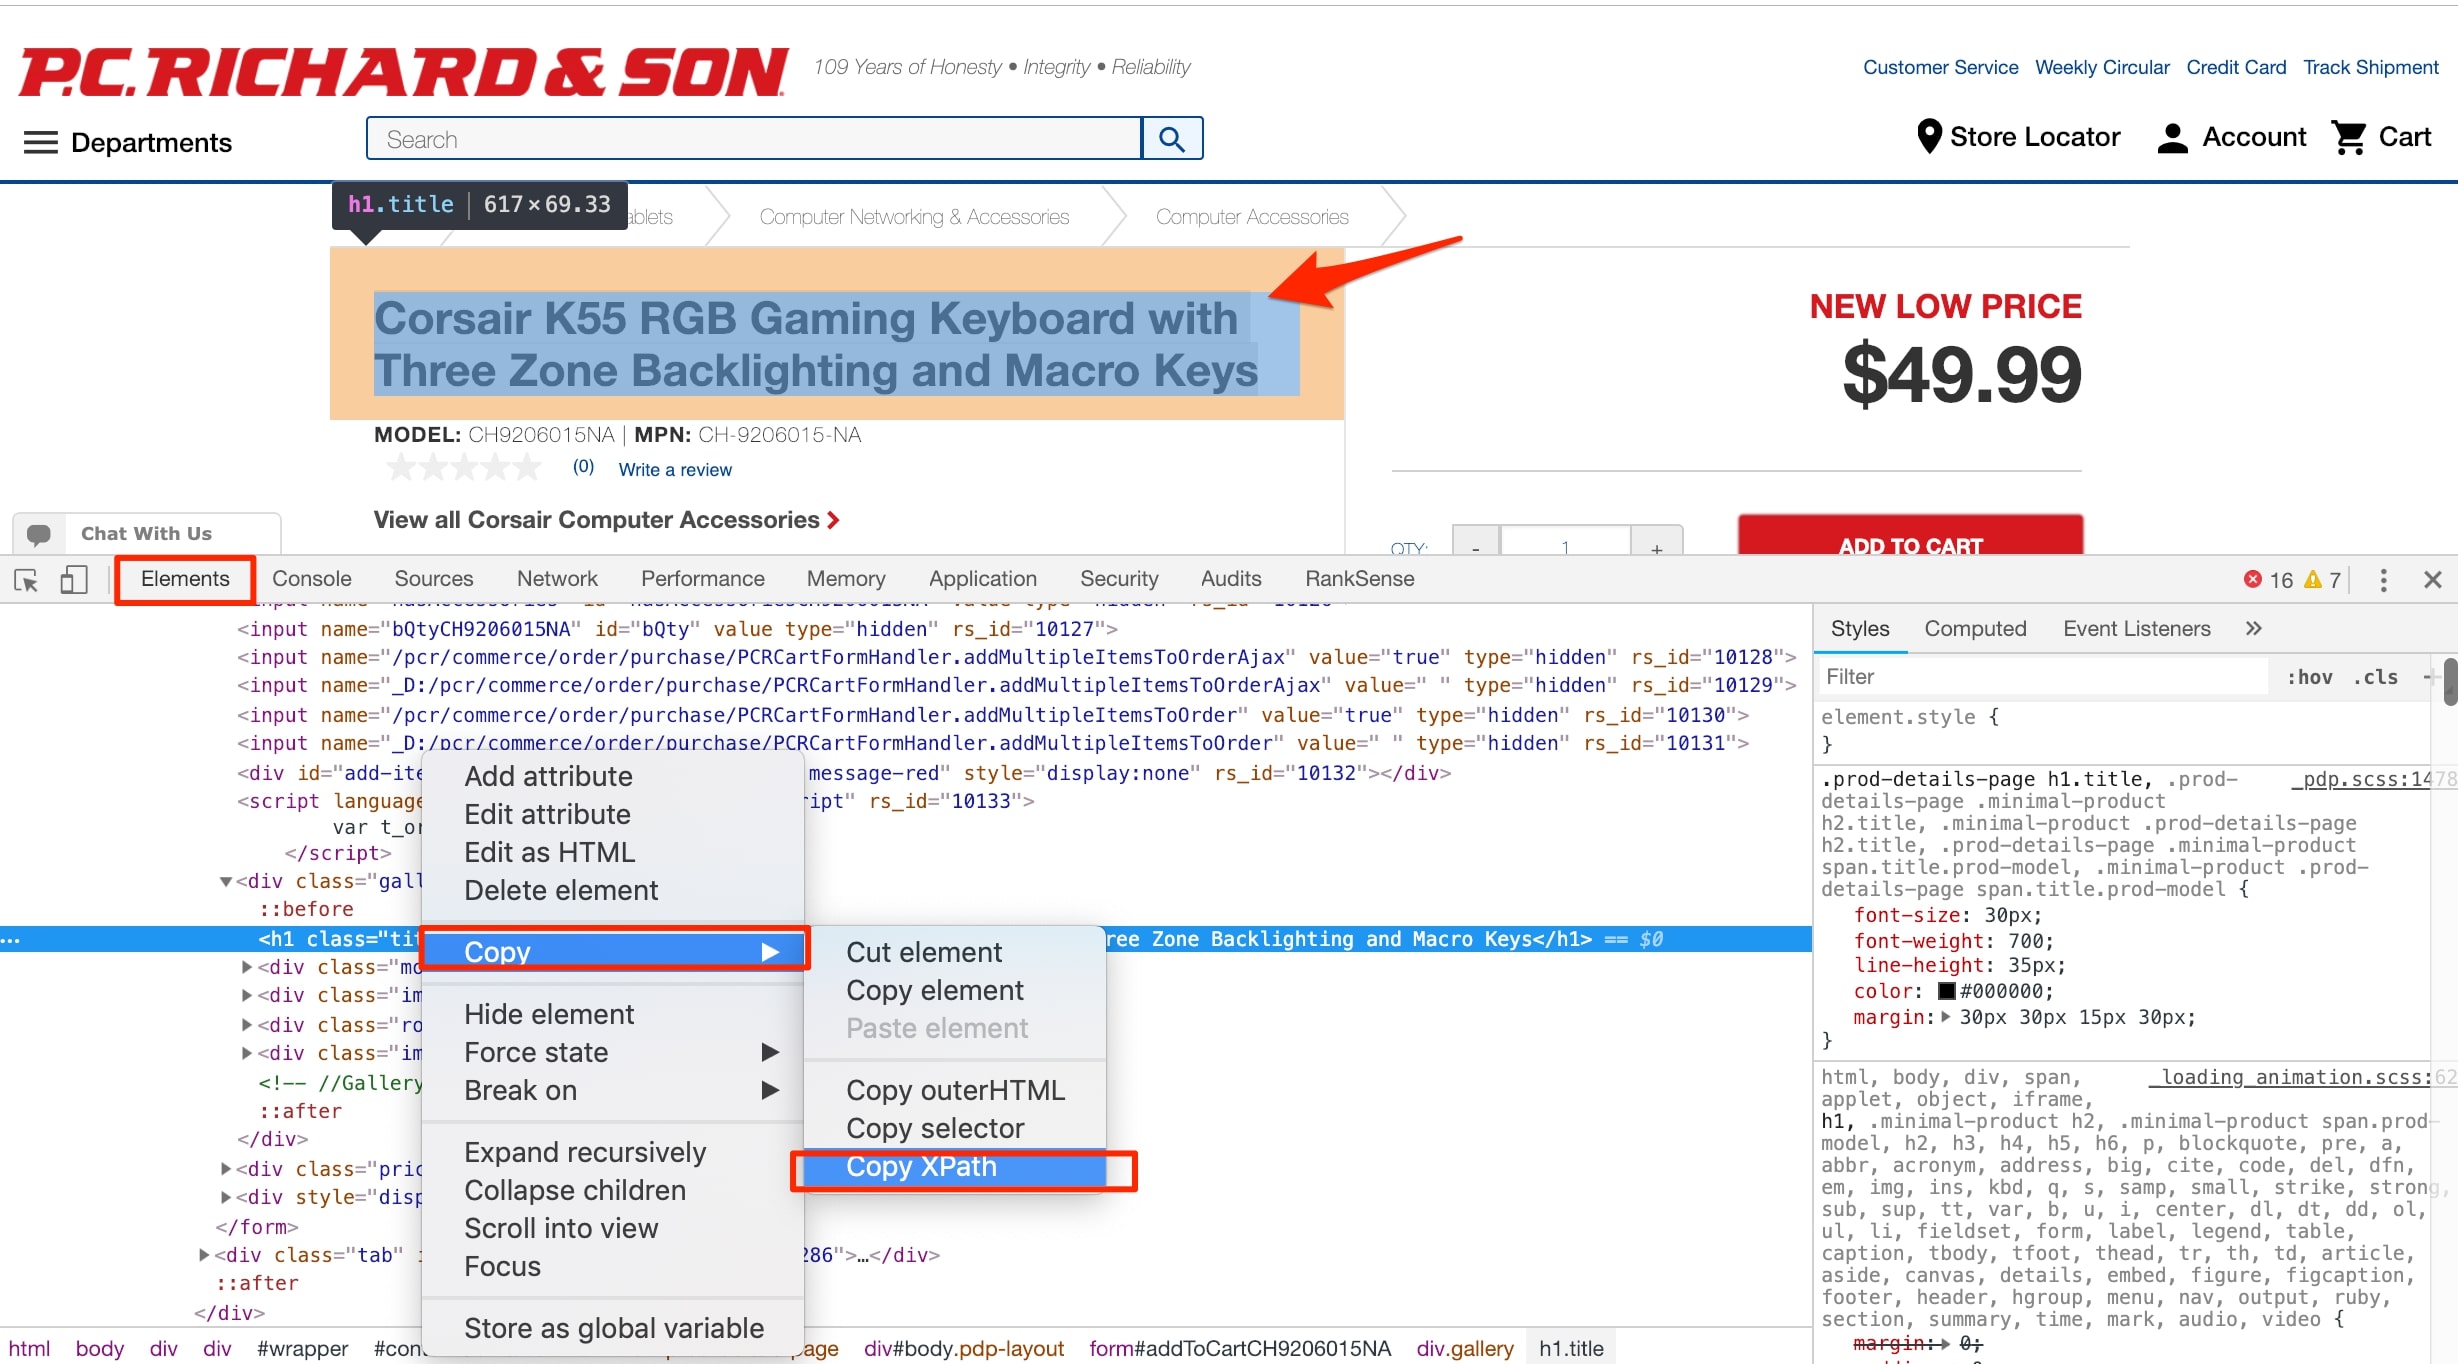
I will define content extraction rules for the required columns as found on the example gaming keyboard product page, below. XPath, a query language, allows you to specify any element in a web page using a special convention, to extract content.
XPath allows you to specify any element on a web page for content extraction. Click image to enlarge.
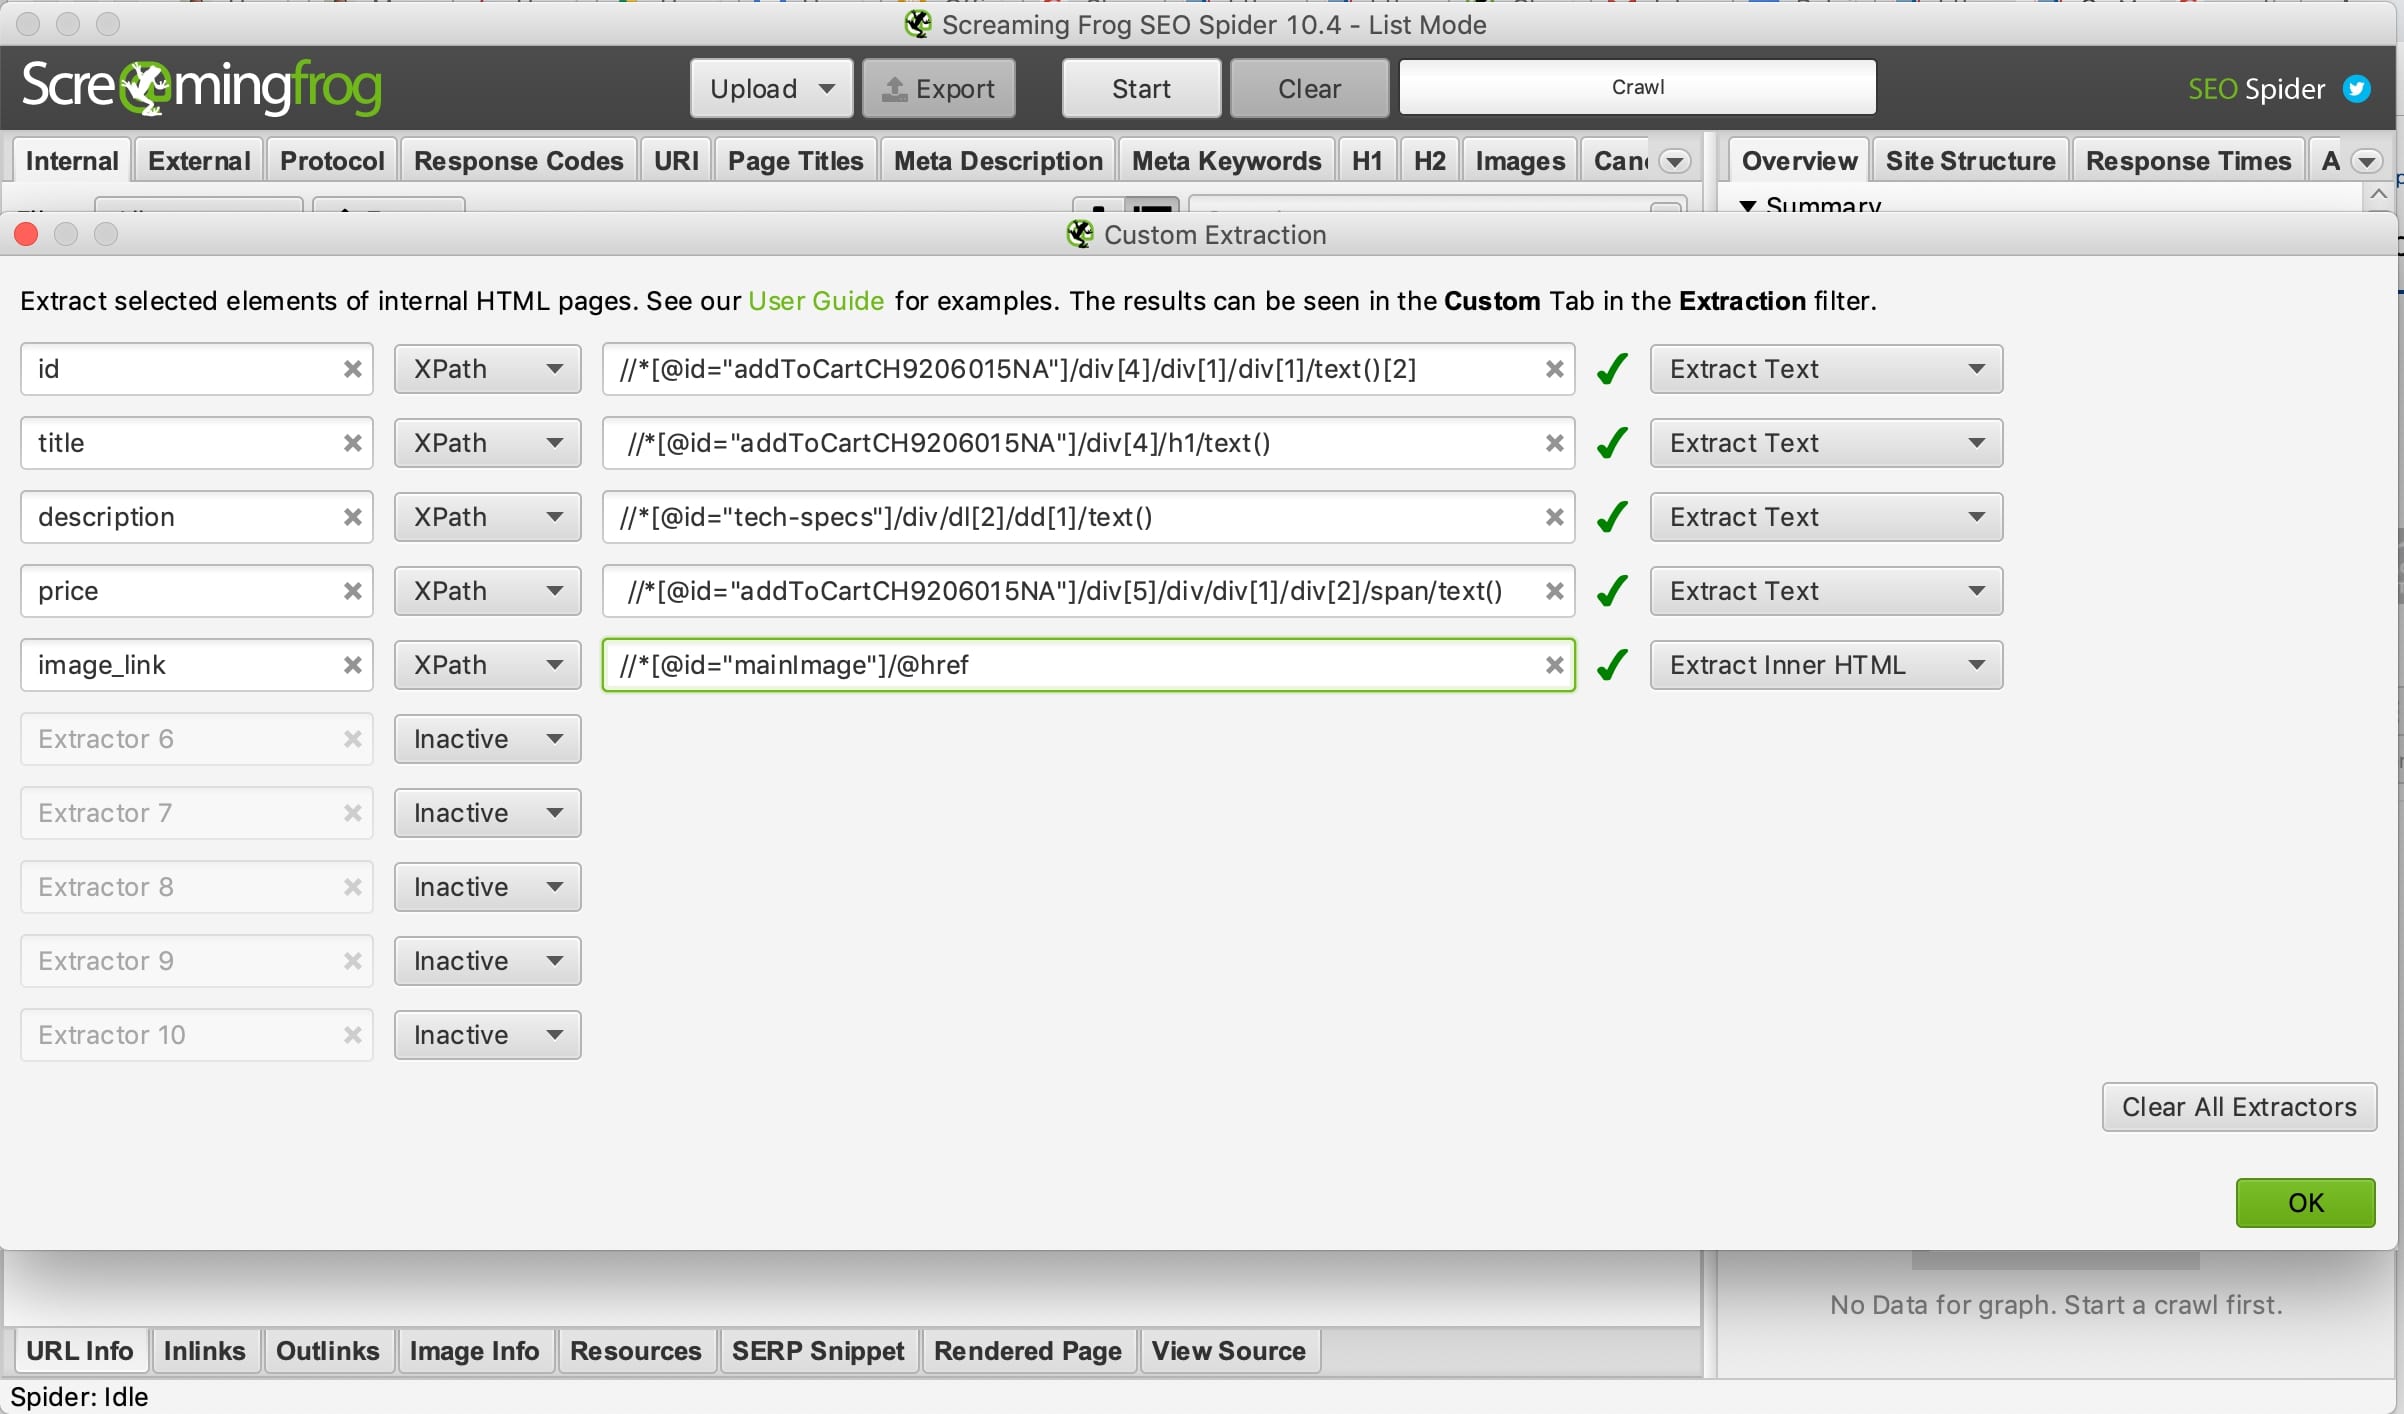
In the screenshot above, I selected the element to extract: “Corsair K55 RGB Gaming Keyboard with Three Zone Backlighting and Macro Keys.” I then right clicked and chose “Elements” in Chrome Developer Tools. You can mouse over the element and the right clicks again to get the content extractor. I selected XPath and obtained this value from Chrome: //*[@id=”addToCartCH9206015NA”]/div[4]/h1.
When I repeated this for each required column, I received the following XPaths.
- Id (model number). //*[@id=”addToCartCH9206015NA”]/div[4]/div[1]/div[1]/text()[1]
- Title. //*[@id=”addToCartCH9206015NA”]/div[4]/h1
- Description. //*[@id=”tech-specs”]/div/dl[2]/dd[1]/text()
- Condition. I’ll assume it is new.
- Price. //*[@id=”addToCartCH9206015NA”]/div[5]/div/div[1]/div[2]/span
- Availability. I’ll assume the item is available unless stated otherwise.
- Link. We know the page URL.
- Image link. //*[@id=”mainImage”]
Validating XPaths
Next, I will confirm that the XPaths will work. I can do this directly using the Elements tab in Chrome Developer Tools.
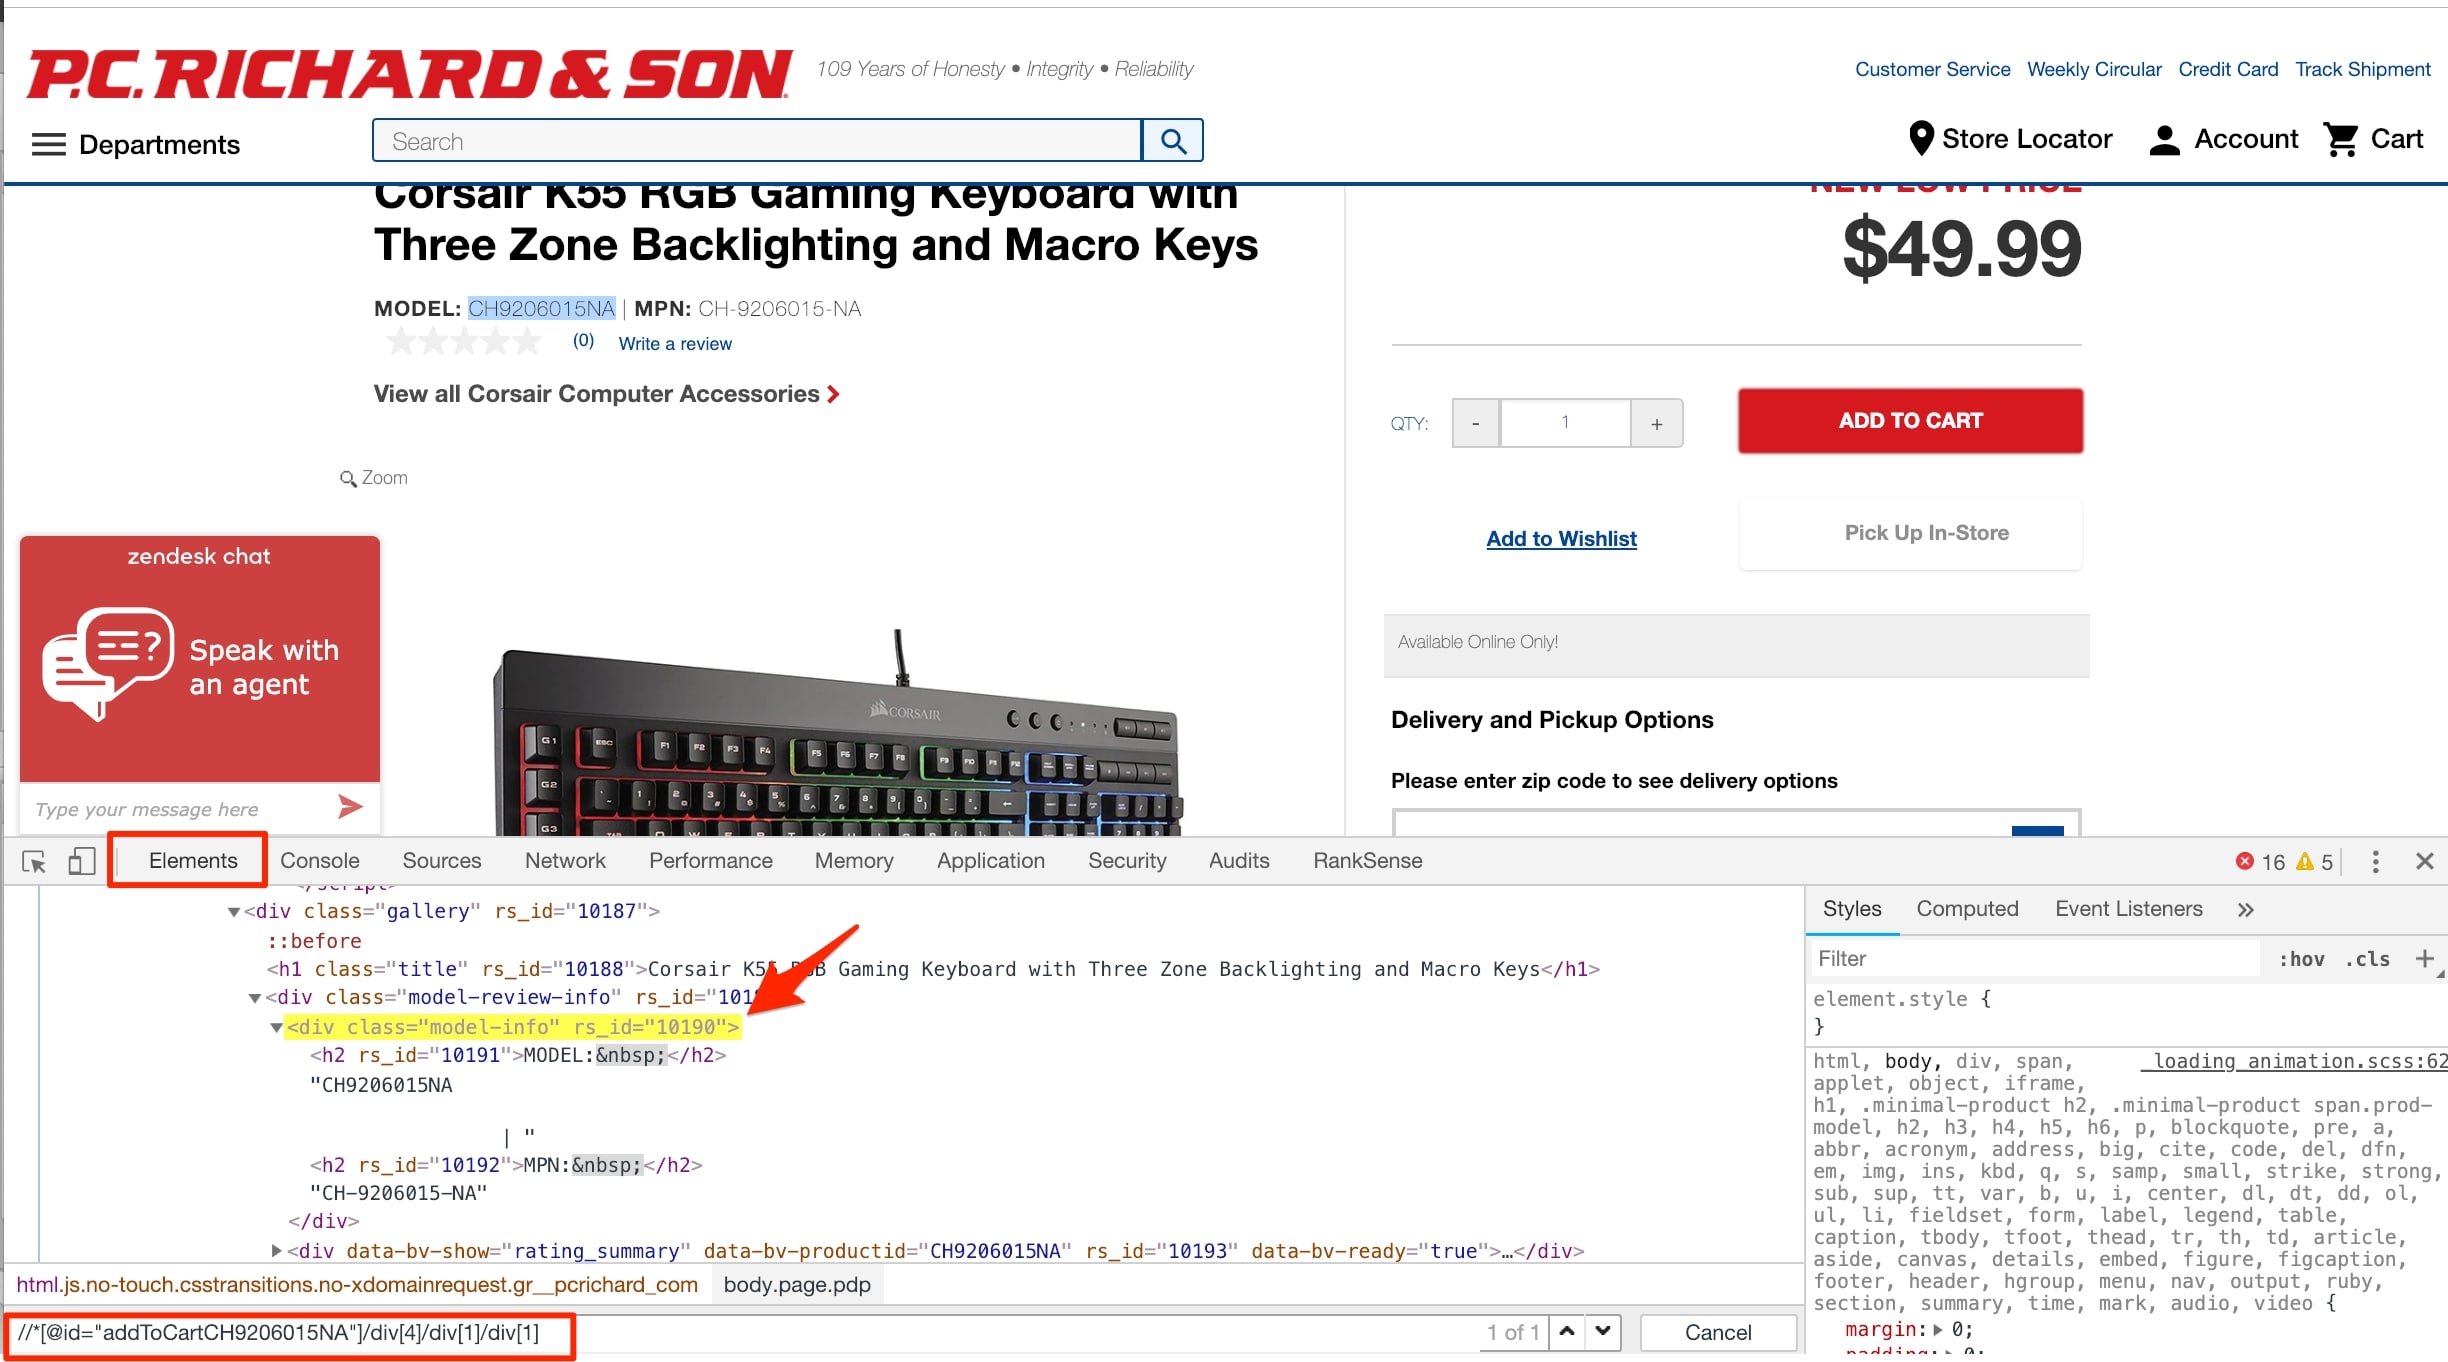
Use the Elements tab in Chrome Developer Tools to make sure XPaths will work. Click image to enlarge.
In the Elements tab, type Ctrl+F to open a search box. Type the XPath you want to verify there. Type slowly to see where it works and doesn’t. For example, to verify our product id XPath, I shortened it to:
//*[@id=”addToCartCH9206015NA”]/div[4]/div[1]/div[1].
This captures more than I need; I will clean up after extraction. You can repeat this process to verify and adjust the remaining XPaths.
Note that if I disable JavaScript, the product information box disappears. Some XPaths we calculated won’t work unless our crawler renders the content using JavaScript.
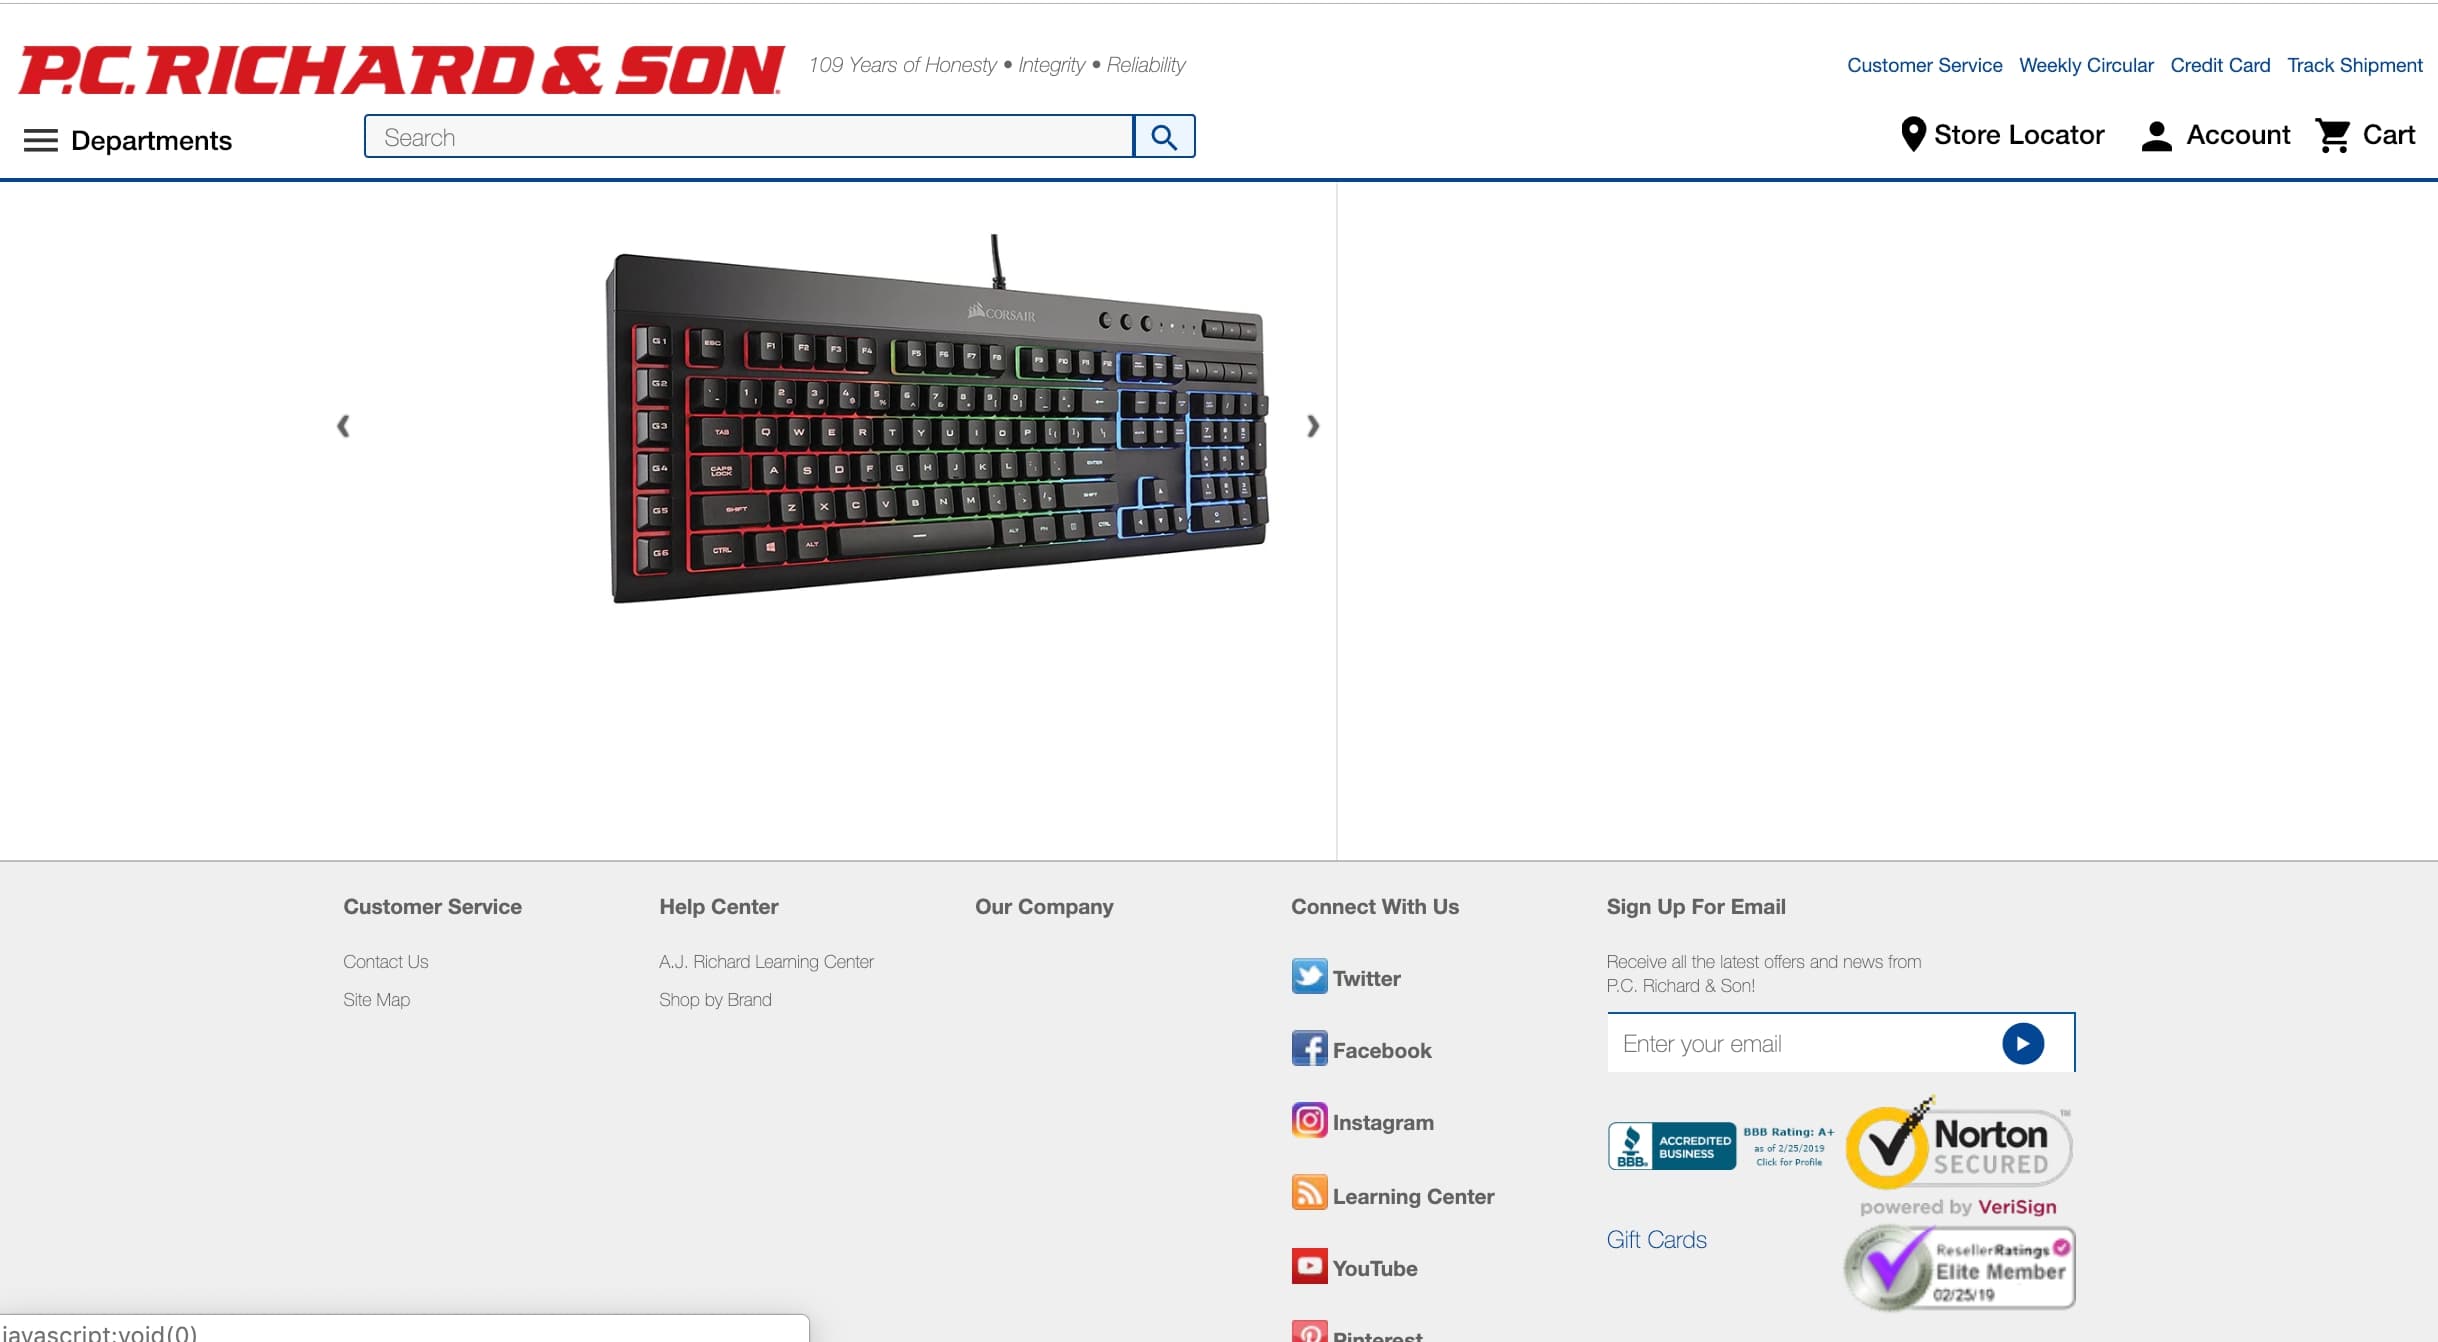
If you disable JavaScript, the product information box disappears.
Extraction
Now is the fun part. I will run the extraction process using Screaming Frog, but other web crawlers will do the job, too. I’ll start by copying our validated XPaths to Screaming Frog, at Configuration > Custom > Extraction.
Run the extraction process using Screaming Frog or your favorite web crawler. Click image to enlarge.
Input the name of each column from the Google Sheet you will extract. Then click on the “Inactive” pull-down menu and select XPath. Copy and paste the verified XPath, then select “Extract Text” if your XPath ends with text(). Otherwise, leave as “Extract Inner HTML.” Click OK to save your XPaths.
Next, I’ll change the default Screaming Frog rendering behavior from text to JavaScript so all XPaths will work. Find the setting in the main menu under Configuration > Spider > Rendering.

Change the default Screaming Frog rendering behavior from text to JavaScript so all the XPaths will work. Click image to enlarge.
—
Screaming Frog will now do the heavy lifting. In the main menu change the mode to “List,” click on “Upload,” and select “Download Sitemap,” which, in our case, is the URL of the products XML sitemap we discovered above for P.C. Richard & Son. The extracted columns will appear at the end of the data grid. Note the image links on the screenshot below getting extracted correctly.
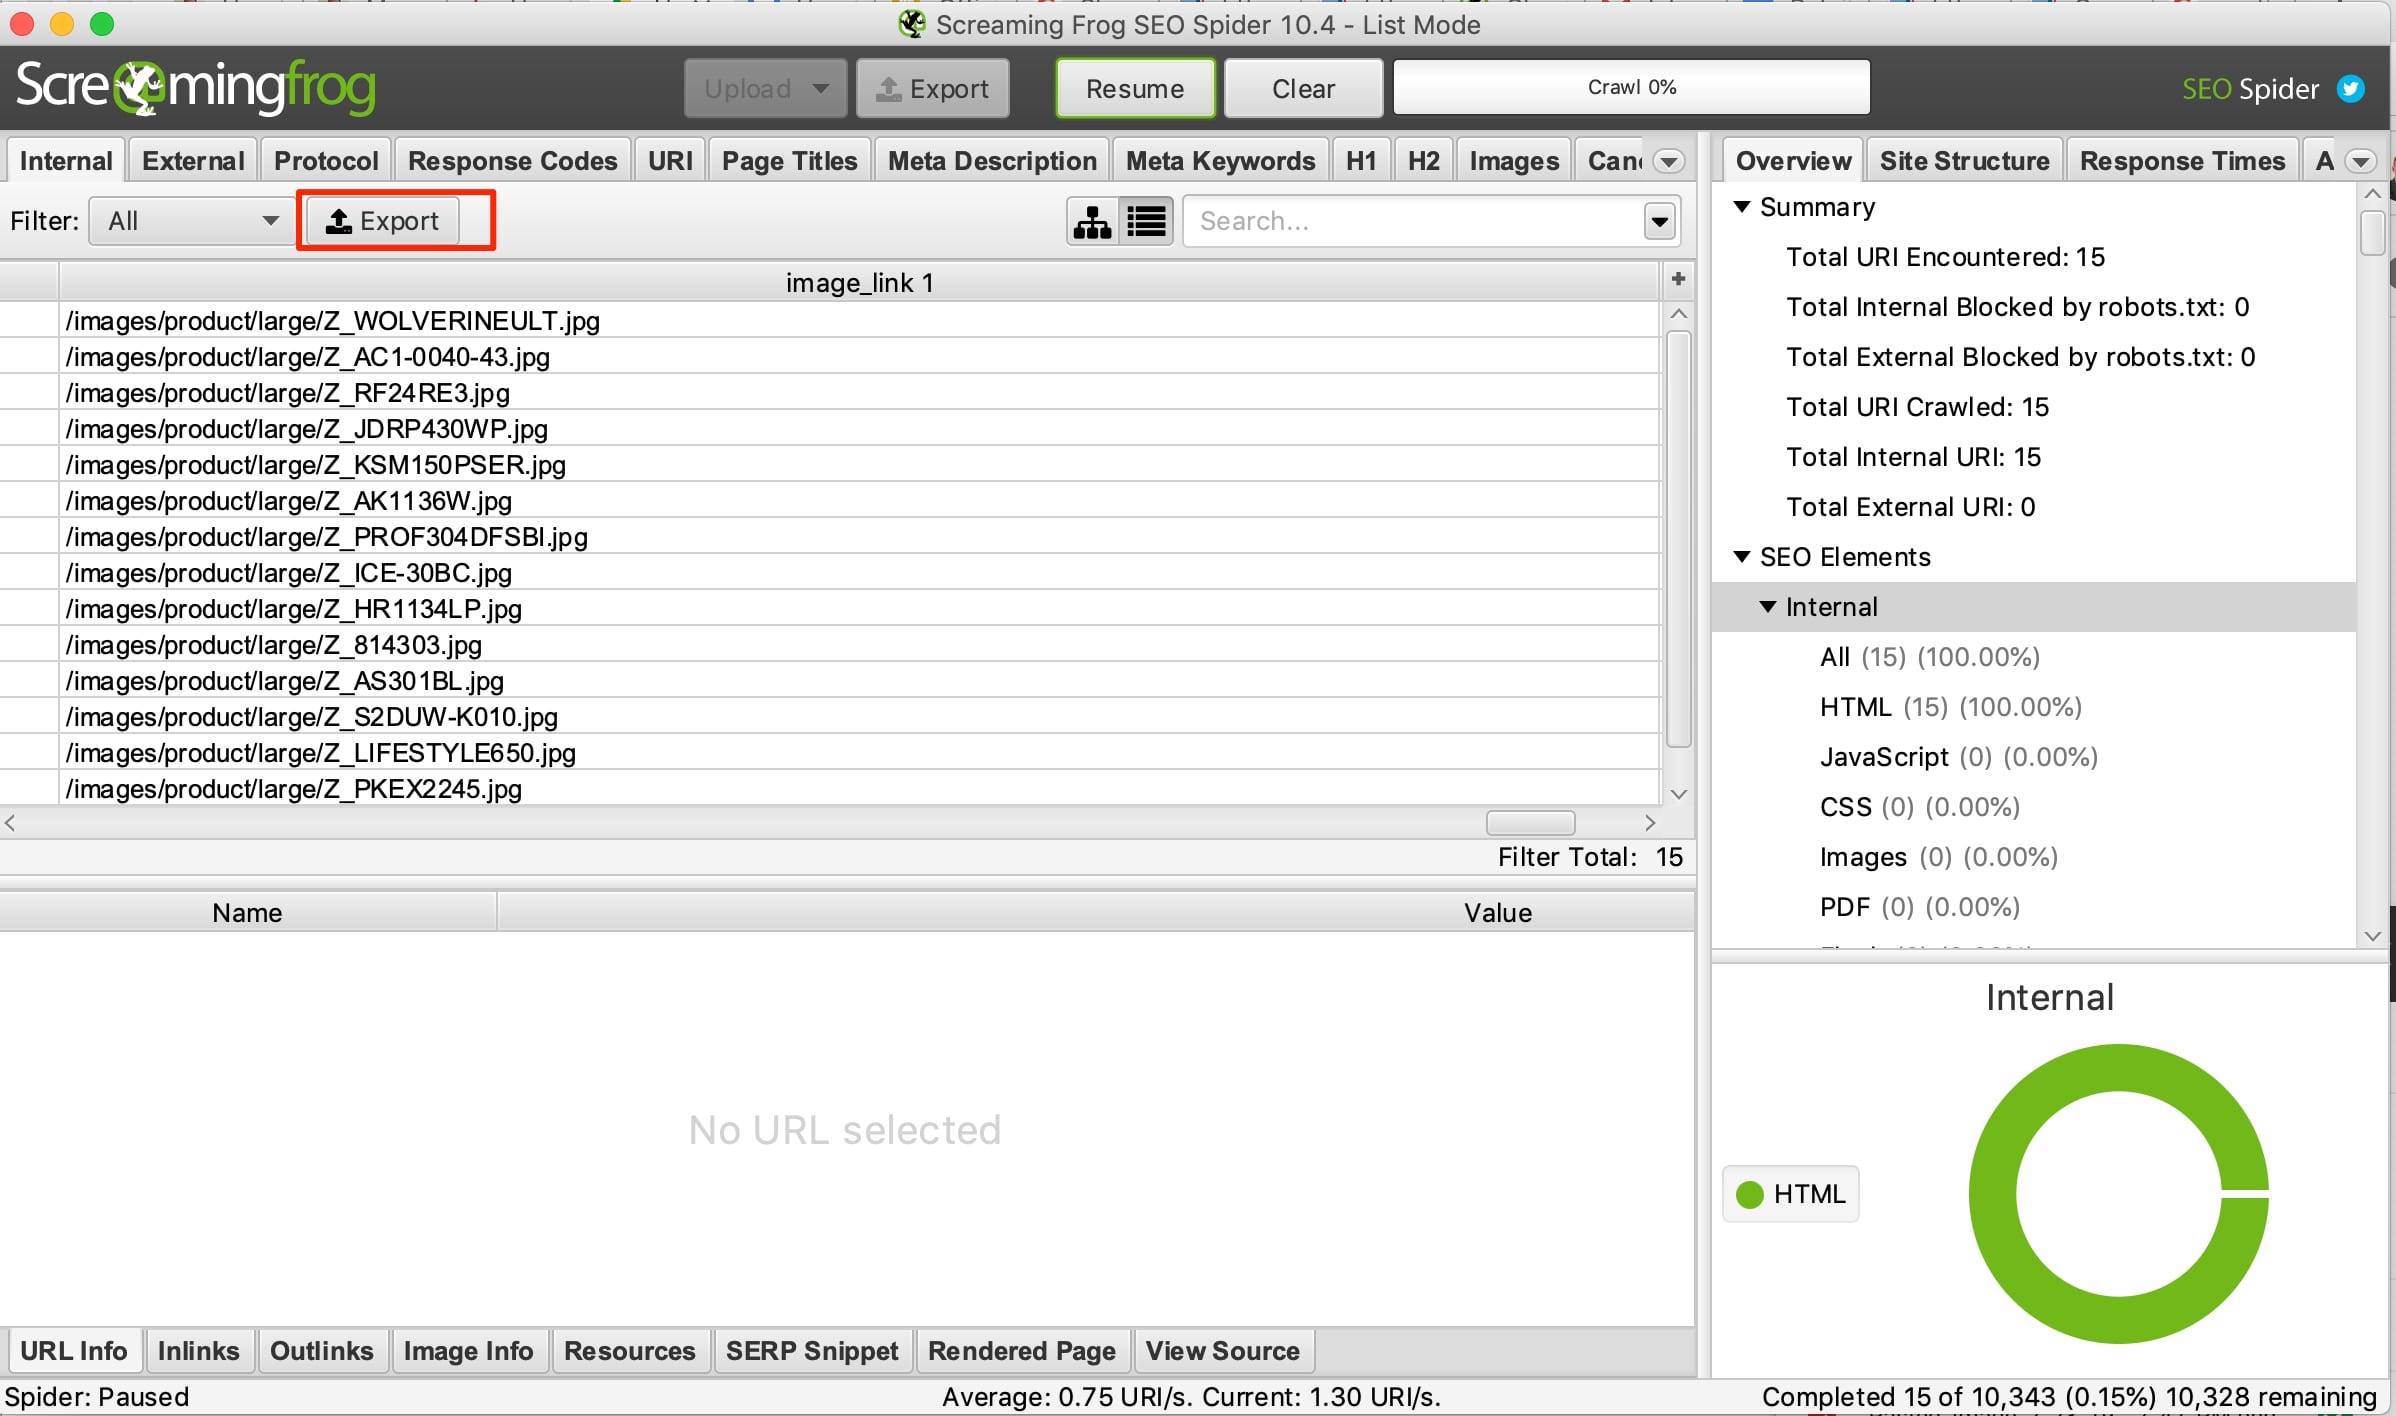
The extracted columns will appear at the end of the data grid. This screenshot shows the image links being extracted. Click image to enlarge.
After the crawl is finished, export it to a CSV file. Import that file to Google Sheets, remove the columns with the unnecessary metadata, and perform any cleanup directly in Google Sheets. For example, our image URLs are relative, but we need them as absolute.